URC1 • 8
CONSTRUCTION OF THE URC1:
The first thing we will do with this kit is check all of our parts and pieces to
make sure we have them all. Use the parts list and your layout diagram to do
this. If there are any differences, make sure the schematic agrees with what
you have, and also be aware of the tolerances parts have in a kit. Non-critical
parts can vary quite a bit with almost no effect on kit operation. For example
you may get 1uF capacitors in place of 10uF capacitors, or a 3.579 crystal in
place of a 3.579545 crystal. No harm done as these will make no difference in
kit operation. Note there are two boards in this kit, as we will start with the
larger main board in our assembly. You may have to break apart the two
boards depending on how they are shipped.
1. Orient the circuit board as shown in the parts layout diagram.
2. Install J1, the PC mounted 1/8" minijack. This is where you hook up the
audio with the DTMF tones.
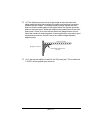
3. Install C14, a 47uF electrolytic capacitor. Electrolytic capacitors are
polarized and must be installed correctly. They are usually marked with a
black stripe and a ( - ) indicating their negative lead, while PC boards will
usually indicate the ( + ) hole.
At this point you may wish to make the decision of whether or not to use IC
sockets to mount your ICs. Though they will add to the cost of your kit, they will
prevent the horror of soldering in ICs the wrong direction, or the inability to
easily replace a bad IC yourself. If you are a confident good kit builder, you
wont have to worry about this.
4. Install U7, the 4 channel digital to analog converter (MAX 500, 16 dip).
Pay extra close attention to the orientation of this device and make sure it
is installed in the same direction as in the parts layout diagram. Notice the
part has a tab or dimple representing pin 1. Also note that most if not all of
these components are static sensitive so if you want to be cautious,
ground your body with a clip lead to a ground such as an oscilloscope
chassis. Make sure and practice good soldering skills, and keep an eye
out for solder bridges or cold joints as you go.
5. Install C6, a 10uF electrolytic capacitor. Make sure and check polarity
before soldering!
6. Install R4, a 47K resistor (yellow-violet-orange).
7. Install the 20 pin IC socket where U6 is to go, the microcontroller IC
with the sticker marked URC1. Gently insert the U6 into the socket noting
where pin 1 is. Pay close attention to the orientation of the tab on this part.


