Chapter 1 11
Connections & Setup
TV + VCR + Satellite Receiver
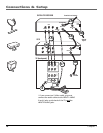
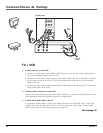
1. Connect your Satellite Receiver to your TV
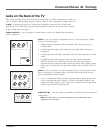
A. Connect the audio/video cables. Connect the audio cables (white and red) to the INPUT2
AUDIO R and L jacks on the back of the TV and to the Audio Output Jacks on the
Satellite Receiver.
B. Connect the video cable (yellow) to the INPUT2 VIDEO jack on the back of the TV and
to the Video Output Jack on the satellite receiver.
C. Connect S-Video cable (optional). Connect an S-Video cable to the S-VIDEO jack on the
TV and to the S-VIDEO jack on the satellite receiver. (An S-Video cable provides better
picture quality than a regular video cable, but it is optional.)
Note: If you connect an S-Video cable, you must connect the audio cables to the INPUT1 AUDIO R and
L jacks on the back of the TV, not the INPUT2 AUDIO jacks.
2. Connect coaxial cables to the Satellite Receiver
A. Connect the coaxial cable from your cable outlet, cable box, or antenna to the Input Jack
on your satellite receiver (sometimes labeled IN FROM ANT).
B. Connect the coaxial cable from your satellite dish antenna to the Input Jack on your
satellite receiver (sometimes labeled SATELLITE IN).
3. Connect the Satellite Receiver to the VCR and to the TV
A. Connect a coaxial cable to the Output Jack (sometimes labeled OUT TO TV) on the
satellite receiver and to the Input Jack on the VCR (sometimes labeled IN FROM ANT).
B. Connect a coaxial cable to the Output Jack on the VCR (sometimes labeled OUT TO TV)
and to the CABLE/ANTENNA jack on the TV.
4. Connect G-LINK cable
If you haven’t already done so, remove the Demo Pin from the G-LINK jack. Then, connect
the G-LINK cable to the G-LINK jack on the TV. Next step, place one of the wands of the
G-LINK cable to work with your VCR (instructions are on page 14).
Go to page 14


