


Installation
56 Q-1500d Series Installation/Operation Manual
PRE
L
IMINAR
Y
When you have completed the primary lens adjustments (Q-1500d/CineWide with
AutoScope only): Remove the anamorphic lenses and set the lens transport motor
power switch to the “on” position.
Adjusting the Picture
Orientation
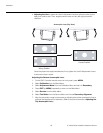
By default, the Q-1500d is configured for a “floor/front” installation, in which the projector
is installed upright and in front of the screen. If it is installed behind the screen and/or
mounted on a ceiling, you must change the picture orientation. To do this:
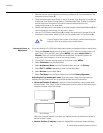
1. On the DHD Controller remote control or front panel, press MENU.
2. Select Service from the Main Menu.
3. Select Display Device from the Service Menu.
4. Select Configure from the Display Device menu, then select Installation.
5. Select Orientation, then choose Floor/Rear, Ceiling/Front or Ceiling/Rear, to match
the installation method.
Anamorphic Lens
Installation
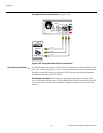
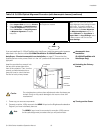
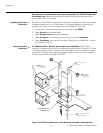
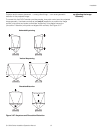
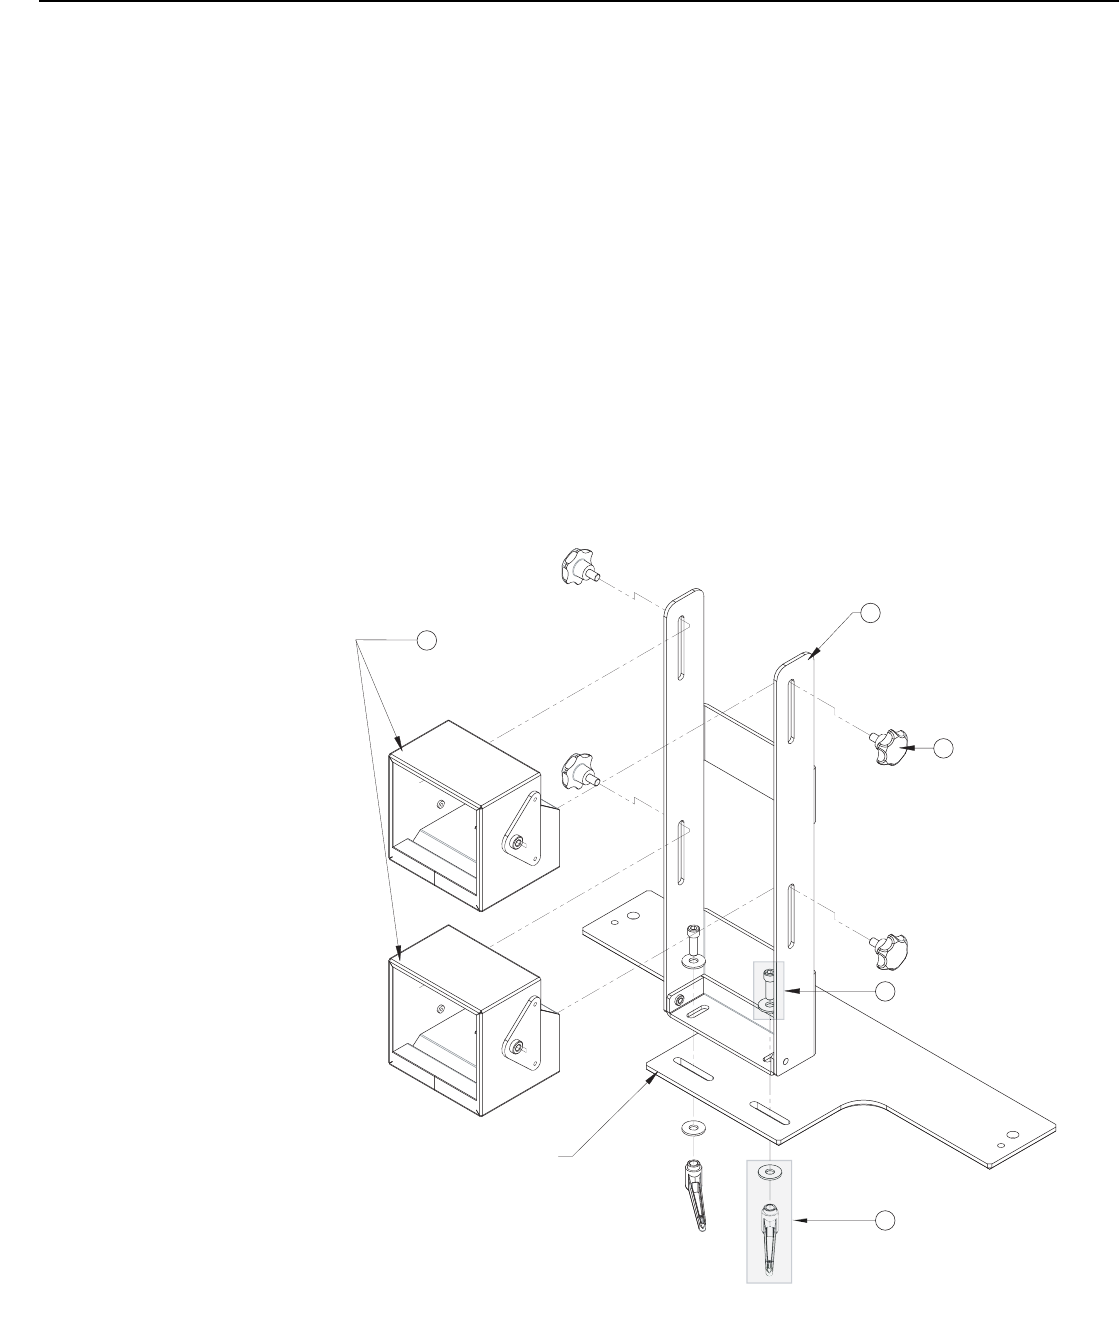
Q-1500d/CineWide - Whitney Anamorphic Lens Installation: The Q-1500d
“Whitney” Anamorphic lens mount kit consists of everything shown in Figure 3-25. Some
components shipped with your projector may differ slightly from what is shown in these
instructions. If any items are missing or damaged, please contact your Runco dealer or
Runco Customer Service at (800) 23-RUNCO.
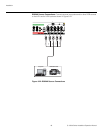
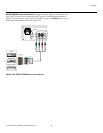
Figure 3-25. Whitney Anamorphic Lens Mounting Assembly - Exploded View
➤
➤
Whitney
Anamorphic
Lenses (2x)
Yaw/X-adjustment Lever
and Washer (2x)
Anamorphic Lens
Holder
2
1
Height/Pitch
Adjustment
Knobs (4x)
3
5
¼-20 Hex Bolt
and Washer (2x)
4
CineWide Base Plate
for Whitney Lens