


Installation
Q-1500d Series Installation/Operation Manual 57
PRE
L
IMINAR
Y
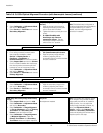
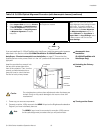
1. Remove the two Yaw/X Adjustment Levers and Washers (5) from the bottom of the
Anamorphic Lens Holder (2).
2. Place the Anamorphic Lens Holder on top of (or under, if the projector is inverted) the
CineWide Base Plate. Position the bracket so that the slots at the bottom of the lens
holder are perpendicular to the corresponding slots on the base plate.
3. Secure the Anamorphic Lens Holder to the plate using the Hex Bolts/Washers (4) and
Yaw/X Adjustment Levers that you removed in Step 1.
4. Use the Height/Pitch Adjustment Knobs (3) to attach the Anamorphic Lenses (1) to
the Anamorphic Lens Holder.
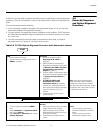
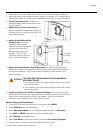
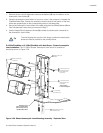
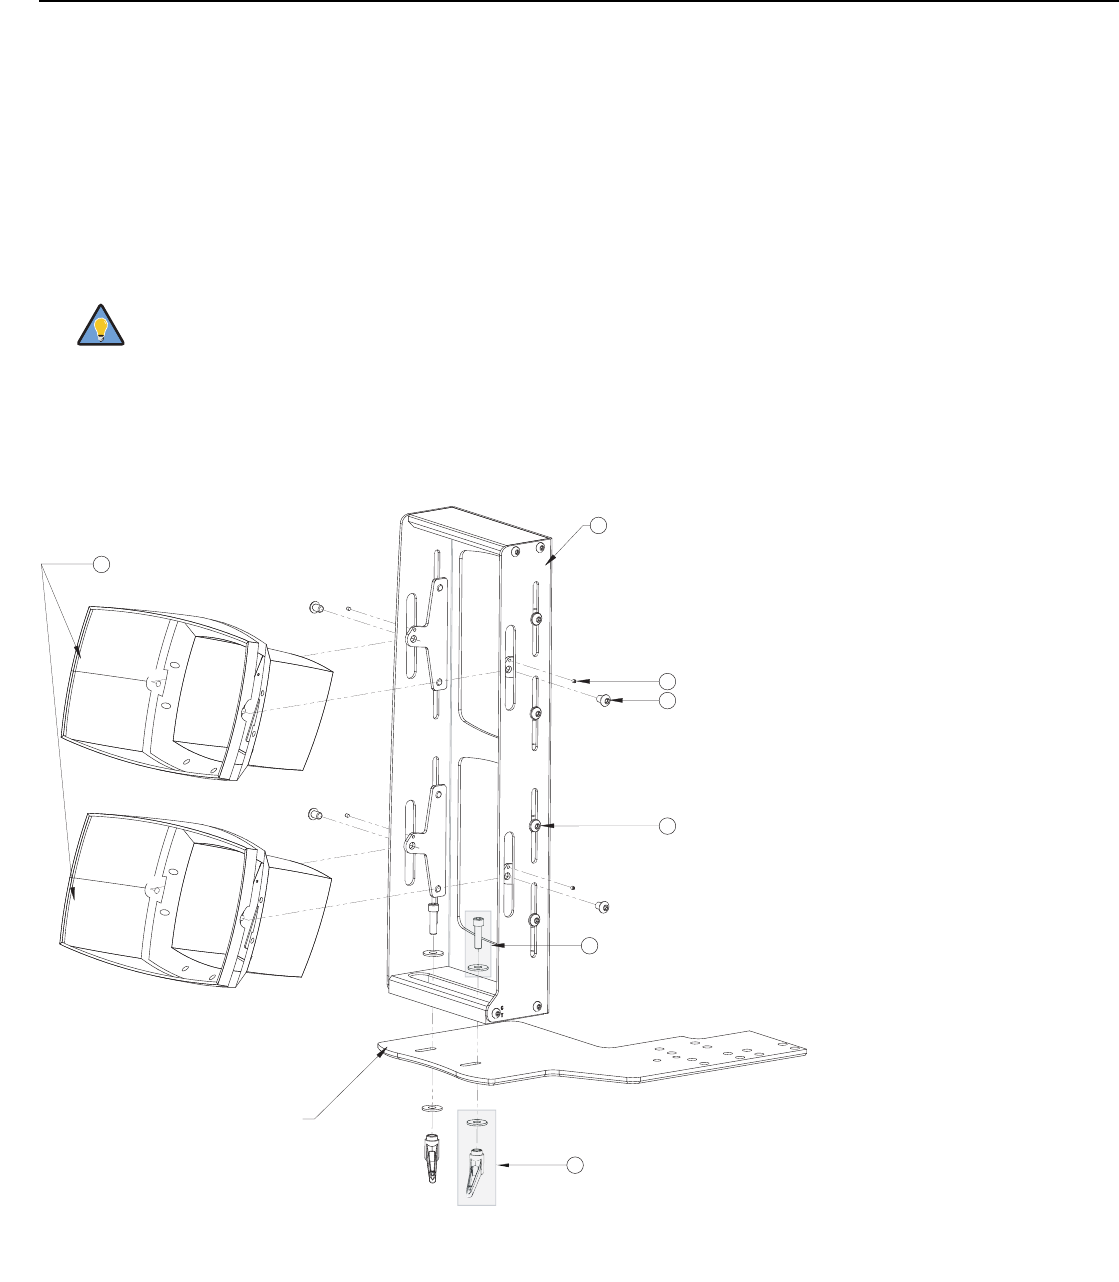
Q-1500d/CineWide or Q-1500d/CineWide with AutoScope - Shasta Anamorphic
Lens Installation: The Q-1500d “Shasta” Anamorphic lens mount kit consists of
everything shown in Figure 3-26.
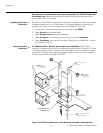
Figure 3-26. Shasta Anamorphic Lens Mounting Assembly - Exploded View
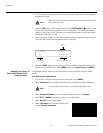
To avoid clipping the corners of the image, position the anamorphic
lenses as close as possible to the primary lenses.
Tip
*Use included
L-wrench to tighten
Shasta Anamorphic
Lenses (2x)
Yaw/X-adjustment Lever
and Washer (2x)
Anamorphic Lens
Holder
2
1
4-40 Set Screw (4x)*
3
¼-20 Button-head
Height Adjustment
Screw (8x)*
5
¼-20 Button-head
Pitch Adjustment
Screw (4x)*
4
7
¼-20 Hex Bolt
and Washer (2x)
6
AutoScope Lens
Motor Carriage Plate
(shown here) or Fixed
CineWide Base Plate