


English - 42
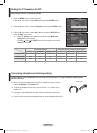
• The interlace mode is not supported.
• The TV operates abnormally if a non-standard video format is selected.
• The table above conforms to IBM/VESA regulations and is based on using the Analog Input.
• “
✔
” mark means that this mode is supported.
➢
• For the PN42A410C1D, PC text quality is optimum in VESA mode (1024 x 768@60Hz).
• For the PN50A410C1D, PC text quality is optimum in VESA mode (1360 x 768@60Hz).
(Three pixels on left, right, top and bottom will be grayed out at the resolution setting of 1360x768@60Hz. This is not a mechanical
problem but a result caused by the pixel difference between the standard resolution and the PDP panel.)
• When this TV is used as a PC display, 32-bit color is supported.
• Depending on the manufacturer, your PC display screen might appear different. (and depending on your particular version of
Windows.) Check your PC instruction book for information about connecting your PC to a TV.
• If a vertical and horizontal frequency-select mode exists, select 60Hz (vertical) and 48.4KHz (horizontal).
•
In some cases, abnormal signals (such as stripes) might appear on the TV screen when the PC power is turned off (or if the PC is
disconnected). If so, press the SOURCE button on the remote control or TV panel to enter a VIDEO mode. Also, make sure that the PC
is connected.
Setting up the TV with your PC
Use the Auto Adjust function to have the TV set automatically adjust the video signals it receives from the PC.
The function also automatically fine-tunes the settings and adjusts the frequency values and positions.
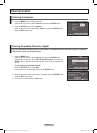
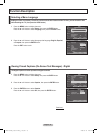
How to Auto Adjust
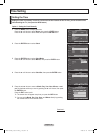
1
Press the MENU button to display the menu.
Press the ▲ or ▼ button to select Picture, then press the ENTER button.
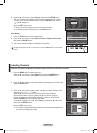
2 Press the ▲ or ▼ button to select Auto Adjustment, then press the ENTER
button. The message Auto Adjustment in progress. Please wait. appears on
the screen and the picture adjustments are automatically activated.
Press the
EXIT button to exit.
➢
This function does not work in DVI-Digital mode.
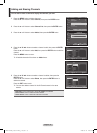
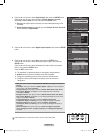
Easy Setting
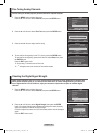
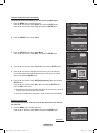
1 Press the TOOLS button on the remote control.
2 Press the ▲ or ▼ button to select Auto Adjustment, then press the ENTER
button.
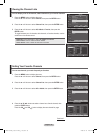
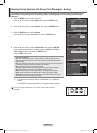
Adjusting the Screen Quality
The purpose of the picture quality adjustment is to remove or reduce picture
noise. If the noise is not removed by fine tuning alone, then do the frequency
adjustments to the utmost and fine tune again. After the noise has been
reduced, re-adjust the picture so that it is aligned on the center of the screen.
➢
Preset: Press the SOURCE button to select PC mode.
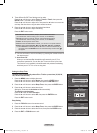
1
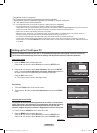
Press the MENU button to display the menu.
Press the ▲ or ▼ button to select Picture, then press the ENTER button.
Press the ▲ or ▼ button to select Screen, then press the ENTER button.
Continued...
Mode : Standard
►
Cell Light 7
Contrast 95
Brightness 45
Sharpness 50
Auto Adjustment
Screen
►
▼
More
PictureT V
Enter
Move
Return
Image Lock
►
Position
►
Image Reset
Resolution : 1024x768 @60Hz
Screen
T V
Enter
Move
Return
Auto Adjustment in progress.
Please wait.
i
Tools
Picture Mode :
Standard
Sound Mode :
Speech
Sleep Timer : Off
Auto Adjustmen
Enter
Exit
Move
BN68-01428A_01531A-00Eng_1-60.in42 42 2008-04-18 오후 2:24:29