* If Source Stream is 2ch, "Re-encoded
Dolby D" Settings are not applied.
Blu-ray Discs may include three audio streams :
- Main Feature Audio : The audio soundtrack
of the main feature.
- BONUSVIEW audio : An additional
soundtrack such as the director or actor’s
commentary.
- Navigation Sound Effects : When you
choose a menu navigation selection, a
Navigation Sound Effect may sound.
Navigation Sound Effects are different on
each Blu-ray Disc.
✎
NOTES
`
Be sure to select the correct Digital Output or
you will hear no sound or just loud noise.
`
If the HDMI device (AV receiver, TV) is not
compatible with compressed formats (Dolby
Digital, DTS), the audio signal outputs as PCM.
`
Regular DVDs do not have BONUSVIEW audio
and Navigation Sound Effects.
`
Some Blu-ray Discs do not have BONUSVIEW
audio and Navigation Sound Effects.
`
If you play MPEG audio soundtracks, the audio
signal outputs as PCM regardless of your
Digital Output selections (PCM or Bitstream).
`
If your TV is not compatible with compressed
multi-channel formats (Dolby Digital, DTS), the
player may output PCM 2ch downmixed audio
even though you selected Bitstream (either Re-
encoded or Unprocessed) in the setup menu.
`
If your TV is not compatible with PCM sampling
rates over 48kHz, the player may output 48kHz
downsampled PCM audio even though you set
PCM Downsampling to Off.
PCM Downsampling
Lets you choose to have 96KHz PCM signals
downsampled to 48KHz before they are
outputted to an amplifier. Choose only if your
amplifier or receiver is not compatible with a
96KHz signal.
Dynamic Range Control
Lets you apply dynamic range control to
Dolby Digital, Dolby Digital Plus, and Dolby
True HD audio.
• Auto : Automatically controls the dynamic
range of Dolby TrueHD audio, based
on information in the Dolby TrueHD
soundtrack.
Also turns dynamic range control on for
Dolby Digital and Dolby Digital Plus.
• Off :
Leaves the dynamic range uncompressed,
letting you hear the original sound.
• On : Turns dynamic range control on for
all three Dolby formats. Quieter sounds
are made louder and the volume of loud
sounds is reduced.
Downmixing Mode
Lets you select the multi-channel downmix
method that is compatible with your stereo
system. You can choose to have the player
downmix to normal stereo or to surround
compatible stereo.
Network Settings
Please contact your ISP to find out if your IP
address is static or dynamic. If it is dynamic
- and most are - we recommend using the
Auto procedure for network setup. This is
easiest and will work in the majority of cases.
If it is static, you must use the manual set up
procedure.
Network setup directions start below.
✎
NOTES
`
This unit can only be connected to a Network
via a wired connection.
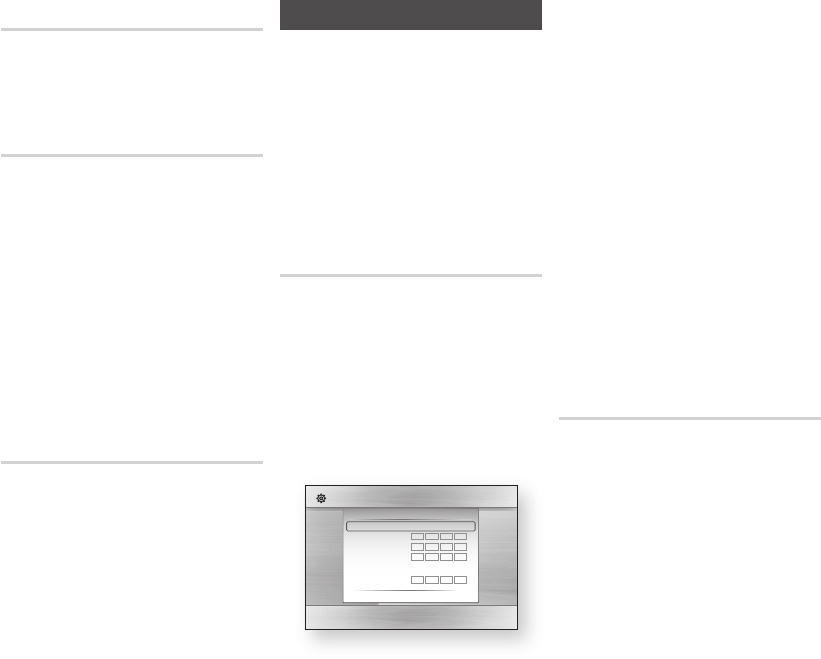
Wired Network Settings
1. In the Home menu, press the ◄►
buttons to select Settings, and then
press the
v
button.
2. Press the ▲▼ buttons to select
Network, and then press the
v
button.
3. Press the ▲▼ buttons to select Wired
Network Settings, and then press the
v
button. The Wired Network Settings
screen appears.
4. In the Internet Protocol Setup field,
select Auto if it is not selected. (Press
v
to select Auto, and then press
v
.)
5. The Auto Function acquires and fills
in the values for IP Address, Subnet
Mask, etc., automatically.
✎
NOTES
`
This process can take up to five minutes.
6. After the Network Function has acquired
the network values, press the RETURN
button.
7. Select Network Test, and then press
v
to ensure the player has connected
to your network.
8. When the Network Test is complete,
press the RETURN twice to return to
the Main Menu.
9. If the Network Function does not acquire
the network values, go to the directions
for Manual Setup.
Manual Network Setup
Before you start manual network setup, you
need the network setting values.
To get the network setting values, contact
your ISP (Internet Service Provider) or your
network administrator.
To enter the Network Settings into your
player, follow these steps:
1. In the Home menu, press the ◄►
buttons to select Settings, and then
press the
v
button.
2. Press the ▲▼ buttons to select
Network, and then press the
v
button.
Display
Audio
Network
System
Language
Security
General
Support
Settings
Wired Network Settings
Internet Protocol Setup : Auto
\
IP Address :
0
0
0
0
Subnet Mask :
0
0
0
0
Gateway :
0
0
0
0
DNS : Auto
DNS Server :
0
0
0
0
>
Move
"
Select
'
Return
11


