English - 44
This enables the user to select from the CAM-provided menu.
1.
Press the D.MENU button to display the DTV menu.
2.
Press the ▲ or ▼ button to select "Setup", then press the
ENTER/OK button.
3.
Press the ▲ or ▼ button to select "System", then press the
ENTER/OK button.
4.
Press the ▲ or ▼ button to select "Common Interface",
then press the ENTER/OK button.
5.
Select to "CI Menu" by pressing the ▲ or ▼ button, and
press the ENTER/OK button.
6.
Select the required option by pressing the ▲ or ▼ button,
and press the ENTER/OK button.
7.
Press the EXIT button to exit.
Select the CI Menu based on the menu PC Card.
This contains information on CAM inserted in the CI slot and
displays it.
1.
Press the D.MENU button to display the DTV menu.
2.
Press the ▲ or ▼ button to select "Setup", then press the
ENTER/OK button.
3.
Press the ▲ or ▼ button to select "System", then press the
ENTER/OK button.
4.
Press the ▲ or ▼ button to select "Common Interface",
then press the ENTER/OK button.
5.
Press the ENTER/OK button to display the information for
your application.
6.
Press the EXIT button to exit.
The Application Info inserting is about the CI CARD.
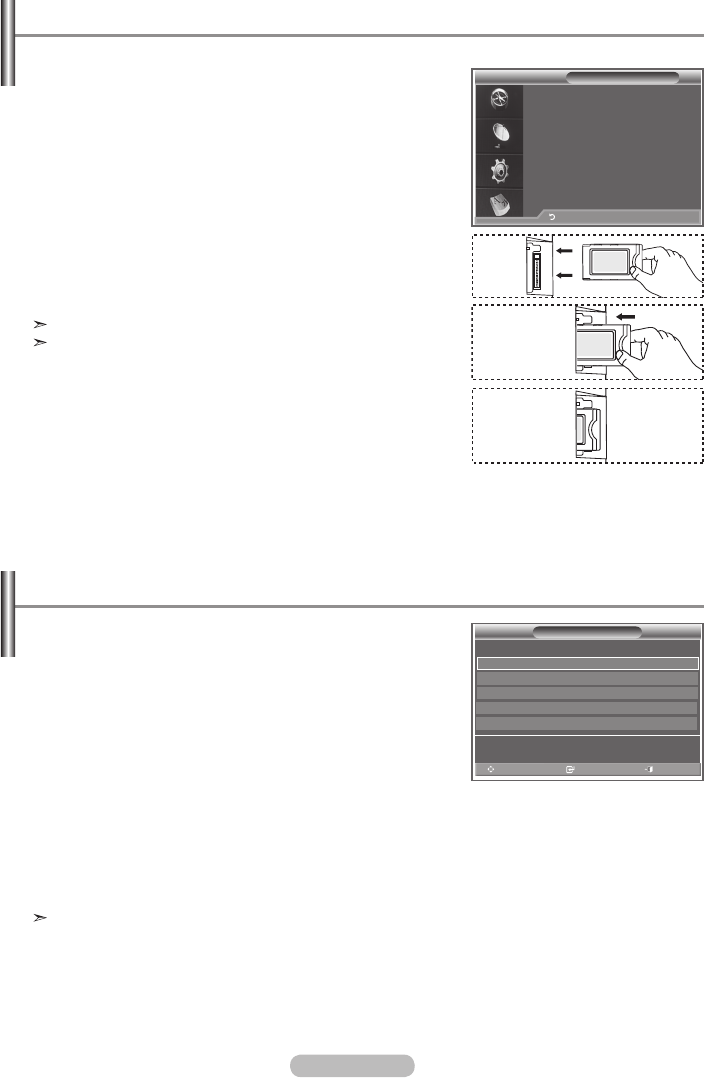
You can install the CAM anytime whether the TV is ON or
OFF.
1. Purchase the CI CAM module by visiting your nearest dealer
or by phone.
2. Insert the CI CARD into the CAM in the direction of the
arrow until it fits.
3. Insert the CAM with the CI CARD installed into the common
interface slot.
(Insert the CAM in the direction of the arrow, right up to the end
so that it is parallel with the slot.)
4. Check if you can see a picture on a scrambled signal
channel.
Viewing Common Interface
Application Info
Type : CA
Manufacturer : Channel Plus
Info : Top Up TV
Return
Selecting the CI (Common Interface) Menu
CI Menu
Main menu
Move Enter Exit
Module information
Smart card information
Language
Software Download
Press OK to select, or Exit to quit
BN68-01186B-Eng-0309.indd 44 2007-03-13 �� 9:23:24


