


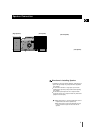
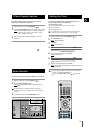
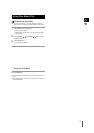


You can view the various functions available on your system.
Switch the system off by pressing On/Standby ( ).
Press the Color Display/Demo button.
Result:
The various functions available are listed in turn on the
display.
All these functions are described in detail in this booklet.
For instructions on how to use them, refer to the appropriate
sections.
To cancel this function, press Color Display/Demo again.
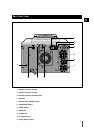
2
3
1
Demo Function
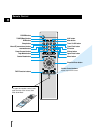
On/Standby
AUX
Phones
Color Display
/Demo
Po
Surr
Sl
Mon
REC/Pause
CD Synchro
CD Repeat
TUNER
/Band
Tuning Mode
DVD/CD
TAPE
D
V
D
/
M
P
3
-
C
D
/
C
D
-
R
/
R
W
P
L
A
Y
B
A
C
K
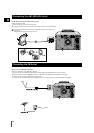
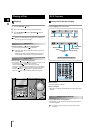
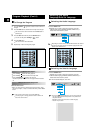
The System allows you to choose your favorite color to
produce your own personal atmosphere.
Switch the system on by pressing On/Standby ( ).
Press the Color Display/Demo button and select the color you want.
Result:
Whenever the button is pressed, the color is repeated in the
sequence of Cyan
➞
Green
➞
Red
➞
Blue
➞
Violet
➞
Y. Green
➞
White
➞
Off
➞
Auto.
If you select Auto mode, 7 colors are displayed for 3 seconds
alternatively.
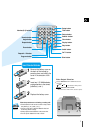
2
3
1
7-Color Display Function
13
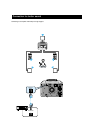
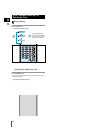
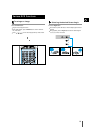
Your system is equipped with a clock which allows you to
turn your system on and off automatically.
You should set the clock:
When you first purchase the micro component system
After a power failure
After unplugging the unit
For each step, you have a few seconds to set the required
options. If you exceed this time, you must start again.
Switch the system on by pressing On/Standby ( ).
Press Timer/Clock twice.
Result:
CLOCK is displayed.
Press Enter.
Result:
The hour flashes.
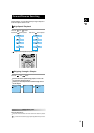
To... Press...
Increase the hours
Decrease the hours
When the correct hour is displayed, press Enter.
Result:
The minutes flash.
To... Press...
Increase the minutes
Decrease the minutes
When the correct time is displayed, press Enter.
Result: The clock starts and is displayed, even when the system is in
standby mode.
You can display the time, even when you are using another
function, by pressing Timer/Clock once.
You can use the Multi Jog to instead /
button in step
4,6.
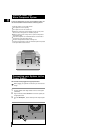
Setting the Clock
1
2
3
4
5
6
7
GB