English-6
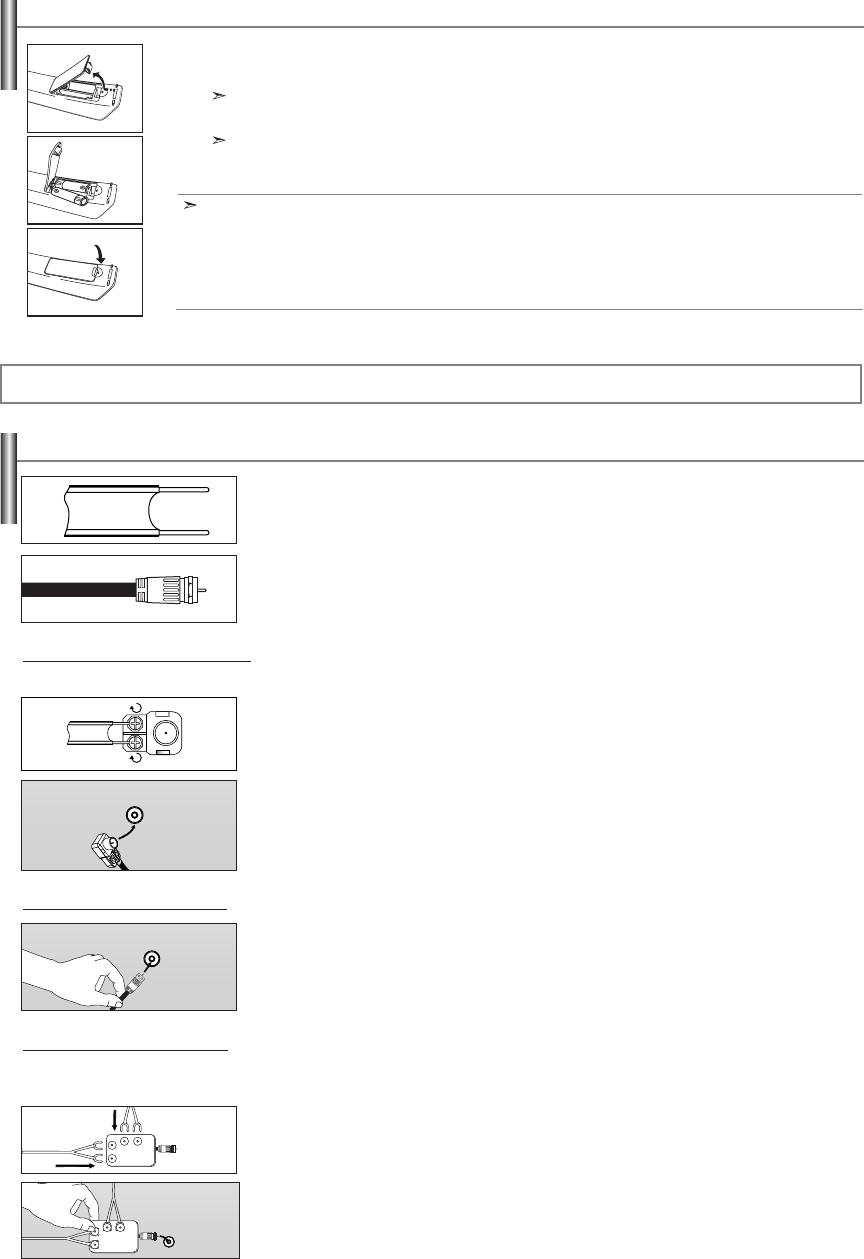
1. Lift the cover at the back of the remote control upward as shown in the figure.
2. Install two AAA size batteries.
Make sure to match the “+” and “–” ends of the batteries with the diagram inside the compartment.
3. Replace the cover.
Remove the batteries and store them in a cool, dry place if you won’t be using the remote control for a long time.
The remote control can be used up to about 23 feet from the TV.
(Assuming typical TV usage, the batteries last for about one year.)
If the remote control doesn’t work, check the following:
1. Is the TV power on?
2. Are the plus and minus ends of the batteries reversed?
3. Are the batteries drained?
4. Is there a power outage, or is the power cord unplugged?
5. Is there a special fluorescent light or neon sign nearby?
Installing Batteries in the Remote Control
1. Place the wires from the twin leads under the screws on a 300-75
Ω
adapter
(not supplied).
Use a screwdriver to tighten the screws.
2. Plug the adaptor into the ANT IN terminal on the back of the TV.
Connecting VHF and UHF Antennas
If your antenna has a set of leads that look like this, see “Antennas with 300
Ω
Flat Twin Leads” below.
If your antenna has one lead that looks like this, see “Antennas with 75
Ω
Round Leads”.
If you have two antennas, see “Separate VHF and UHF Antennas”.
Antennas with 300 Ω Flat T
win Leads
If you are using an off-air antenna (such as a roof antenna or “rabbit ears”) that has 300
Ω
twin flat leads, follow the directions below.
1. Plug the antenna lead into the ANT IN terminal on the back of the TV.
Antennas with 75 Ω Round Leads
1. Connect both antenna leads to the combiner.
2. Plug the combiner into the ANT IN terminal on the bottom of the rear panel.
Separate VHF and UHFAntennas
If you have two separate antennas for your TV (one VHF and one UHF), you must combine the two antenna signals before connecting the antennas to the
TV. This procedure requires an optional combiner-adaptor (available at most electronics shops).
UHF
VHF
ANT IN
ANT IN
ANT IN
UHF
VHF
Connections
BN68-01001C-X0Eng.qxd 3/16/06 1:31 AM Page 6


