25
Your television has several settings which allow you to control
picture quality.
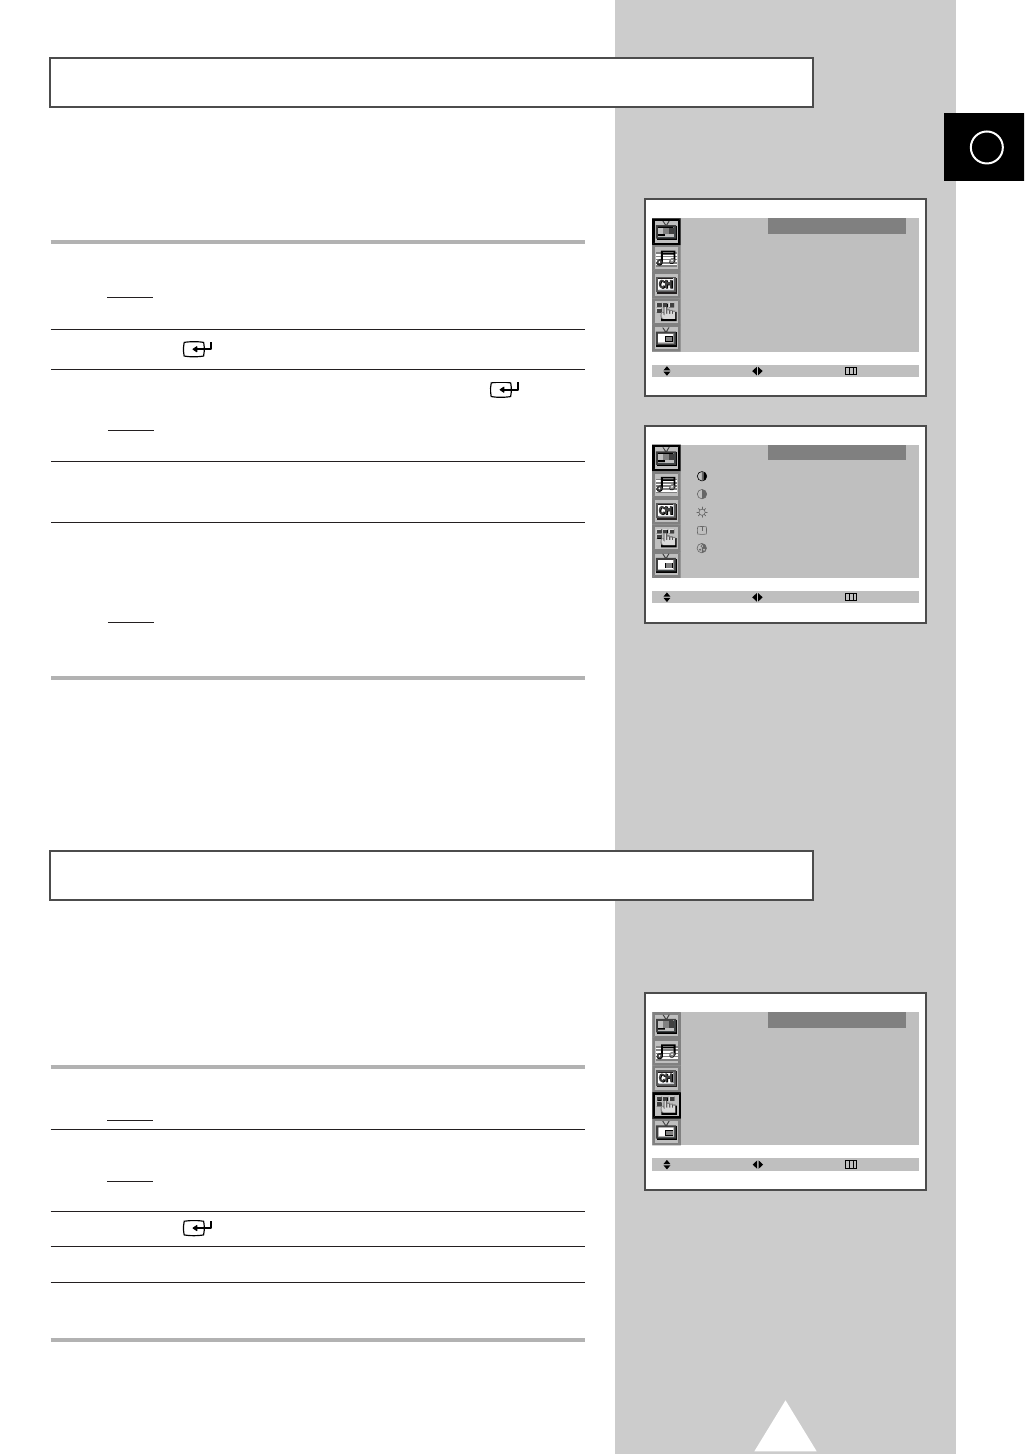
1 Press the MENU button.
Result
:
The options available in the
PICTURE
group are
displayed.
2 Press the button.
3 Press the ▼ or ▲ button to select ADJUST. Press the button.
Result
: The options available in the ADJUST group are
displayed with
COLOUR TONE is selected.
4 Press the ➛ or ❿ button to select the option (COOL2, COOL1,
NORMAL, WARM1, WARM2).
5 Press the ▼ or ▲ button to select the option (CONTRAST,
BRIGHTNESS, SHARPNESS, COLOUR or TINT-NTSC only) to be
adjusted. Press the
➛ or ❿ button.
Result
: The horizontal bar is displayed. Move the horizontal
bar’s cursor left or right by pressing the
➛ or ❿
button.
➣
If you make any changes to these settings, the picture
standard is automatically switched to
CUSTOM.
Adjusting the Picture Settings
ENG
SELECT ADJUST EXIT
PICTURE
MODE
œœ
DYNAMIC
√√
ADJUST
√√
SCAN MODE : AUTO
DIGITAL NR : OFF
LNA : OFF
SELECT ADJUST EXIT
ADJUST
COLOUR TONE : NORMAL
CONTRAST : 100
BRIGHTNESS : 50
SHARPNESS : 75
COLOUR : 55
If no signal is being received or the signal is very weak, a blue
screen automatically replaces the noisy picture background.
If you wish to continue viewing the poor picture, you must set the
“
BLUE SCREEN” mode to “OFF”.
1 Press the MENU button.
Result
: The main menu is displayed.
2 Press the ▼ or ▲ button to select FUNCTION.
Result
: The options available in the FUNCTION group are
displayed.
3 Press the button.
4 Press the ▼ or ▲ button to select BLUE SCREEN.
5 Select the required option (ON or OFF) by pressing the ➛ or ❿
button.
Setting the Blue Screen Mode
SELECT ADJUST EXIT
FUNCTION
LANGUAGE : ENGLISH
TIME
√√
CONVERGENCE
√√
BLUE SCREEN : ON
PLUG & PLAY
√√
DEMONSTRATION
√√


