


ENGLISH
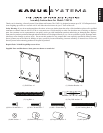
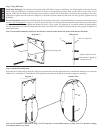
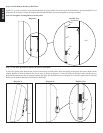
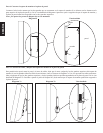
Step 1: Hang Wall Plate
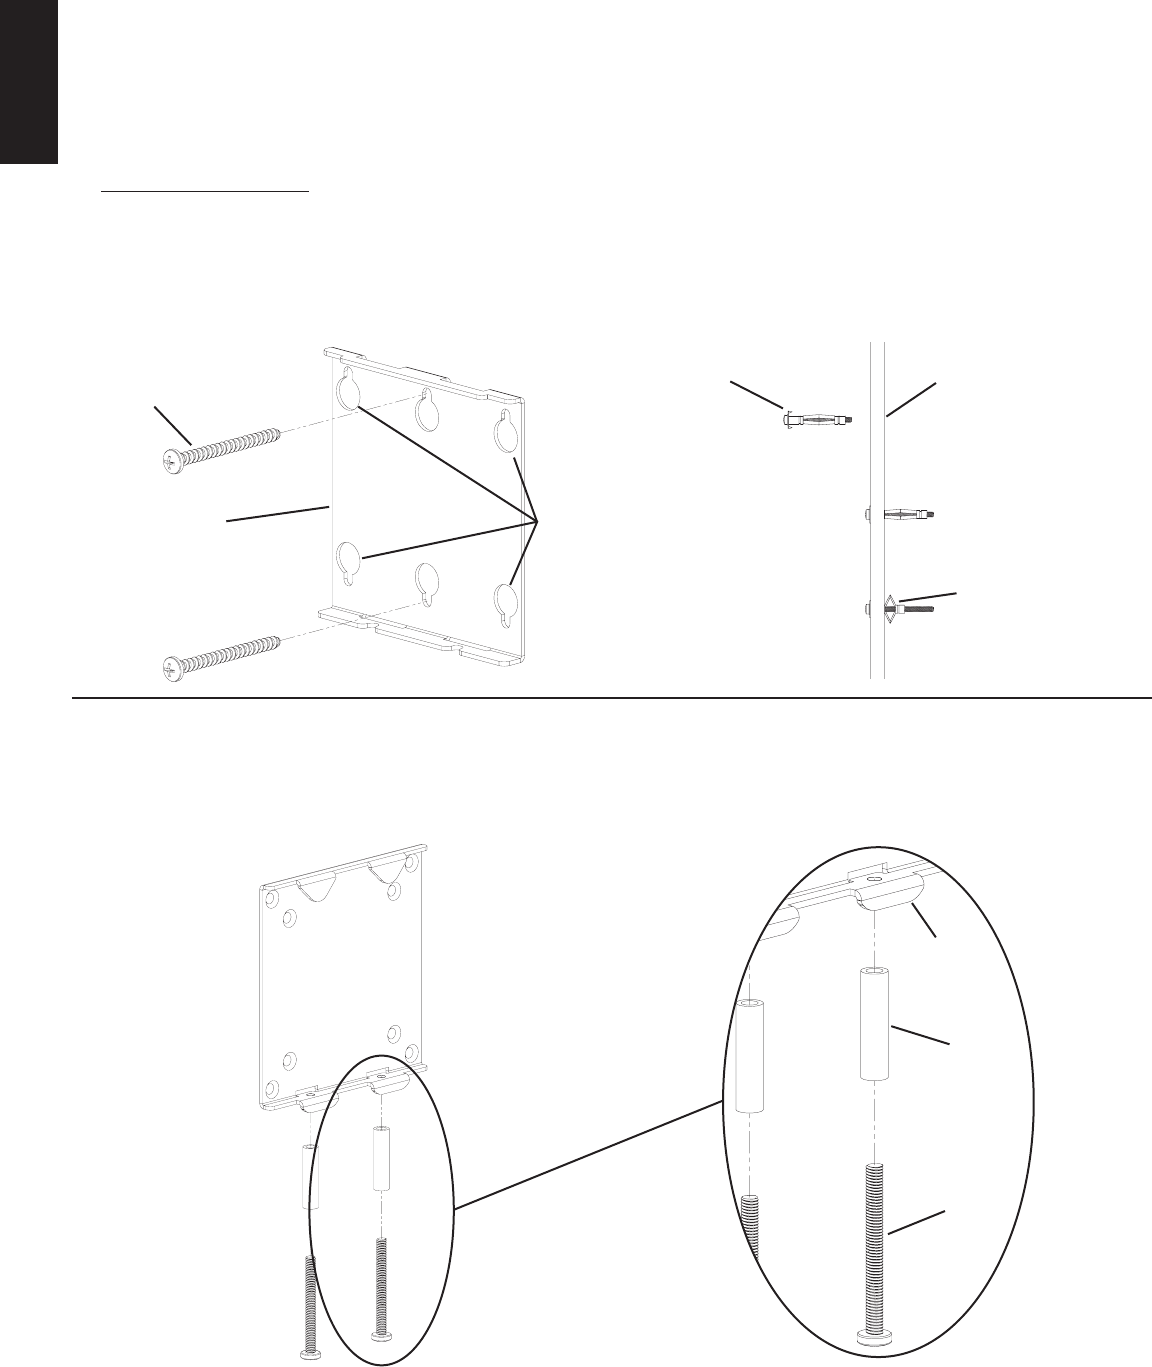
Wood Stud Mounting: First, determine the location of the Wall Plate (a) prior to installation. Use a high quality stud sensor to locate
a stud. Using the Wall Plate as a template and mark two holes in the apporpriate location. Make sure the hole is in the center area of
the stud. Attach the Wall Plate to the wall using two Lag Bolts (c). Make sure the Wall Plate is oriented so the at surface in the center
of the plate is against the wall as shown in Diagram 1a. Proceed to keyhole mount the Wall Plate onto the Lag Bolts. Tighten each Lag
Bolt rmly.
Drywall Installation: Position the Wall Plate in the desired location on the wall. Using the Wall Plate as a template, mark the location of
the four outer mounting holes. Using a 3/8
”
drill bit, proceed to drill a 3/8
”
pilot hole in each marked location. Install a Dry Wall Anchor
(d) in one of the pilot holes and tighten the anchor bolt until it is fully seated. See Diagram 1b. Loosen the anchor bolt approximately
1/4
”
and repeat process for the three additional pilot holes. Once Wall Plate is keyhole mounted onto the wall, proceed to tighten all 4
anchor bolts rmly.
Note: For Drywall Installations, make sure the Washer is inbetween the head of the anchor bolt and the Wall Plate.
Diagram 1a Diagram 1b
d drill 3/8” pilot hole
c
a drywall mounting holes
tighten anchor bolt until
the Anchor is pulled up
against the wall
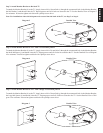
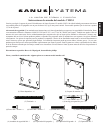
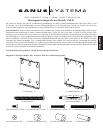
Step 2: Install M5 Locking Bolts
Insert each M5 Locking Bolt (h) through a M5 Spacer (l) and thread it into the appropriate hole in the Monitor Bracket (b) as seen in the
Detailed View of Diagram 2. Thread the M5 Locking Bolt into the Monitor Bracket just enough to engage the threading.
Diagram 2 Detailed View
b
l
h
Note: For TVs that have a at back see Step 3. For TVs that have a recessed hole pattern, see Step 4. For TVs that have a deeply
recessed hole pattern, see Step 5.