19
r
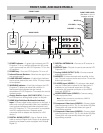
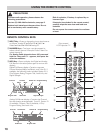
RECALL Key—Select the first channel you want to
watch; then select another channel using the
NUMBER keys. Press RECALL to switch easily
between the channels.
Note: The RECALL key is inactive when an external input
is selected (Video 1, Video 2, Video 3, or HDMI) and it
cannot toggle between a Digital channel and an Analog
channel. See TUNER key description.
t
MENU Key—Press this key to display the on-screen
menu.
y
TUNER Key—Use this key to toggle from one tuning
system to another, Digital channels and Analog
channels.
Note: The TUNER key is inactive when an external input
is selected (Video 1, Video 2, Video 3, or HDMI).
u
CAPTION Key—Press to select analog or digital
captioning. The Analog Caption modes are: CC1–CC4,
Quikcap, and OFF. The Digital Caption modes are:
Digital CC1–CC6, Quikcap, and OFF.
i
Channel Scanning (CH ed) Keys—Press e (up) d
(down) keys to tune to the next higher or lower
channel in the Channel Scan Memory list. The
scanning loop includes analog channels, and digital
channels.
o
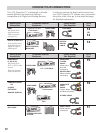
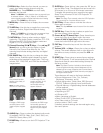
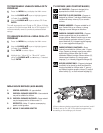
PIX SHAPE Key—Use this key to change the video
display format. Available options depend on signal
received and the broadcast’s aspect ratio. They may
include: PIX1, PIX2, PIX3, and PIX4. See simulated TV
images below:
!0
AUDIO Key—Press to select the desired audio mode
(if available): DIGITAL: Main, Sub1, Sub2, Sub3, etc.;
ANALOG: Stereo, Mono, SAP.
!1
POWER Key—Press to turn the LCD Projection TV on
or off.
!2
SLEEP Key—Press this key, then press the “0” key to
set the Sleep Timer. The desired time can be set from
30 minutes up to 3 hours in 30 minutes increments.
To display the remaining time, press this key again.
Sleep Timer will switch off the LCD Projection TV
automatically.
Note: The Sleep Timer cancels when the LCD Projection
TV is turned off or if a power failure occurs.
!3
MUTE Key—Press once to minimize the volume.
Press again to restore.
Note: This key will not mute the sound from the audio
out jacks
.
!4
ENTER Key—Press this key to select an option from
the menu system, when required.
!5
Cursor e (up) d (down) Keys—Press these keys to
move the cursor up and down within the menu.
Cursor < (left)
> (right) Keys—Press these keys to
move the cursor left and right within the menu.
!6
EXIT Key—Press this key to exit from the menu
system.
!7
Volume (VOL – +) Keys—Press the – + keys to adjust
volume. The screen displays a left or right red arrow
that blinks as many times as you press the VOL – +
keys.
!8
RESET Key—Press twice to restore factory settings.
The LCD Projection TV will automatically start Channel
Search and clear all customized settings (except for
the lamp counter).
Note: The Reset Function includes a channel search.
Current Digital and Analog channel databases will be
deleted and new ones created by the Channel Search
process. To receive Digital Cable channels, see page 21
for Digital Cable Search.
These features will reset to the factory defaults:
• Picture Adjustments: Color, Tint, Contrast,
Brightness, Sharpness, and AI
• Sound Adjustments: Treble, Bass, SRS Surround,
FOCUS, TruBass or Woofer Level, and Woofer
• Channel Memory—Digital/Analog channel databases
will be replaced
• Analog Audio to Stereo
• Captioning to OFF
• V-Guide to OFF
• Menu Language to English
• Sleep Timer to OFF (if previously set)
• Any Video mode to TV mode
• Lamp mode to “Mid” mode
If desired, personal settings can be made again using
the menu options.
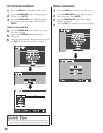
PIX1
Gray colored borders
appear at the sides, of
the screen.
Note: 4:3 image without
distortion on a 16:9 screen.
PIX3
Enlarges a PIX2 image
vertically (some of the
image may be cropped
off).
PIX2
A 16:9 image fills the
screen normally. A 4:3
image is stretched
horizontally and may
appear distorted.
PIX4
Stretches the PIX3 image
horizontally (portions of
the sides and/or top and
bottom may be cropped
off).


