6
GB
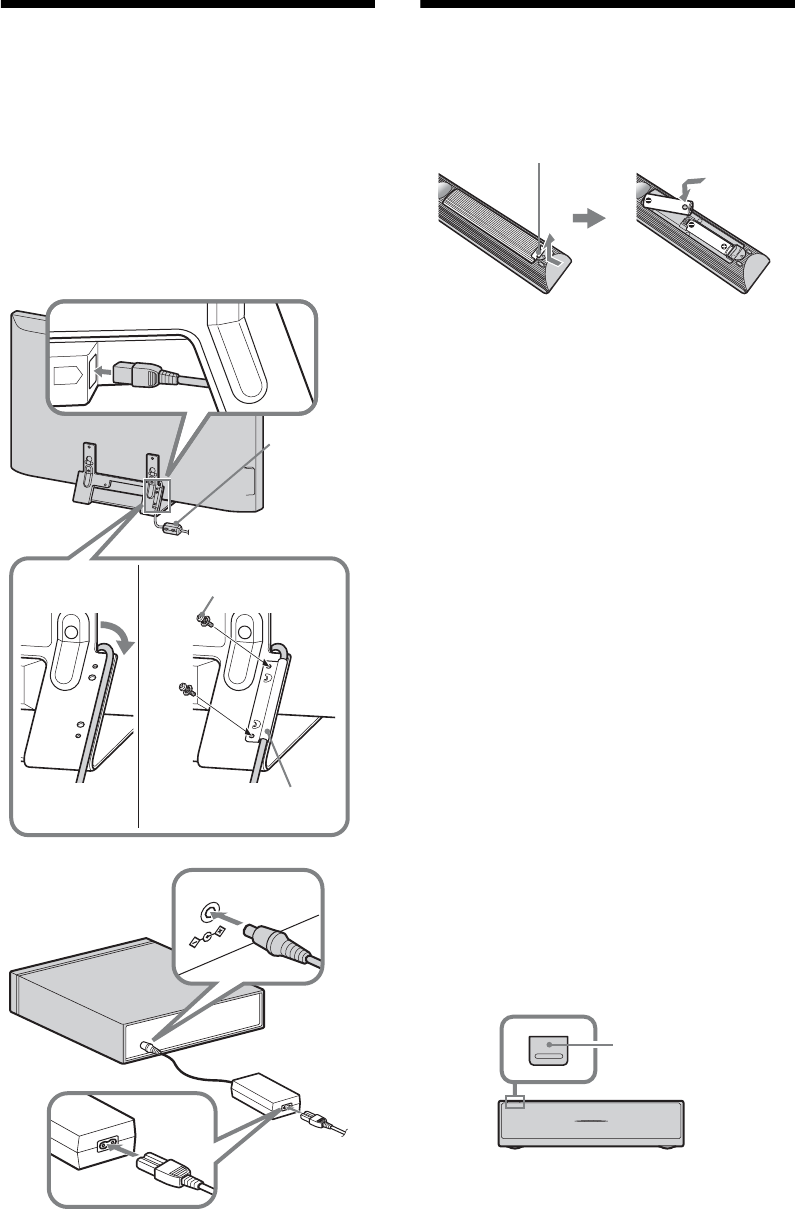
4: Connecting the mains
lead
~
• Make sure to secure the mains lead.
• To ensure compliance with current EMC
legislation, ensure the following conditions are
met.
• Fix the mains lead holder (supplied) after
checking the mains lead is in the groove of the
mains lead holder (supplied) to avoid scratching
the mains lead.
5: Performing the initial set-
up
Inserting batteries into the remote
~
• Observe the correct polarity when inserting
batteries.
• Do not use different types of batteries together or
mix old and new batteries.
• Dispose of batteries in an environmentally
friendly way. Certain regions may regulate the
disposal of batteries. Please consult your local
authority.
• Handle the remote with care. Do not drop or step
on it, or spill liquid of any kind onto it.
• Do not place the remote in a location near a heat
source, a place subject to direct sunlight, or a
damp room.
Establishing the wireless
communication between the unit
~
• This unit can be placed in the same room.
• Keep about 30 cm to 20 m distance between the
monitor and media receiver when installing.
• Keep clear the area between the monitor and
media receiver. Otherwise the picture may
deteriorate.
• Rearrange the installation position of the monitor
and media receiver in case of fuzzy picture.
• Do not place either unit on a metallic rack.
• Do not use two units or more at the same time in
an area of radio interference.
1 Press 1 to turn on the unit power.
D
C
IN
18V
AC
IN
1
23
Media receiver
to mains
socket
Monitor
to mains socket
Screws (supplied)
Mains lead holder
(supplied)
Ferrite core
Push and lift the cover to open.
POWER button
Media receiver


