Chapter 6 Maintenance 83
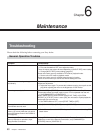
Chapter 6 Maintenance
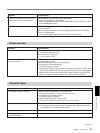
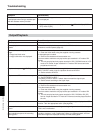
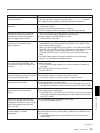
Symptom Cause/Remedy
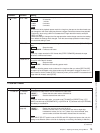
A user bit is not displayed correctly during
fast-forward/rewind.
“– – –– – –” appears on the date display
(page 36)
.
Although the HDMI cable or component
video cable is connected properly to a
television set or monitor to play back a
tape, no image or audio is output.
When you connect the unit to a 4:3
television set, the displayed image
appears flattened.
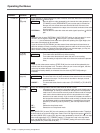
Even though [HDV/DV IN TC] in [TC/UB
SET] menu is set to [EXTERNAL], the
time code of the input i.LINK signal is not
recorded.
After playing at 1/10 of normal speed in
forward or reverse for more than 1 minute,
normal playback forward starts.
Playback pause mode is released and the
unit goes into the stop mode.
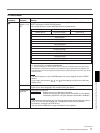
Playback pause mode is released and the
tape forwards for each preset time
interval.
After the unit has been left in the stop
mode and no key operations have been
attempted for more than one hour, the unit
goes into the standby mode (the unit’s
power turns off).
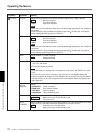
The pause mode of playback, recording,
or audio dubbing is released
automatically.
• When input video signals without a user bit are recorded while HDV is input to
i.LINK, the user bit is not displayed correctly. Either “–– –– –– ––” or “00 00 00
00” is displayed during playback and fast-forward/rewind, respectively.
• The tape has been played back without setting the date and time.
t Set the date and time.
• The tape portion being played back has no recording.
• If there is a scratch or noise on the tape, the data code cannot be read.
t Use the correct setting for [HDMI/CMPNT] in [VIDEO OUT] in [IN/OUT REC]
menu in accordance with the equipment to be connected.
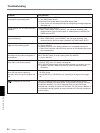
• No audio is output from COMPONENT OUT jacks.
t Connect also an audio cable.
t When you output from HDMI OUT jack and COMPONENT OUT jacks, set
[HDMI/CMPNT] and [DOWN CONVERT] of [VIDEO OUT] in [IN/OUT REC]
menu correctly before play back.
When you output from
HDV/DV jack, set [HDV t DV CONV] and [DOWN
CONVERT] of [i.LINK SET] in [IN/OUT REC] menu correctly before play back.
When you output from S VIDEO jack and VIDEO jack, set [DOWN
CONVERT] of [VIDEO OUT] in [IN/OUT REC] menu correctly before play
back.
t DVCAM/DV tape images recorded in the wide mode are not displayed
properly. Use a widescreen-compatible monitor.
• The i.LINK signal output from the digital non-linear editing controller does not
include a time code.
t Confirm that the editing software you are using is capable of outputting a
time code.
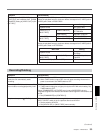
• INPUT SELECT switch is not set to HDV/DV.
t Set it to HDV/DV.
• To protect a tape, the unit is set to start normal playback after playing at 1/10 of
normal speed in forward or reverse for more than 1 minute.
t Play back the tape at 1/3 of normal speed in forward or reverse.
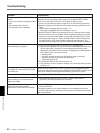
• To protect the tape, the unit is set to go into the stop mode after the playback
pause mode continues for a certain period.
t Set [FROM STILL] in [VTR SET] menu to [STEP FORWARD]. If you do so,
the tape will forward by one frame for each time interval set in [STILL TIME].
• To protect the tape, the unit is set to forward the tape after the playback pause
mode continues for a certain period.
t Set [FROM STILL] in [VTR SET] menu to [STOP]. If you do so, the unit goes
into the stop mode after the playback pause mode continues for the interval
set in [STILL TIME].
• [AUTO STANDBY] in [OTHERS] menu is set to [ON].
t Set [AUTO STANDBY] to [OFF].
• To protect the tape and the video heads, the unit goes into the stop mode after
the pause mode of recording, audio dubbing, or duplicating continues for more
than 3 minutes.
t To maintain the pause mode, set [FROM REC P] in [VTR SET] menu to
[REC PAUSE].
(Continued)


