10
Auto converge the Red, Green, and
Blue Lines
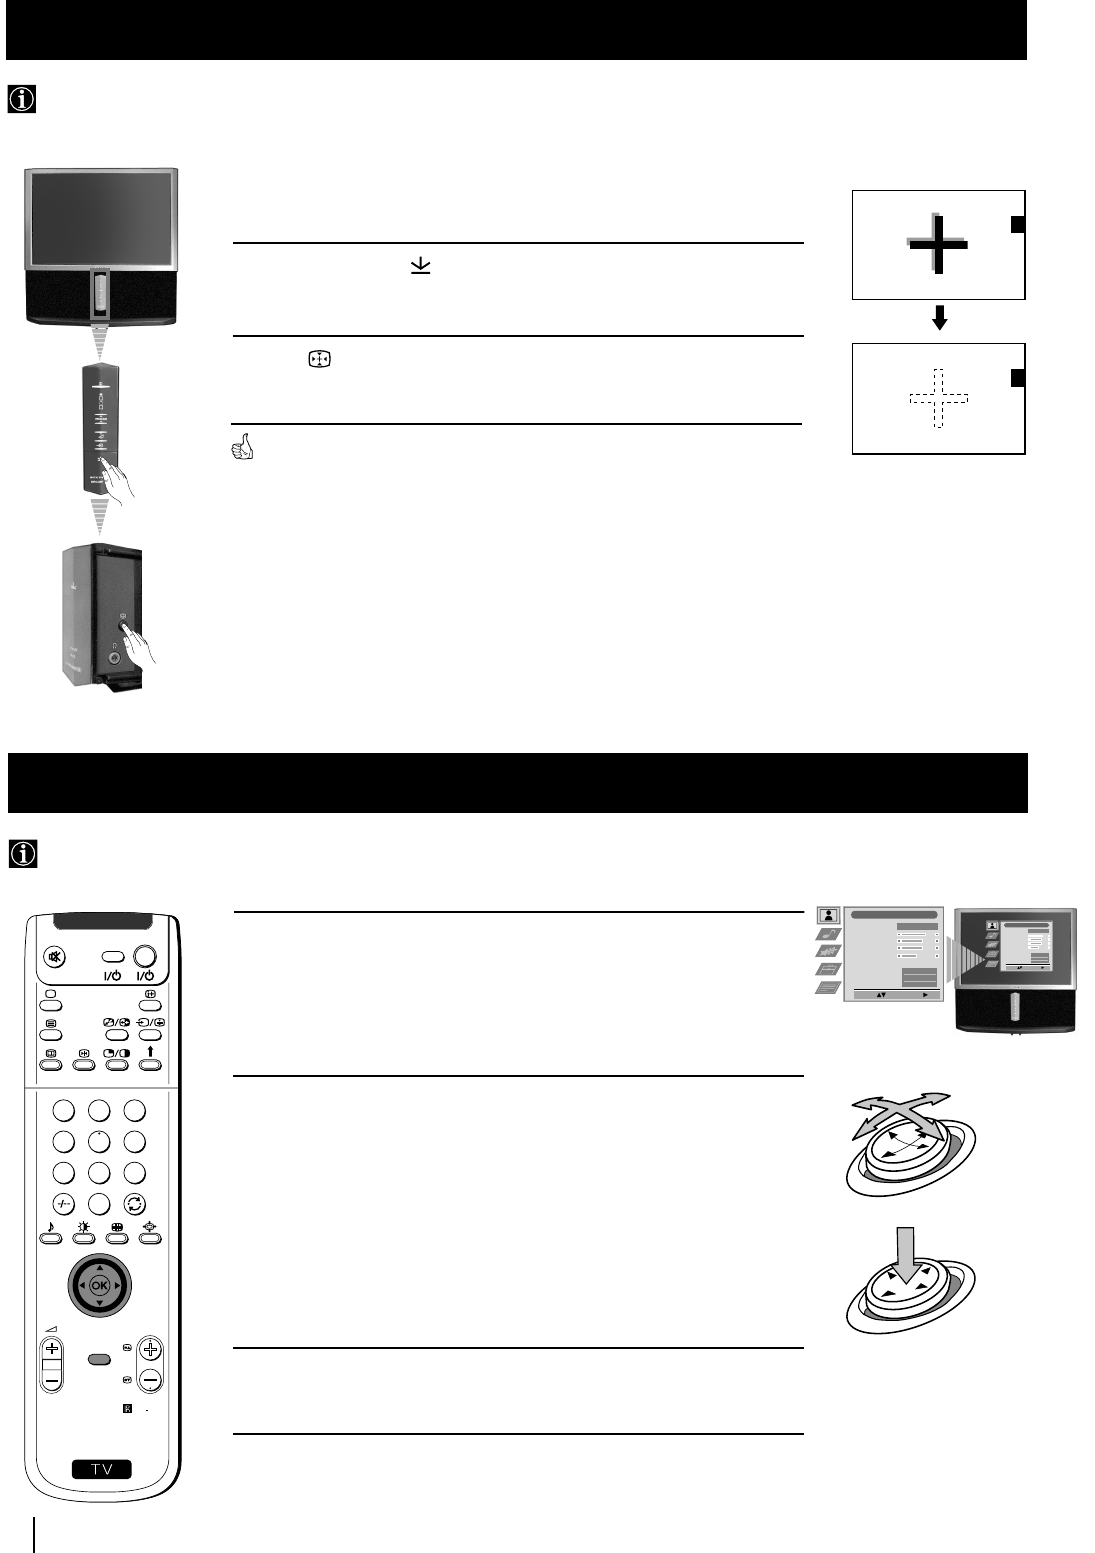
1 Press on the mark , on the front of the projection TV to reveal the
front connectors.
2 Press button placed on the right side of front connectors.
The Auto Convergence function works for about 10 seconds. When the white
cross disappears from the screen, your projection TV is ready for use.
Notes:
The Auto Convergence function does not work when:
• no signal is input.
• the input signal is weak.
• the screen is exposed to spotlights or direct sunlight.
• you watch the teletext broadcast.
• you watch NexTView.
First Time Operation - Menu System
Due to the earth’s magnetism, the picture might become undefined and you could see different colours on the outlines of the images.
In that case, proceed as follows.
Adjusting Colour Registration (Convergence)
1 Press the MENU button to switch the first level menu on.
2 •To higlight the desired menu or option, push the joystick to
4 or $.
•To enter to the selected menu or option, push to z
•To return to the last menu or option, push to Z.
•To alter settings of your selected option, push to $/4/Z or z.
•To confirm and store your selection, press OK.
3 Press the MENU button to remove the menu from the screen.
Your projection TV uses an on-screen menu system to guide you through the operations. Use the following buttons on the Remote
Control to operate the menu system:
Introducing the Menu system
First Time Operation - Menu System
S
RM
892
PROGR
MENU
1
4
7
2
5
8
0
3
6
9
VIDEO TV
Picture Adjustment
Select: Enter Menu:
Picture Mode
Contrast
Brightness
Colour
Sharpness
Reset
AI
Noise Detection
Digital Mode
Personal
On
On
DRC 50
Picture Adjustment
Select: Enter Menu:
Picture Mode
Contrast
Brightness
Colour
Sharpness
Reset
AI
Noise Detection
Digital Mode
Personal
On
On
DRC 50
O
K
push to $/4/Z or z
press OK


