23
GB
Menu System
This function enables you to designate a name to the optional equipment you have connected to the sockets of this projection TV.
This name can contain up to 5 characters (letters or numbers).
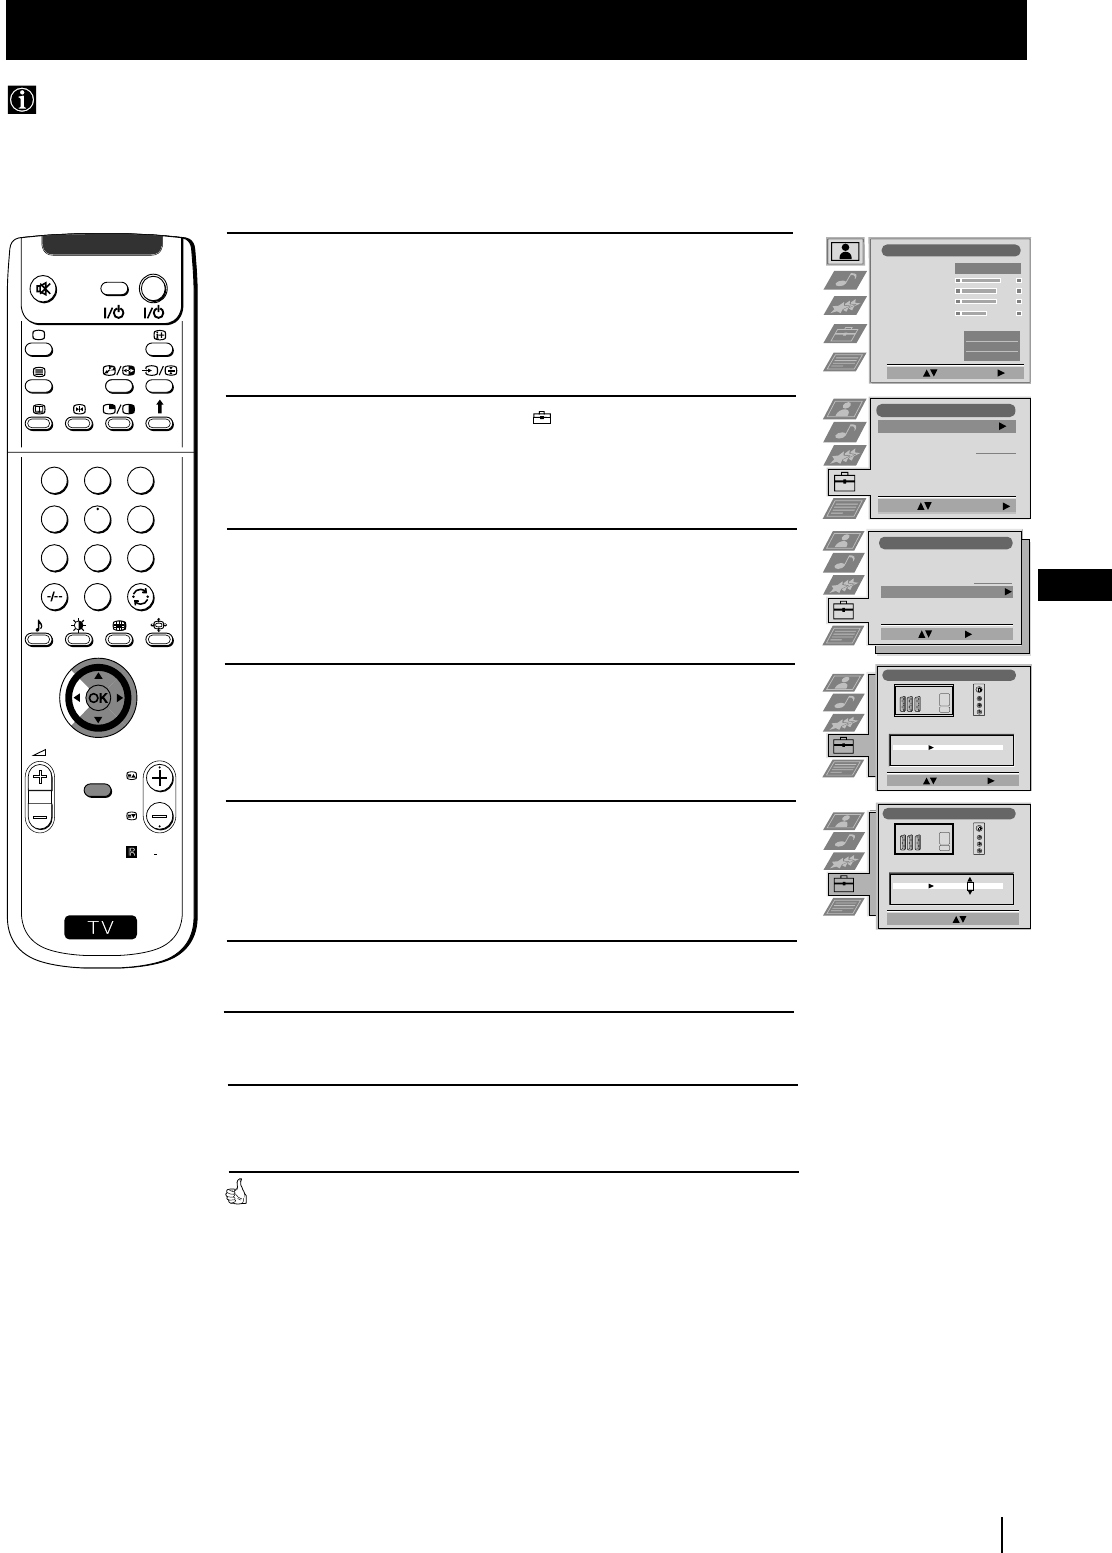
Labelling of Input Sources
1 Press the MENU button on the remote control to display the menu
on the screen.
2 Push the joystick to $ to select the symbol, then push to z to
enter the Set Up menu.
3 Push the joystick to $ or 4 to select AV Preset, then push to z.
4 Push the joystick to $ or 4 to select the input source you wish to
name (eg AV2), then push to z to highlight the first element of
the Label column.
5 Push the joystick to $ or 4 to select a letter, number, "+" or blank;
then push to z to confirm this character. Select the other four
characters in the same way.
6 After selecting all the characters, press the OK button.
7 Repeat steps 4 to 6 if you wish to label other input sources.
8 Press the MENU button to exit and return to the normal TV screen.
Whenever the equipment with the labeled input is selected for use, the
name appears for a few seconds on the screen.
S
RM
892
PROGR
MENU
1
4
7
2
5
8
0
3
6
9
VIDEO TV
Picture Adjustment
Select: Enter Menu:
Picture Mode
Contrast
Brightness
Colour
Sharpness
Reset
AI
Noise Detection
Digital Mode
Personal
On
On
DRC 50
Set Up
Auto Tuning
Programme Sorting
Select NexTView
AV Preset
Manual Set Up
Select:
Start Auto Tuning
Start
- - - - - - -
Enter:
Set Up
Auto Tuning
Programme Sorting
Select NexTView
AV Preset
Manual Set Up
Select:
- - - - - - -
AV Preset
Select: Enter:
INPUT LABEL
VIDEO
VIDEO
VIDEO
AV1
AV2
AV3
AV4
AV Preset
Select A-Z, 0-9: Confirm: OK
INPUT LABEL
IDEO
V
VIDEO
VIDEO
AV1
AV2
AV3
AV4
Menu System


