12
Using Your New Projection TV
Y
P
B
/
C
B
P
R
/
C
R
Y
P
B
/
C
B
P
R
/
C
R
R
L
R
L
1 2
G
B
R
VIDEO
R-AUDIO-L
LINE OUT
Y
COMPONENT VIDEO OUT
S VIDEO OUT
C
B
C
R
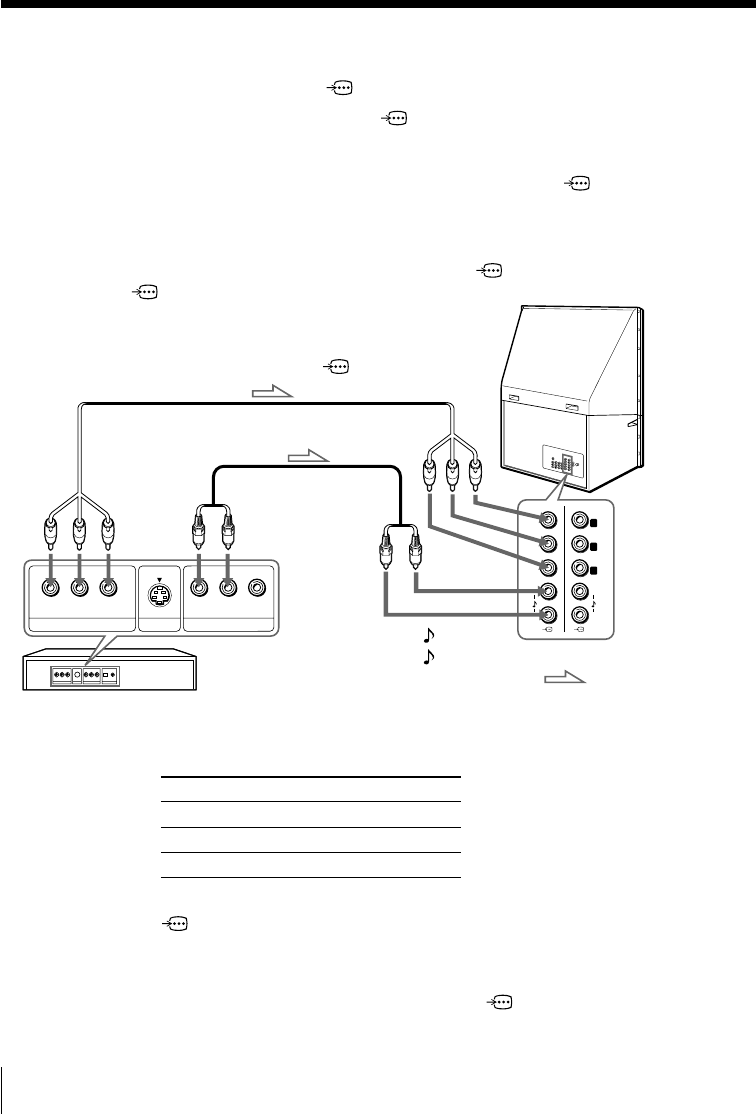
Connecting a DVD player to (component video input)
1 Using an audio cable, connect R and L under 1 or 2 (component video input) on
your projection TV to the LINE OUT, AUDIO R and L output connectors on your
DVD player.
2 Using a component video cable, connect Y, PB/CB, and PR/CR under 1 or 2
(component video input) on your projection TV to the COMPONENT VIDEO OUT
Y, C
B, and CR output connectors on your DVD player.
3 Press t or HD/DVD on the remote or t on the projection TV until “HD/DVD 1”
appears on the screen if you connect your DVD player to
1, or “HD/DVD 2” for
connection to
2.
To component
video output
Component video cable
(not supplied)
DVD
player
To -L (white)
-R (red)
To audio
output
Audio cable
(not supplied)
: Signal flow
To 1 or 2
(component video input)
Rear of
projection TV
Notes
• Some DVD player terminals may be labeled differently:
Connect To (on the DVD player)
Y (green) Y
PB/CB (blue) Cb, B-Y or PB
PR/CR (red) Cr, R-Y or PR
• Connect nothing to the HD/VD jacks when connecting a DVD player to
1 or 2 (component video input).
• If you select “HD/DVD 1” or “HD/DVD 2” on your projection TV screen,
no sound and no picture will be output from T (monitor output). This
does not indicate a malfunction.
• When receiving a progressive signal through (component video
input), TWIN pictures and PROGRAM INDEX features are not available,
and “DRC-MF” and “GAME MODE” are not selectable.
Connecting optional components (continued)


