


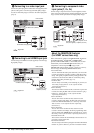
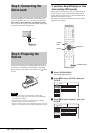
6
Step 3: Connecting the Video Cords
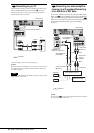
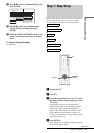
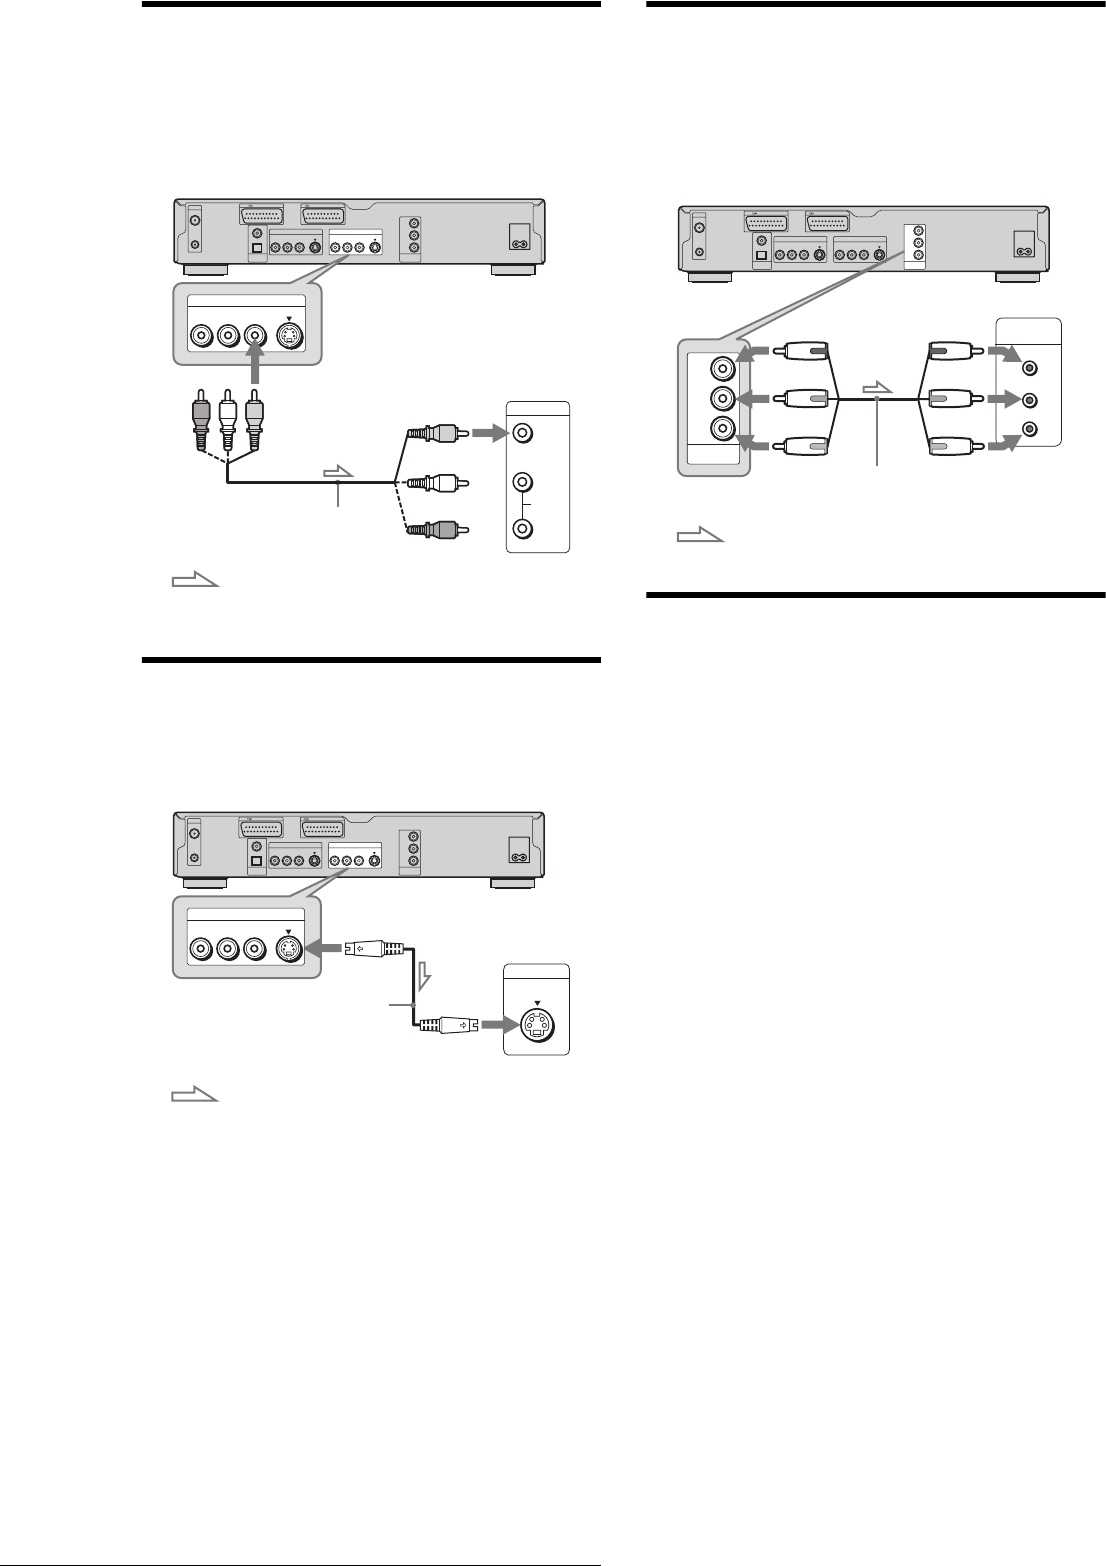
B Connecting to a video input jack
Connect the yellow plug of the audio/video cord (supplied) to the
yellow (video) jacks. You will enjoy standard quality images.
Use the red and white plugs to connect to the audio input jacks
(page 8).
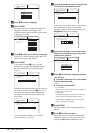
C Connecting to an S VIDEO input jack
Connect using an S VIDEO cord (not supplied). You will enjoy
high quality images.
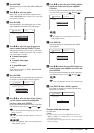
D Connecting to component video
input jacks (Y, C
B, CR)
Connect using a component video cord (not supplied) or three
video cords (not supplied) of the same kind and length. You will
enjoy accurate colour reproduction and high quality images.
About the SMARTLINK features
(for SCART connections only)
If the connected TV complies with SMARTLINK, NexTView
Link, MEGALOGIC
1
, EASYLINK
2
, CINEMALINK
2
,
Q-Link
3
, EURO VIEW LINK
4
, or T-V LINK
5
, this recorder
automatically runs the SMARTLINK function after you
complete the connection pattern A on page 5 (the
SMARTLINK indicator lights up when you turn on your TV).
You can enjoy the following SMARTLINK features.
• Preset Download
You can download the tuner preset data from your TV to this
recorder, and tune the recorder according to that data in Easy
Setup. This greatly simplifies the Easy Setup procedure. Be
careful not to disconnect the cables or exit the Easy Setup
function during this procedure (page 11).
• TV Direct Rec
You can easily record what you are watching on your TV (see
“Recording TV programmes” in the separate booklet
“Operating Instructions”).
• One Touch Play
You can turn on the recorder and TV, set the TV’s input to the
recorder, and start playback with one touch of the H (play)
button (see “Playing Discs” in the separate booklet
“Operating Instructions”).
• One Touch Menu
You can turn on the recorder and TV, set the TV to the
recorder’s channel, and display the Title List menu with one
touch of the TITLE LIST button (see “Selecting a Recorded
Title on a Disc” in the separate booklet “Operating
Instructions”).
• One Touch Timer
You can turn on the recorder and TV, set the TV to the
recorder’s channel, and display the timer programming menu
with one touch of the TIMER button on the remote (see “Timer
Recording” in the separate booklet “Operating Instructions”).
• Automatic Power Off
The recorder will turn off automatically if the recorder is not
used after you turn off the TV.
• NexTView Download
You can easily set the timer by using the NexTView Download
function on your TV. Refer to your TV’s instruction manual.
~
AC IN
LINE 2 OUT
S VIDEOVIDEOR-AUDIO-L
COMPONENT
VIDEO OUT
C
B
Y
C
R
LINE 4 IN
S VIDEOVIDEOR-AUDIO-L
LINE 1 - TV
AERIAL
IN
OUT
LINE 3/DECODER
DIGITAL OUT
PCM/DTS/MPEG/
DOLBY DIGITAL
COAXIAL
OPTICAL
LINE 2 OUT
S VIDEOVIDEOR-AUDIO-L
AUDIO
INPUT
L
R
VIDEO
DVD recorder
to LINE 2 OUT (VIDEO)
Audio/video cord (supplied)
TV, projector, or AV
amplifier (receiver)
: Signal flow
(yellow)
(yellow)
~
AC IN
LINE 2 OUT
S VIDEOVIDEOR-AUDIO-L
COMPONENT
VIDEO OUT
C
B
Y
C
R
LINE 4 IN
S VIDEOVIDEOR-AUDIO-L
LINE 1 - TV
AERIAL
IN
OUT
LINE 3/DECODER
DIGITAL OUT
PCM/DTS/MPEG/
DOLBY DIGITAL
COAXIAL
OPTICAL
INPUT
S VIDEO
LINE 2 OUT
S VIDEOVIDEOR-AUDIO-L
DVD recorder
to LINE 2 OUT (S VIDEO)
S VIDEO cord (not supplied)
TV, projector, or AV
amplifier (receiver)
: Signal flow
~
AC IN
LINE 2 OUT
S VIDEOVIDEOR-AUDIO-L
COMPONENT
VIDEO OUT
C
B
Y
C
R
LINE 4 IN
S VIDEOVIDEOR-AUDIO-L
LINE 1 - TV
AERIAL
IN
OUT
LINE 3/DECODER
DIGITAL OUT
PCM/DTS/MPEG/
DOLBY DIGITAL
COAXIAL
OPTICAL
PR/CR
PB/CB
Y
COMPONENT
VIDEO IN
COMPONENT
VIDEO OUT
C
B
Y
C
R
DVD recorder
to COMPONENT
VIDEO OUT
(green)
(blue)
(red)
(green)
(blue)
(red)
Component video
cord (not supplied)
TV, projector, or AV
amplifier (receiver)
: Signal flow