21
DATE DISPLAY
FORMAT
Select the date display format using the mouse or the control button on the remote
control. Options are: MM/DD/YYYY, YYYY/MM/DD, DD/MM/YYYY, YYYY-MM-DD, MM-
DD-YYYY, DD-MM-YYYY
DATE&TIME
SETUP
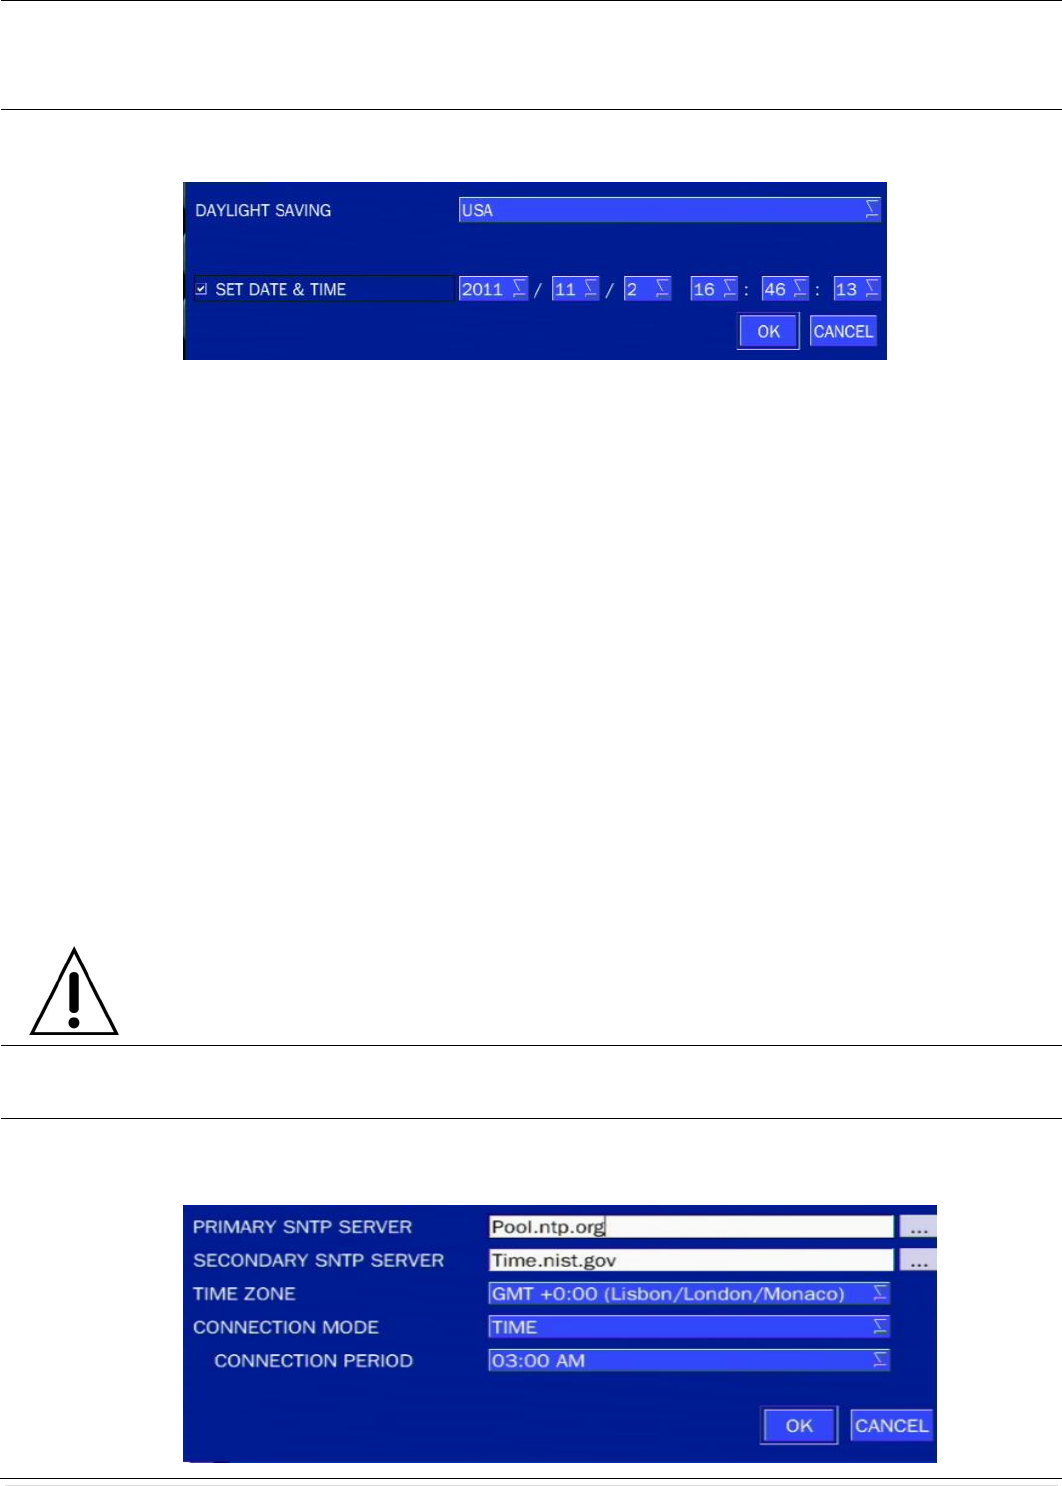
Select the display date and time using the mouse or the control button on the remote
control and press OK button to set the present date and time.
Select DAYLIGHT SAVING using the mouse and the control button on the remote control
and select the appropriate daylight saving time zone.
If choosing EU or OTHERS, set the applicable conditions.
The options are:
OFF: Daylight saving is turned off.
USA: Applies the USA daylight saving time.
EU: Applies the EU daylight saving time.
- Select the GMT AREA using the mouse or the control button.
- Set the time difference with the standard time using the mouse or the control
button.
OTHERS: If the time zone is neither USA nor EU, set the start and end date of the
daylight saving period.
- Select BEGIN or END using the control button and press the SEL button.
- Select the item using the mouse or the control button, select the setting
value using the control button and press the ESC button to return to SET
DATE & TIME setup menu.
Caution
- Do not set the start time to 23:00 for DLS.
- DLS cannot be applied if the date of BEGIN and END is the same.
CLIENT
ACCESS
Enable/Disable remote access through the network.
NTP
SETUP
NTP (Network Time Protocol) which synchronizes the time of the computer systems over
variable-latency data networks.


