Installation Instructions SB-WM46
7
Cover Plate Installation
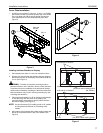
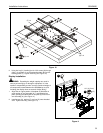
1. Install four cover plates (T) using four 10-32 x 1 1/8" Phillips
pan machine screws (V) and four spacers (W). Insert screw
into cover plate and add the spacer before inserting the
cover plate tab into the arm assembly/wall plate. (See
Figure 3)
Figure 3
Installing Interface Brackets to Display
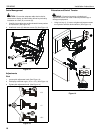
1. Place display face down on a soft, non-abrasive surface.
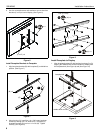
2. Remove four sets of bolts and washers that were shipped
attached to the back of the display. Set hardware aside for
re-use. (See Figure 4)
WARNING: The bolts and washers are designed to be
permanent fixtures on the television. Never remove the bolts
or washers except for installation of the wall mount! Always
replace bolts immediately. Installing the television without the
bolts and washers may result in serious personal injury and/
or damage the television!
3. Place interface brackets (C or D) on the back of the display
so that they align with the holes on the display. Use
removed screws and washers to loosely attach interface
brackets to display. (See Figure 5)
NOTE: Use short brackets (D) if installing to 46" or 55" models
and long interface brackets (C) if installing to 65"
models.
4. Align bottom of the brackets with rubber sealing gasket and
the top of the brackets with the top of the washer. (See
Figure 5)
Figure 4
Figure 5
(W) x 4
Place tab
into slot
(T) x 4
2
x 4
just above rubber sealing gasket
level with top of washers
(46" or 55" models)
(65" models)
level with top of washers
just above rubber sealing gasket
(D) x 2
(C) x 2


