


TiVo Desktop & Home Media Features
38
4
Connecting Your TiVo
®
DVR to a Home Network
Connecting your DVR to a home network opens up a whole new world of digital home
entertainment. If you already have a home network, you’re ready to get started.
1. Connect your DVR to your home network.
• Wired (Ethernet) Networks: Use an Ethernet cable to connect the TiVo DVR to your
home network using its built-in Ethernet jack (as shown on the Start Here poster).
• Wireless Networks: Get a USB network adapter for your DVR.
Visit www.tivo.com/adapters
for a list of compatible adapters. Connect the adapter to
one of the TiVo DVR’s USB ports as shown on the Start Here poster.
2. The next time you press the TiVo button, you should see a message informing you that the
DVR has detected a network connection.
If the message includes the option Set Up Network, select it. See “Network Settings” on
page 61 if you need help. If the Set Up Network option does not appear in the message, the
DVR was able to configure your network settings automatically.
3. Download the Home Media Features Guide at www.tivo.com/guides
to learn more about
connecting to a home network, and using TiVo Desktop and Home Media Features.
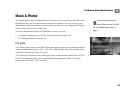
TiVo Desktop
TiVo Desktop is a free software application for your home computer. It allows you publish
digital music and digital photos, which makes them available to your DVR. Download TiVo
Desktop from www.tivo.com/desktop
.
If you don’t have a home network,
and you want to learn how to
create one, Linksys, a leading
manufacturer of networking equipment,
provides valuable information at its
website at www.linksys.com.
®
Some TiVo home media features
may not be available on some TiVo
DVRs.