


FCC
Declaration
of
Conformity
Compliance
Statement
(Part
15):
The
Toshiba
19S1410U,
24Sl410U,
and
32Sl410U
Televisions
comply
with Part
15
of
the FCC rules.
Operation
is
subject to the following
two
conditions:
(I)
This
device may not cause harmful interference,
and
(2)
This
device must accept any interference
received, including interference that may cause
undesired operation.
The party responsible for compliance to these rules
is:
Toshiba
America
Information Systems, Inc.
9740 Irvine Blvd.; Irvine,
CA
92618
Ph: 1-800-631-3811
Note: This equipment has been tested
and
found to comply with the limits for a Class B
digital device, pursuant to Part 15
of
the FCC
rules. These limits are designed to provide
reasonable protection against harmful
interference in
a residential installation. This
equipment generates, uses,
and
can radiate
radio frequency energy and,
if
not
installed
and
used in accordance wIth the instructions,
may
cause harmful interference to radio
communications. However, there is
no
guarantee that interference will
not
occur
in a
particular installation.
If
this equipment does
cause harmful interference to radio
or
television
reception, which can be determined
by
removing
and
applying
power
to the equipment, the
user
IS
encouraged
to try to correct the interference
by
one
or
more
of
the following measures:
• Reorient
or
relocate the receiving antenna.
• Increase
the
separation between the
equipment
and
the receiver.
•
Connect
the
equipment
into an outlet on a circuit
different from that to which the receiver
is
connected.
•
Consult
the
dealer
or
an experienced radio/TV
technician for help.
Caution: Changes
or
modifications to this
equipment
not
expressly approved
by
Toshiba
courd void the user's authority to operate this
equipment.
5
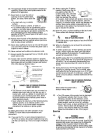
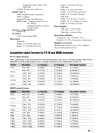
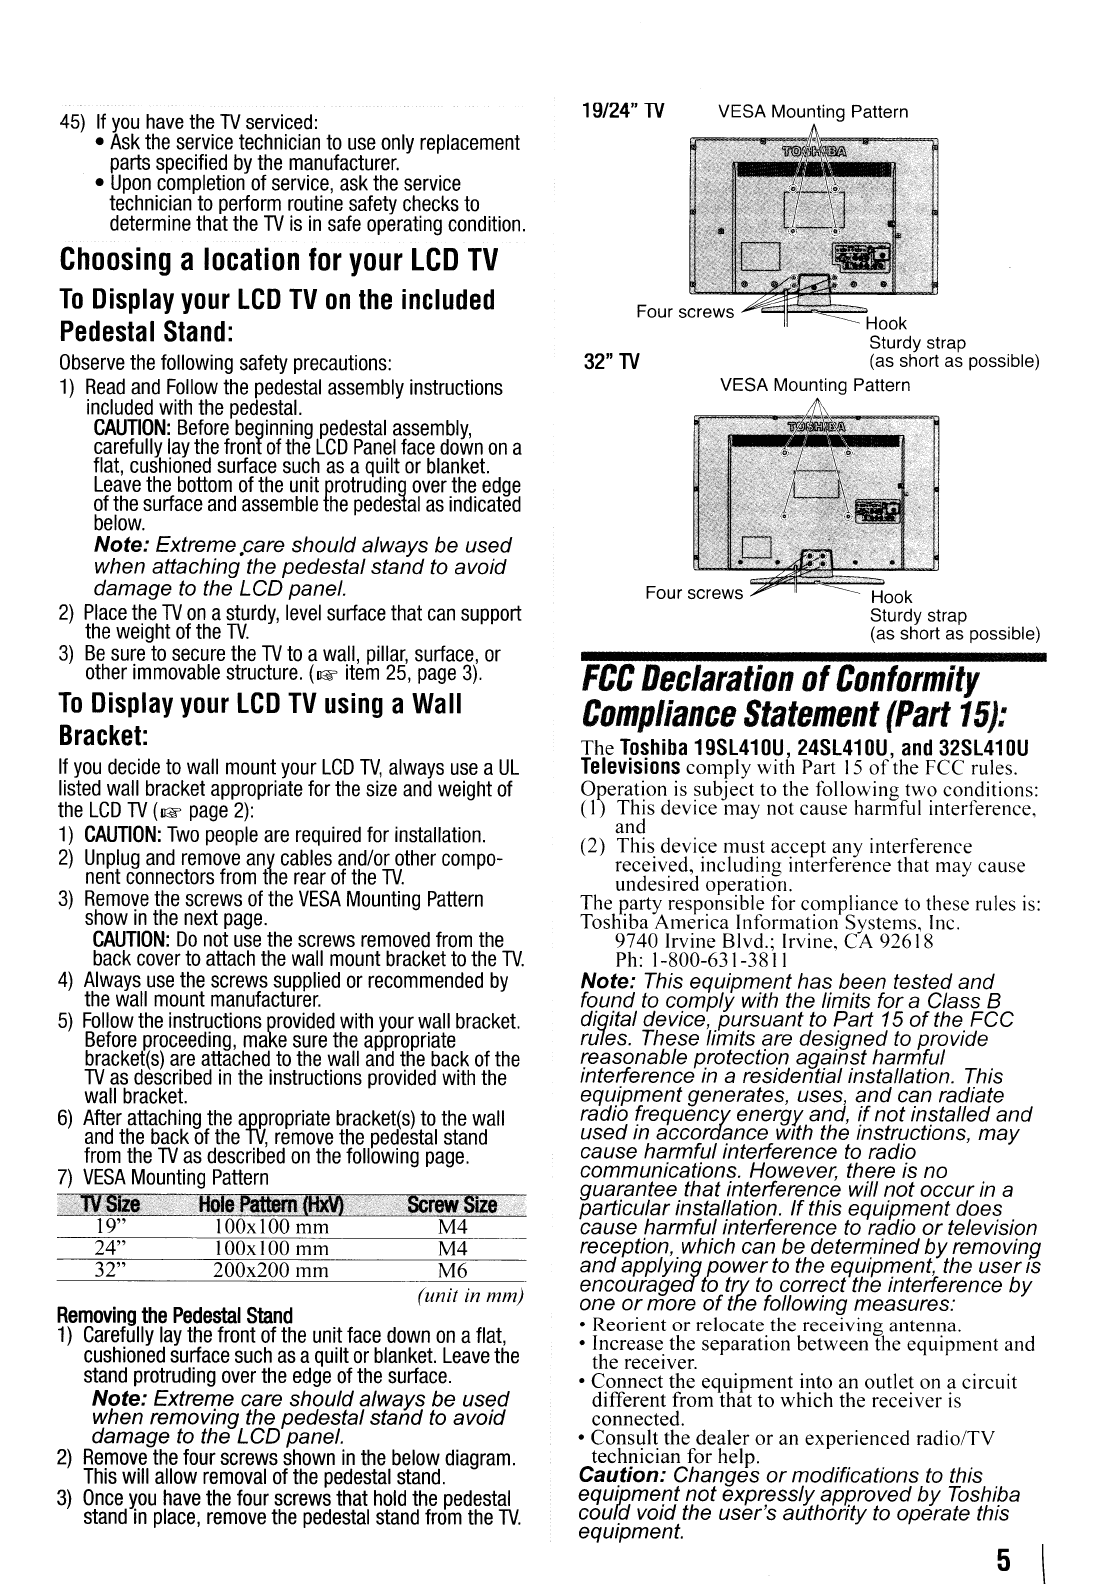
Hook
Sturdy strap
(as short as possible)
Hook
Sturdy strap
(as short as possible)
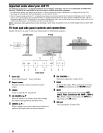
VESA Mounting Pattern
VESA Mounting Pattern
32"lV
19/24"
TV
19" 100x100
mm
M4
24" I
OOx
100 mm M4
32" 200x200
mm M6
(unit
in
mm)
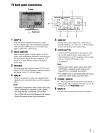
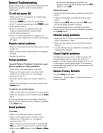
Removing
the
Pedestal
Stand
1)
CarefUlly
lay
the
front
of
the
unit
face
down
on
a
flat,
cushioned
surface
such
as
a
quilt
or
blanket.
Leave
the
stand
protruding
over
the
edge
of
the
surface.
Note: Extreme care should always be
used
when removing the pedestal stand to avoid
damage to the
LCD
panel.
2)
Remove
the
four
screws
shown
in
the
below
diagram.
This
will
allow
removal
of
the
pedestal
stand.
3)
Once
you
have
the
four
screws
that
hold
the
pedestal
stand
in
place,
remove
the
pedestal
stand
from
the
TV.
45)
If
you
have
the
TV
serviced:
•
Ask
the
service
technician
to
use
only
replacement
parts
specified
by
the
manufacturer.
•
Upon
completion
of
service,
ask
the
service
technician
to
perform
routine
safety
checks
to
determine
that
the
TV
is
in
safe
operating
condition.
Choosing
a
location
for
your
LCD
TV
To
Display
your
LCD
TV
on
the
included
Pedestal
Stand:
Observe
the
following
safety
precautions:
1)
Read
and
Follow
the
pedestal
assembly
instructions
included
with
the
pedestal.
CAUTION:
Before
beginning
pedestal
assembly,
carefully
lay
the
front
of
the
LCD
Panel
face
down
on
a
flat,
cushioned
surface
such
as
a
quilt
or
blanket.
Leave
the
bottom
of
the
unit
protruding
over
the
edge
of
the
surface
and
assemble
the
pedestal
as
indicated
below.
Note: Extreme .care should always be
used
when attaching the pedestal stand to avoid
damage to the
LCD
panel.
2)
Place
the
TV
on
a
sturdy,
level
surface
that
can
support
the
weight
of
the
TV.
3)
Be
sure
to
secure
the
TV
to
a
wall,
pillar,
surface,
or
other
immovable
structure.
(1&
item
25,
page
3).
To
Display
your
LCD
TV
using
a
Wall
Bracket:
If
you
decide
to
wall
mount
your
LCD
TV,
always
use
a
UL
listed
wall
bracket
appropriate
for
the
size
and
weight
of
the
LCD
TV
(1&
page
2):
1)
CAUTION:
Two
people
are
required
for
installation.
2)
Unplug
and
remove
any
cables
and/or
other
compo-
nent
connectors
from
the
rear
of
the
TV.
3)
Remove
the
screws
of
the
VESA
Mounting
Pattern
show
in
the
next
page.
CAUTION:
Do
not
use
the
screws
removed
from
the
back
cover
to
attach
the
wall
mount
bracket
to
the
TV.
4)
Always
use
the
screws
supplied
or
recommended
by
the
wall
mount
manufacturer.
5)
Follow
the
instructions
provided
with
your
wall
bracket.
Before
proceeding,
make
sure
the
appropriate
bracket(s)
are
attached
to
the
wall
and
the
back
of
the
TV
as
described
in
the
instructions
provided
with
the
wall
bracket.
6)
After
attaching
the
appropriate
bracket(s)
to
the
wall
and
the
back
of
the
TV,
remove
the
pedestal
stand
from
the
TV
as
described
on
the
following
page.
1)
VESA
Mounting
Pattern