


English
19
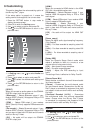
With this player connected to network, you can
play video, music and photo fi les from the server.
Media Server Search
Note:
- Not all media formats are supported.
1. Connect this player to server network and set
the Media Server Search to Enable.
See Network on page17 for details.
2. Press SETTING to enter the setup screen and
use
/ to select Video, Music, or Photo,
then press OK.
The Media Center menu appears on the screen.
3. Press / to select Media Server list, and
then press OK.
4. Press / to a kind of media (Photo, Music,
Video) and press OK.
It should match the selection on the setup
screen. (If you selected Video on the setup
screen, you also should select Video here.)
5. Press / to select a fi le (or folder) and press
OK or to start playback.
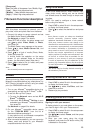
Miracast
TM
1. Press HOME or select Portal in the setup screen
to display the Home screen.
2. Use / / / to select YouTube, and then
press OK to confi rm.
3. Please enjoy any contents.
Watching movies with YouTube
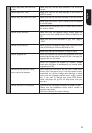
[Sharpness]
Select the level of sharpness: Low, Middle, High.
{Low} - Select Low sharpness level.
{Middle} - Select Middle sharpness level.
{High} - Select High sharpness level.
Allows you to enjoy videos, music and photos on your
Miracast
TM
compatible device (e.g. smartphone) by
Wi-Fi Direct
TM
connection without using an access
point (for BDX5400KE model only).
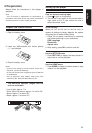
1. Turn on your Miracast
TM
compatible device (e.g.
smartphone) and set the Wi-Fi Direct
TM
to On.
2. To set this Blu-ray Disc™ player.
1) To enter the Network menu and set Wi-Fi
Direct
TM
to Enable.
2) Then enter Wi-Fi Direct
TM
Setting to scan
and select your Miracast
TM
compatible device,
then press OK.
See Network on page16 for details.
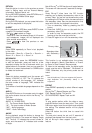
3. On your Miracast
TM
compatible device, search
for the “TOSHIBA BDPL” from the list of
discovered devices and select it.
It may take the unit and Miracast
TM
compatible
device a few seconds to connect.
4. After connected successfully, you can now enjoy
videos, music and photos on your Miracast
TM
compatible device from the unit.
A new cloud based service, where content (csp,
video, photo, music, setting, etc) can be viewed
and shared across the web through a simple user
interface.
NOTE: You need to confi gure a home network
before using this feature.
1. Press HOME or select Portal in the setup screen
to display the Home screen.
2. Press
/ to select the desired icon and press
OK.
Notes:
- Some features require an always-on broadband
internet connec on, firmware update and/or
addi onal bandwidth dedicated to this product.
Third party internet services may change or be
dicon nued or restricted at any me. Toshiba makes
no warran es, representa ons, or assurances about
the content, availability or func onality of third-
party content or servics. Use of third party internet
services may require registra on by a computer
and/or payment of charges and membership. Not
all services or content may be available on this
product, in your country or with your language.
In order to experience the full capabili es of this
product, fully compa ble devices may be required.
For more informa on, visit h p://www.toshiba.eu/
cloudtv-bluray
- This service may be Forcibly blocked according to
the situa on of CSP service.
Using Portal Menu
7
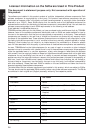
Network Functional description
To display photos in your web album on the screen,
you need to sign in with your Picasa account.
1. Press HOME or select Portal in the setup screen
to display the Home screen.
2. Use
/ / / to select Picasa, and then press
OK to confi rm.
3. Enter your user name using the virtual
keyboard, and press the OK button while [OK]
is selected on the screen.
Browsing photos with Picasa
Signing in with your account