


105
Configuring the DVR
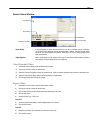
In order to access the DVR remotely, the DVR Server must be setup to allow remote connections.
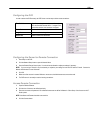
Time Out Value Specifies a value (in seconds) to wait for a signal
from the Surveillix Remote Client. If a signal is not
received by that time, the connection is dropped.
Center Port Used to transfer the connection data.
Image Port Used to transfer the image data.
Search Port Used to transfer the search data.
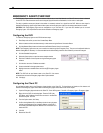
Configuring the Server for Remote Connection
1. Enter Setup on the DVR.
2. Click the Network Setup button to open the Network Menu.
3. Clear the Disable Remote Control option. You should now be allowed to adjust port settings if necessary.
NOTE: If you are using a Firewall, it may be necessary to adjust the port settings on both the DVR and the Firewall. Contact the
Network Administrator for more information.
4. Click OK.
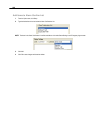
5. Make sure a User account is created. Without a user account, the Administrator account must be used.
6. The DVR server is now ready to receive incoming connections.
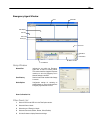
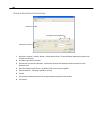
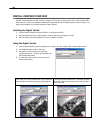
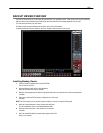
Access Remote Connection
1. Open the Remote Software.
2. Click the icon of the server as defined previously.
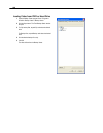
3. Enter the user name and password of an authorized remote user as defined in Network > Client Setup > User Account on the E-
Series system.
NOTE: User Name and Password are both case sensitive.
4. Click the Connect button.