21
Preparations
English Français Español Deutsch Italiano
Português
Svenska
(Orange)
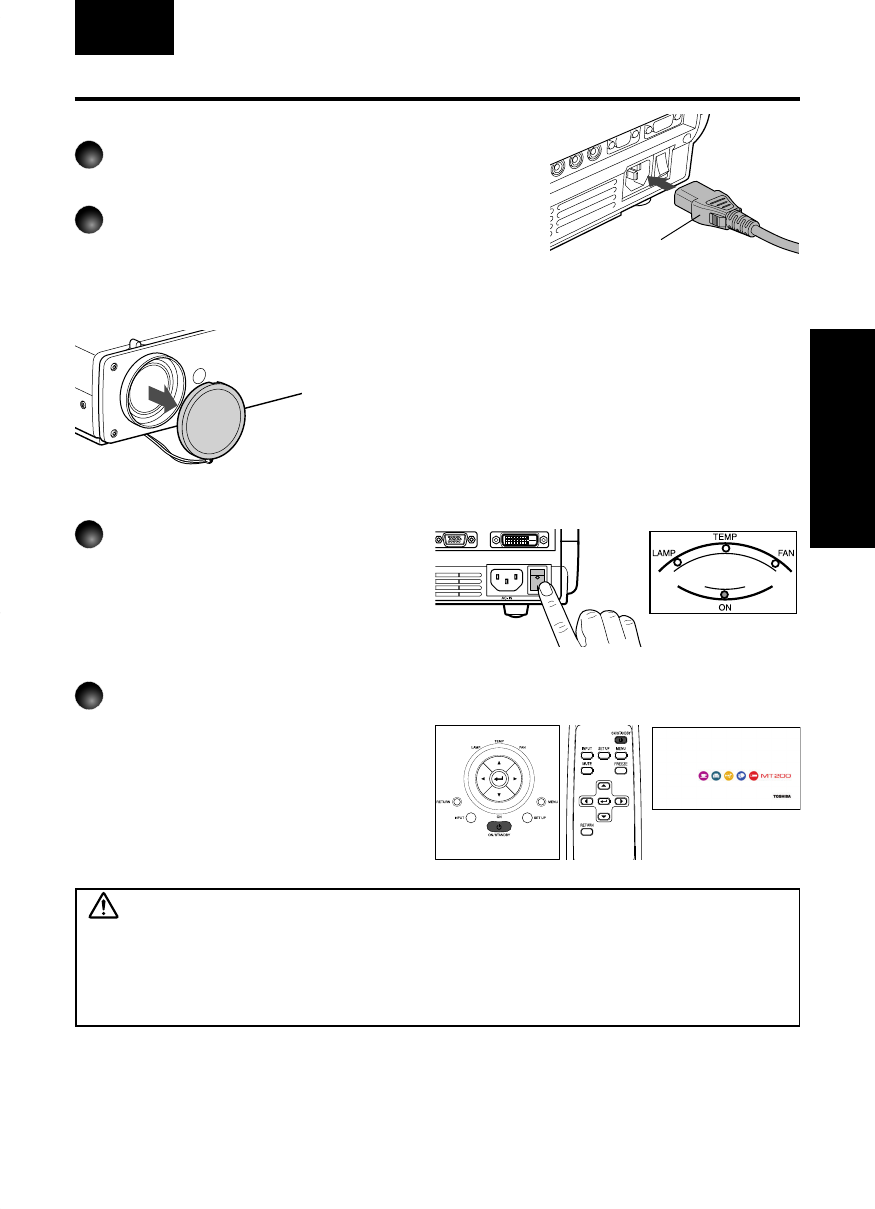
■ Connecting the power cord
1
Insert the power cord connector into the
AC IN socket of the projector.
2
Insert the power cord plug into a wall or
other power outlet.
■ Turning the power on
1
Turn on the main power switch
The ON indicator will change to
orange, indicating standby mode.
• After the main power switch is turned
on, the inner cooling fan starts
cooling.
2
Press the ON/STANDBY
button.
The power turns on, and the following
3 green indicators light: ON, LAMP,
and FAN. After a moment, the start-up
screen appears.
Start-up screen
Control panel
Remote
Control
Power cord connector
(Supplied)
CAUTION
• Do not look into the lens while the lamp is on. The strong light from the lamp may cause
damage to your eyes or sight.
• Do not block the air intake or exhaust. Doing so could cause a fire due to internal overheating.
• Do not place your hands, face, or other objects near the air exhaust. Doing so could cause
burns, deform/break the object.
■ Removing the lens cover
Be sure to remove the lens cover when the power is
turned on. If it is left on, it could become deformed due
to heat.


