


25
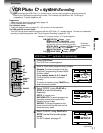
RECORDING
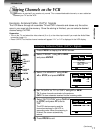
Watching a TV program while
recording another
1) While recording, press
TV/VCR
to turn off
“VCR” indicator.
2) Choose another channel using the channel
selector on the TV.
Skipping unnecessary scenes while
recording
Press
PAUSE/STILL
to stop recording
momentarily. To resume recording, press
PAUSE/STILL
again.
Note
The VCR automatically shifts to the stop mode if the
recording pause mode continues for 10 minutes.
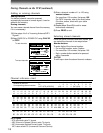
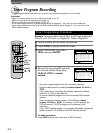
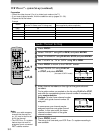
Basic Recording
1
Load a cassette with the safety tab attached.
2
Press
TV/VCR
so that the “VCR”
indicator appears in the VCR display.
3
Select a channel to record with
CHANNEL
on the VCR, or
CH/TRK
or
number buttons
on the remote
control.
If you see “L1” or “L2” in the VCR display, press
I.SELECT
so that the
channel number appears.
• If you record cable channels via the cable box, make the output
channel number of the cable box or “L1” appear, depending on your
connection. (See pages 11 – 13.)
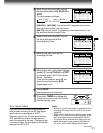
4
Press
SP/SLP
to select the
recording tape speed.
SP: Suitable for general recording with
better picture and sound quality.
SLP: Suitable for tripling recording time, but with less picture and
sound quality than using the SP tape speed.
5
Press
REC
on the VCR, or
simultaneously press both
REC
on
the remote control.
Recording starts.
6
Press
STOP
to stop recording.
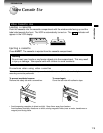
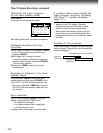
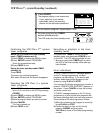
Recording off time setting
By setting the recording off time, the recording
stops and the VCR is turned off automatically.
While recording, press
REC
on the VCR
repeatedly to set the desired off time.
Each time you press
REC
, each half-hour up to
about 4 hours later and “- : - -” appear cyclically.
Notes
• To cancel the recording in progress, press
STOP
.
• If the VCR clock is not set, this function will not
activate.
VCR
SLP
CH
POWER
VCR
SLP
POWER
VCR
SLP
CH
POWER
VCR
SLP
REC
CH
POWER
VCR
SLP
REC
CH
PM
OFF
POWER
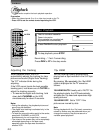
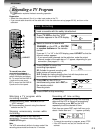
RECORDING
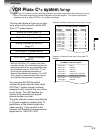
Recording a TV Program
This section explains the basic recording operation.
Preparation
• Select the video channel (3 or 4) or video input mode on the TV.
• If you record cable channels via the cable box, finish the cable box set-up (pages 33-36), and turn on the
cable box.
To record from other
connected equipment
In step 3, press
I.SELECT
to
switch the display as follows:
LI: To record via the LINE IN
1 jacks on the rear panel.
L2: To record via the LINE IN
2 jacks on the front panel.
TIMERREC
78
0
100
9
65
23
4
1
STOP
PLAY/x2
FFREW
6
3
2
4
5
I.SELEC
T