5
21
M3D420SR/M3D421SR/M3D460SR/M3D550SR
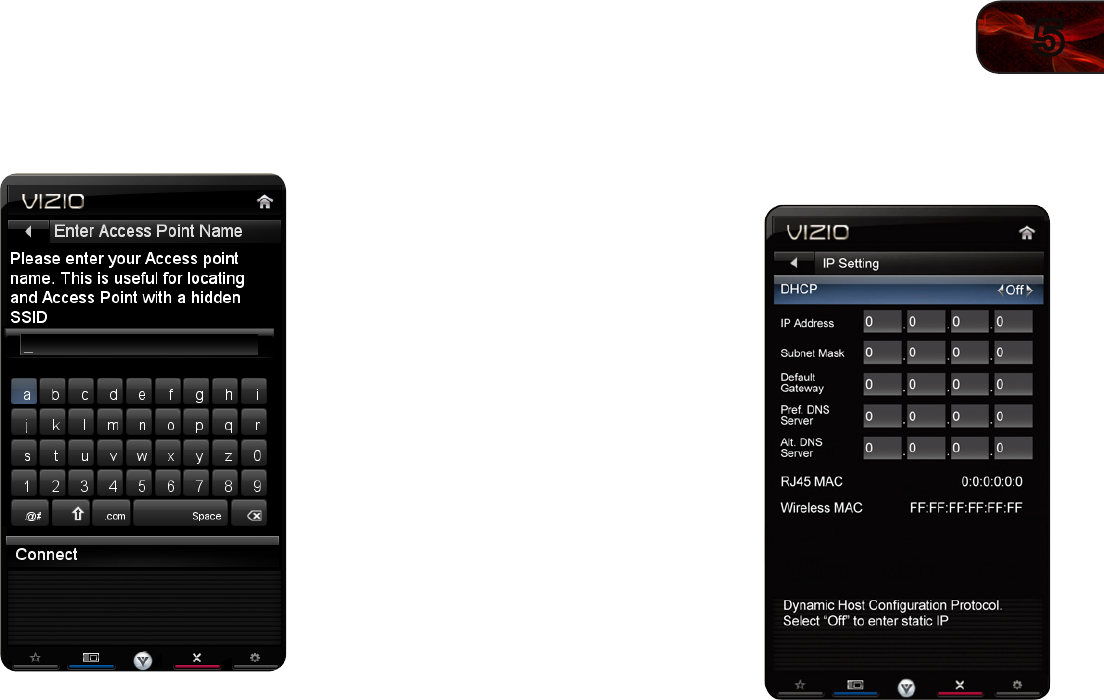
To connect to a wireless network whose network name (SSID) is not being
broadcast:
1. Press the MENU button on the remote.
The on-screen menu is displayed.
2. Use the Arrow buttons on the remote
to highlight the Network icon and
press OK. The Network Connection
menu is displayed.
3. Highlight Enter Access Point Name
and press OK.
4. Using the QWERTY Keypad on the
remote, enter your network’s name
(SSID), then highlight Connect and
press OK. (If you would like to use the
on-screen keyboard instead, highlight
Show Keyboard and press OK.)
5. Using the QWERTY Keypad on
the remote, enter your network’s
password, then highlight Connect and
press OK. (If you would like to use the
on-screen keyboard instead, highlight
Show Keyboard and press OK.)
6. Press the EXIT button on the remote.
ChangingtheAdvancedNetworkSettings
Advanced users can fine-tune the network settings using the Manual Setup
feature.
To change advanced network settings:
1. From the Network Connection menu,
highlight Manual Setup and press
OK. The Change Settings menu is
displayed.
2. Use the Arrow and OK buttons to
adjust each setting:
• DHCP-(DynamicHost
CongurationProtocol)Thissetting
mustbeturnedOfftochangeany
oftheothersettings.
• IPAddress-TheIPaddress
assignedtotheTV.
• SubnetMask-Thesubnetmask.
• DefaultGateway-Yournetwork’s
defaultgatewayaddress.
• Pref.DNSServer-Yourpreferred
domainnameserveraddress.
• AltDNSServer-Youralternatedomainnameserveraddress.
3. If you need the RJ45 (ethernet) MAC address or the Wireless MAC address
to set up your network, these are displayed at the bottom of the Change
Settings menu.
4. Press the EXIT button on the remote.
TestingYourNetworkConnection
To test your network connection:
1. From the Network Connection menu, highlight Test Connection and press
OK.
2. The Test Connection screen displays the connection method, network
name, signal strength, and download speed of your network connection.
3. Press the EXIT button on the remote.
