


VIZIO VM60P HDTV User Manual
Version 3/26/2007 11
www.VIZIO.com
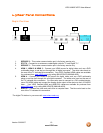
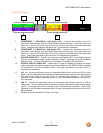
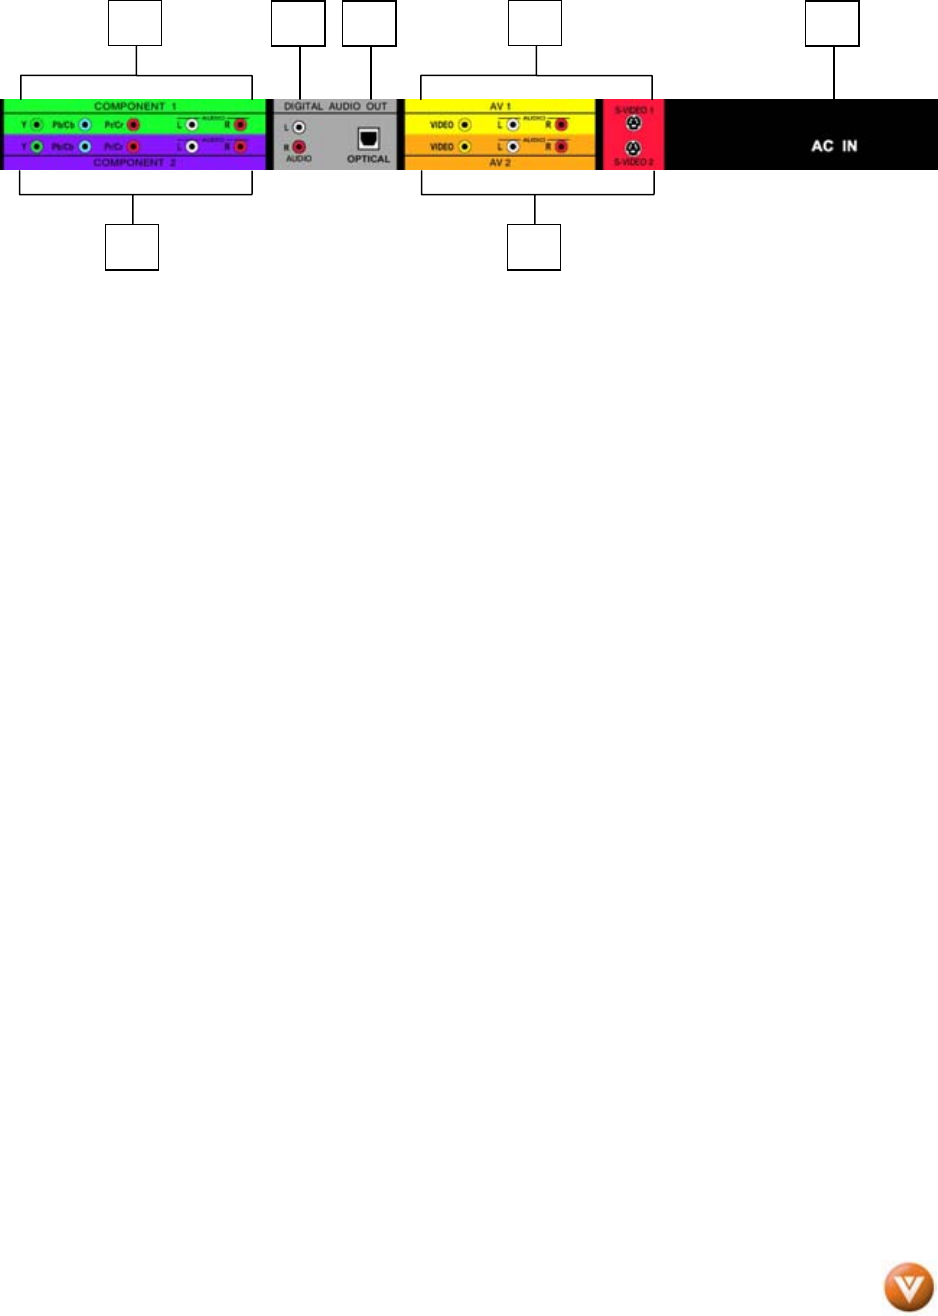
Left Portion
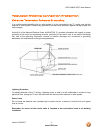
7. COMPONENT 1 (YPb/CbPr/Cr with Audio L/R) – Connect the primary source for
component video devices such as a DVD Player or set top box here. From left to right, use
green for Y, blue for Pb (or Cb), red for Pr (or Cr), white for left audio and red for right audio
inputs. The green color band on the rear of the TV indicates this connection.
8. COMPONENT 2 (YPb/CbPr/Cr with Audio L/R) – Connect the secondary source for
component video devices such as a DVD Player or set top box here. From left to right, use
green for Y, blue for Pb (or Cb), red for Pr (or Cr), white for left audio and red for right audio
inputs. The purple color band on the rear of the TV indicates this connection.
9. ANALOG AUDIO OUT – Connect the audio from the Plasma HDTV to an external device,
such as a home theatre system, external amplifier or stereo. Speakers cannot be connected
directly to here. The gray color band on the rear of the TV indicates this connection.
10. OPTICAL DIGITAL AUDIO OUT – When the DTV input is selected for viewing, the digital
audio associated with digital programming will be available on this SPDIF Optical connector
for connection to your home theatre system. The gray color band on the rear of the TV
indicates this connection.
11. AV1 In – Connect the primary source for composite video devices, such as a VCR or video
game. Use the white and red connectors to connect the external audio from the same source.
The yellow color band on the rear of the TV indicates this connection. The S-Video
connector in the red area is associated with AV1 and if connected will take priority over AV1
RCA connector.
12. AV2 In – Connect the secondary source for composite video devices, such as a VCR or
video game. Use the white and red connectors to connect the external audio from the same
source. The orange color band on the rear of the TV indicates this connection. The S-Video
connector in the red area is associated with AV2 and if connected will take priority over AV2
RCA connector.
13. AC IN – Plug-in the supplied AC Power Cord here.
8
13
7
12
11
9 10