3
English
INTRODUCTION
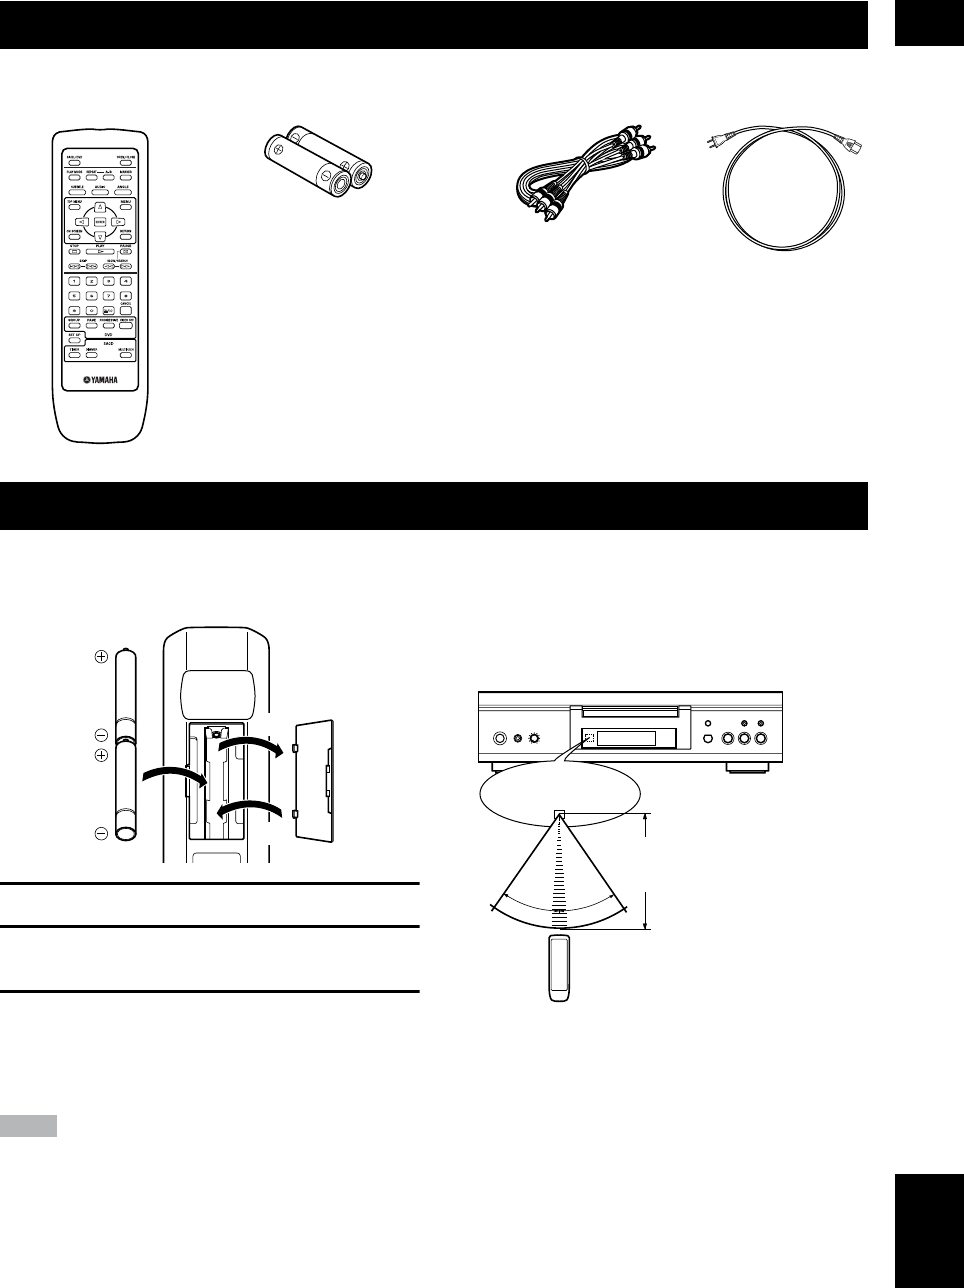
Check your package to make sure it contains the following items:
Insert the batteries in the correct direction by aligning the
+ and – marks on the batteries with the polarity markings
(+ and –) inside the battery compartment.
1
Slide off the battery compartment cover.
2
Insert two batteries (AA, R06, UM-3 type) ori-
ented properly (+ and –).
3
Slide the cover back into place.
Replace worn batteries
Worn batteries limit the operating range of the remote con-
trol. Replace both batteries at the same time.
Note
• Replace both batteries if you notice a decrease in the operating
range of the remote control.
• Do not use old batteries with new ones.
• Do not use different types of batteries (such as alkaline and
manganese) together. Read the battery packaging carefully.
Different types of batteries may be the same shape or color.
• If the batteries leak, dispose of them immediately. Avoid
touching the leaked material or letting it come into contact
with clothing, etc. Clean the battery compartment thoroughly
before installing new batteries.
■
Using the remote control
Handling the remote control
• Do not spill water or other liquids on the remote control.
• Do not drop the remote control.
• Do not leave or store the remote control in the following types
of conditions:
– high humidity or temperature, such as near a heater, stove
or bath;
– dusty places; or
– places subject to extremely low temperatures.
CHECKING THE ACCESSORIES
INSTALLING BATTERIES IN THE REMOTE CONTROL
Remote control Batteries (x2) (AA, R6, UM-3) Audio/Video cable Power cable
1
3
2
30°
30°
Point the remote control at the
sensor, within approximately
6 m (20 feet) of the unit.
Remote control
sensor
DVD-S2300_UA.book Page 3 Thursday, October 3,2002 11:03 AM


