VIEW SETTING
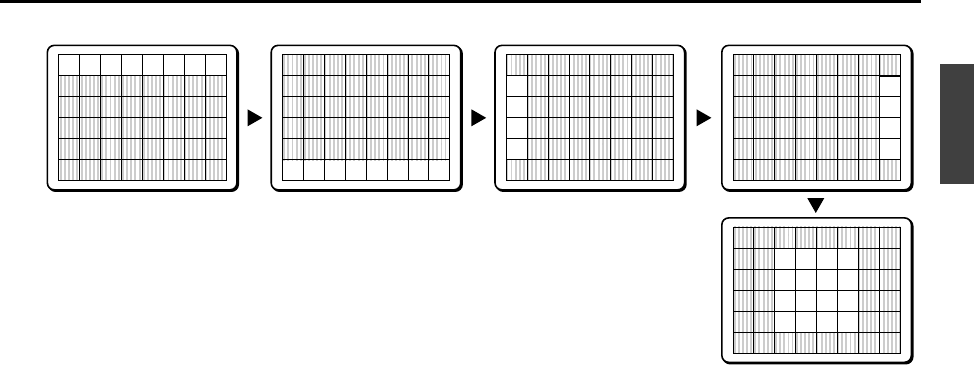
Example of setting the mask in the center weighting position.
6
Use the cursor button (j or l) to select a zone, then
use the cursor button (d or c) to adjust weighting.
Each setting will change as shown in the illustration.
The area from each of the zones 0 – 7, except CENTER, can
be adjusted.
☞
To close the menu screen or return to the previous
screen, select BACK or END for MENU and press the SET
button.
6
BLC WINDOW WEIGHTING
TOP 0
BOTTOM 0
LEFT 0
RIGHT 0
CENTER(FIX) 7
PRESET OFF
MENU BACK
BLC WINDOW WEIGHTING
TOP 0
BOTTOM 0
LEFT 0
RIGHT 0
CENTER(FIX) 7
PRESET OFF
MENU BACK
BLC WINDOW WEIGHTING
TOP 0
BOTTOM 0
LEFT 0
RIGHT 0
CENTER(FIX) 7
PRESET OFF
MENU BACK
BLC WINDOW WEIGHTING
TOP 0
BOTTOM 0
LEFT 0
RIGHT 0
CENTER(FIX) 7
PRESET OFF
MENU BACK
23
4
5
1
BLC WINDOW WEIGHTING
TOP 0
BOTTOM 0
LEFT 0
RIGHT 0
CENTER(FIX) 7
PRESET OFF
MENU BACK
1 TOP: Weighting is at top.
2 BOTTOM: Weighting is at bottom.
3 LEFT: Weighting is at left.
4 RIGHT: Weighting is at right.
5 CENT (FIX): Center weighting is fixed by the number 7.
If this is set to “0”, the light intensity will be ignored. The larger the setting value, the
greater is the weighting given to light coming from the respective side.
Note:
L5AD2/US (VCC-ZM400) GB 2003, 2, 4
English
38


