


Installation
5
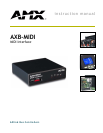
AXB-MIDI MIDI Interface
accommodate the 75 mA draw of the AXB-MIDI. Make sure to connect the GND and +12 VDC
wire on the AXB-MIDI AXlink connector end. Do not connect the optional +12 VDC power
supply wire to the Central Controller's power supply side of the AXlink connector.
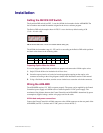
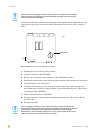
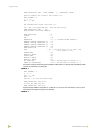
MIDI cable connectors
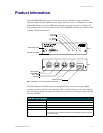
The four MIDI jacks on the rear panel (IN A, IN B, THRU and OUT) are identical 5-pin DIN type
connectors. FIG. 5 shows the pinout for wiring cables to these DIN connectors. It is recommended
that off the shelf MIDI cables be used. MIDI cable lengths will be determined by physical
placement of the Central Controller, AXB-MIDI, and the equipment providing the MIDI input
protocol.
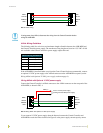
! Pin 2 (shielded ground) is only connected on the THRU and OUT connectors. It is not
connected on IN A and IN B.
! It is recommended that to maintain signal integrity when connecting to any MIDI device,
cable lengths be no more than 20 feet (6.01 meters).
Replacing the Lithium Battery
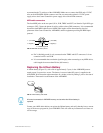
A lithium battery (Figure 15), with a life of approximately 5 years, in the AXB-MIDI protects
stored presets if a power loss occurs. The battery is not used when DC power is supplied to the
AXB-MIDI. Write down the replacement date on a sticker or label by adding 5 years to the date of
installation. Then attach it to the bottom of the AXB-MIDI.
Contact your AMX dealer before you replace the lithium battery and verify that they have a current
copy of the Axcess program for your AXB-MIDI. This will avoid any inadvertent loss of data or a
service outage.
FIG. 5 MIDI DIN connector pinout
FIG. 6 Lithium battery and socket
1 - (not used)
2 - shielded ground
3 - (not used)
4 - Signal (+)
5 - Signal ( -)
All control commands in AXB-MIDI memory are lost when the lithium battery is
replaced.