


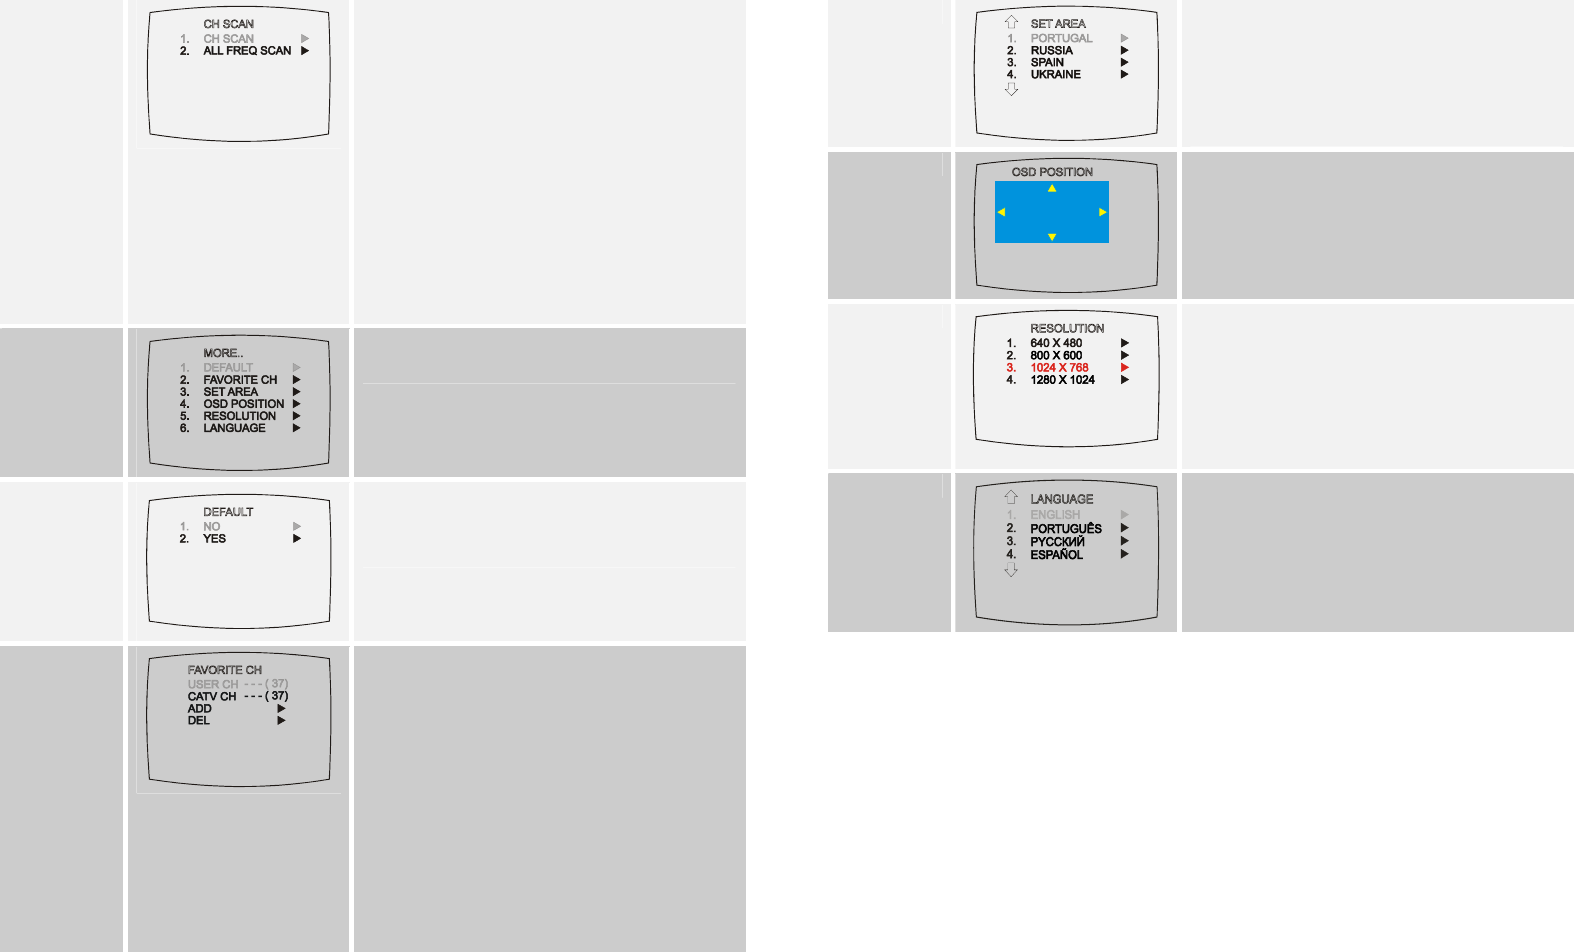
CH SCAN
)
Use CH▲ or CH▼ buttons to select between CH
SCAN or All FREQ SCAN. Press Vol► button to
make the selection. If you want to interrupt or
cancel the scanning process, press MENU button,
but this will only memorize the scanned channel.
These two types of channel-preset functions
enable you to memorize all active channels in your
area.
Use the CH SCAN function first. If there are
channels missing after you perform CH SCAN, use
ALL FREQ SCAN function and repeat the
searching process.
NOTE: ALL FREQ SCAN is a very time consuming
process. If the default frequency table already
includes all active TV channels in your area, then
avoid using the ALL FREQ SCAN.
MORE..
)
Press Vol► button to call up MORE.. menu list.
DEFAULT
)
Use the CH▲ or CH▼ buttons to select YES to
clear all the preset channels and to restore the
original factory default picture setting or NO to exit.
Then press Vol►.
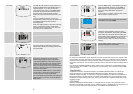
FAVORITE CH
)
This function enables you to add, remove,
reprogram or reassign the TV channels with
channel numbers that are easier to remember.
In the selected USER CH, enter the new channel
number you want to assign or the channel number
you want to remove/add to the channel line up.
Then, in the CATV CH or TV CH, enter the channel
number you want to remap or the channel number
you want to remove/add.
Use the CH▲ or CH▼ buttons to select ADD to
include or DEL to remove the channel number in
the channel line up and then press Vol►.
Note: To browse through channels while setting the
USER CH and CATV number, press the CH▲ or
CH▼ buttons.
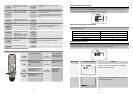
SET AREA
)
Press the MENU button, select MORE, select SET
AREA in the MORE, list items, use the CH▲ or
CH▼ buttons to choose the appropriate country
signal, then press Vol► button to make the
selection.
If your country is not listed, choose another country
with the same TV system as yours.
OSD POSITION
Use the CH▲, CH▼, Vol◄, and Vol► buttons to
move the frame where you want to set the position
of the MENU, then press MENU.
RESOLUTION
)
Use the CH▲ or CH▼ buttons to select NO to
restore the original resolution setting or YES to
accept the new resolution setting then press Vol►.
If the monitor can not support the new setting, the
original setting will be automatically restored after 10
seconds or press PC BGM/Res. button of the
remote control to switch to different resolution
settings.
LANGUAGE
)
Use the CH▲ or CH▼ buttons to select from
different languages then press Vol►.
DISCLAIMER
No warranty or representation, either expressed or implied, is made with respect to the contents of this
documentation, its quality, performance, merchantability, or fitness for a particular purpose. Information
presented in this documentation has been carefully checked for reliability; however, no responsibility is
assumed for inaccuracies. The information contained in this documentation is subject to change without
notice.
In no event will AVerMedia be liable for direct, indirect, special, incidental, or consequential damages
arising out of the use or inability to use this product or documentation, even if advised of the possibility
of such damages.
TRADEMARKS
AVerMedia and AVerTV registered trademarks of AVerMedia TECHNOLOGIES, Inc. IBM PC is a
registered trademark of International Business Machines Corporation. Macintosh is a registered
trademark of Apple Computer, Inc. Microsoft is a registered trademark and Windows is a trademark of
Microsoft Corporation. All other products or corporate names mentioned in this documentation are for
identification and explanation purposes only, and may be trademarks or registered trademarks of their
respective owners.
COPYRIGHT
©2004 by AVerMedia TECHNOLOGIES, Inc. All rights reserved. No part of this publication may be
reproduced, transmitted, transcribed, stored in a retrieval system, or translated into any language in any
form by any means without the written permission of AVerMedia TECHNOLOGIES, Inc.
9
10