


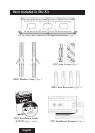
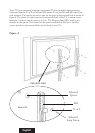
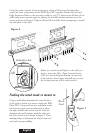
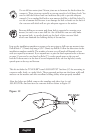
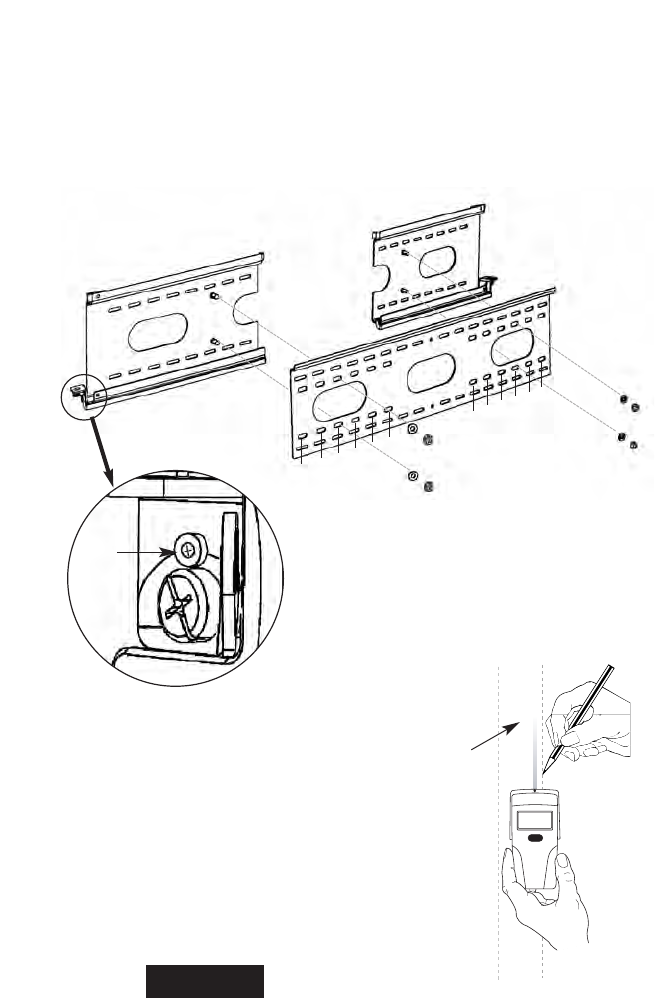
Using the socket wrench, loosen and remove the four M8 nuts and washers that
secure the three components of the Wall Plate (WP) together. Extend the Left and
Right Extension Plates to the necessary width for your TV, then secure all three of the
wall bracket parts together again by placing the four M8 washers and nuts over the
screws as shown in Figure 6. Tighten all four M8 nuts fully before attempting to install
the wall plate to the wall.
English
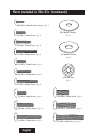
Figure 6
DETAILED VIEW
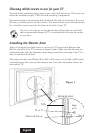
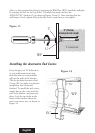
Before you attach the wall plate to the wall, you
need to insert the M4 x 10mm Security Screws
(AB) into the locking mechanism on each end
of the bracket. Insert them only half-way, so that
the locking arm can still be easily rotated.
AB
1
2
4
5
6
3
1
2
4
5
6
3
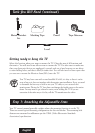
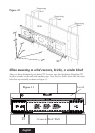
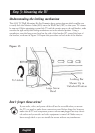
Finding the wood studs to mount to
Using a stud finder, determine the exact location
of the studs to which you want to attach the Wall
Plate (WP). Using an electronic stud finder works
best because it gives you an indication of where
the right and left sides of the stud are.
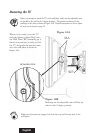
After you
determine the stud locations, mark the right and
left sides of each stud as shown in Figure 7. These
markings help you determine the center location of
each stud for proper drilling.
Wood
Stud
Figure 7