


Divar | Operation Manual | Viewing live and playback video via a web browser EN | 23
Bosch Security Systems
English
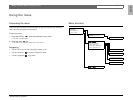
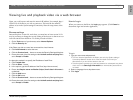
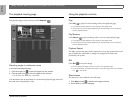
Viewing live and playback video via a web browser
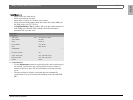
Open your web browser and enter the network IP address (for example, http://
192.168.1.2) of the Divar you wish to connect to. This must be the same IP
address as set in the System settings/Connectivity/Network setup menu of the
Divar.
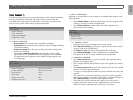
Browser settings
Internet Explorer version 6.0 works best; you must have at least version 5.0. It
may be necessary to change the security setting of the browser so that it can run
ActiveX controls from the Divar. To do this proceed as follows:
1. On the Tools menu of your browser, select Internet Options.
2. Click the Security tab.
If the Divars you wish to control are connected via a local intranet:
3. Click Local intranet to select the zone
4. Click the Custom Level… button to access the Security Settings dialog box.
5. Ensure that each of the five settings under ActiveX controls and plug-ins is
set to Prompt or Enable.
An alternative method is to specify the IP address of each Divar:
3. Click Trusted sites.
4. Click the Sites… button.
5. In the top box, type the IP address of the Divar (http://xxx.xxx.xxx.xxx).
6. Ensure that Require server verification (https:) for all sites in this zone is
unchecked.
7. Click the Add button.
8. Click the OK button.
9. Click the Custom Level… button to access the Security Settings dialog box.
10. Ensure that each of the five settings under ActiveX controls and plug-ins is
set to Prompt or Enable.
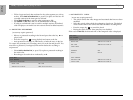
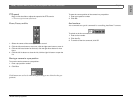
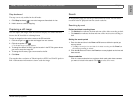
How to Log in
When you connect to the Divar, the Login page appears. (Click Cancel to
discontinue login and exit the application.)
To log in:
1. Type your user name and password.
> The user name and password to be filled-in are set in the System settings/
Connectivity/Network access menu of the Divar itself. Check with your
administrator if you do not have access to the unit.
> To let the system remember your name and password on subsequent use, place a
check mark in the Save login information box. Administrator passwords are
not saved.
2. Select a language from a drop-down menu.
3. Click Login.