CHANGING THE DEFAULT SETTINGS
23
• L-Mono – Left channel output to both Left and Right speakers.
• R-Mono – Right channel output to both Left and Right speakers.
• Mix Mono – Left and Right channels mixed to both Left and Right speakers.
B. Dynamic: To set the Dynamic Range Compression (DRC). DRC can smooth out the sonic
peaks and valleys common with wide-range digital audio. Increasing DRC may make low
level audio more audible during low-level listening. Decreasing or turning off DRC restores
the sonic energy present in the original recording. This function is also useful for late night
viewing of movies to keep the dialogue easy to understand while reducing the overall
dynamic range of the movie.
...........................................................................................................................................................................
HDMI AUDIO
Use this to select digital audio output from the HDMI port. The options are:
• Auto – This setting allows the DVD 8 to select the digital output signal from the current
disk automatically. It will choose whatever is offered by the disk that is currently playing.
Choices include either a RAW digital signal (for DTS and Dolby Digital encoded signals) or a
Linear Pulse Code Modulation (LPCM) digital output signal like a CD disk sends out to an
external digital input in an associated receiver or preamplifier.
• LPCM (default) – See LPCM above. This setting will convert the digital signal from the
disk to LPCM and offer that digital output signal to the associated receiver or preamplifier.
• Off – This setting will offer digital video output only without any digital audio signal.
Choosing this setting will require that the DVD 8 also have a digital input connection to the
associated receiver or preamplifier. This connection can be either an optical digital
(TOSLINK) or a coaxial digital RCA connection for the digital audio signal.
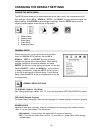
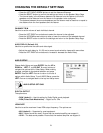
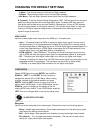
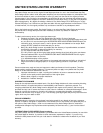
VIDEO SETUP
Choose VIDEO Setup and press ENTER. Use the UP
,
DOWN
, LEFT, and RIGHTcursor buttons to
navigate the options within VIDEO Setup. When making
changes, navigate to the desired selection and press
ENTER. Press the LEFT
arrow to return to the list of
options within VIDEO Setup. To exit VIDEO Setup, use the
DOWN
arrow to navigate to the bottom of the list
making SETUP menu visible. To exit VIDEO Setup, press the
LEFT
arrow to navigate back to the top icon setup menu.
VIDEO SETUP OPTIONS:
...........................................................................................................................................................................
Sharpness
Use this to set the sharpness of the video output. Choose from one of the following options:
• Sharp – Enable edge enhancement. Video details look sharper but this setting may cause
slight white line etching around objects.
• Soft – Soften edges. Video appears to be smoother but may cause slight loss of details.
• Off (default) – Turn off edge enhancement completely. This may be the most natural
setting for a high performance video system.