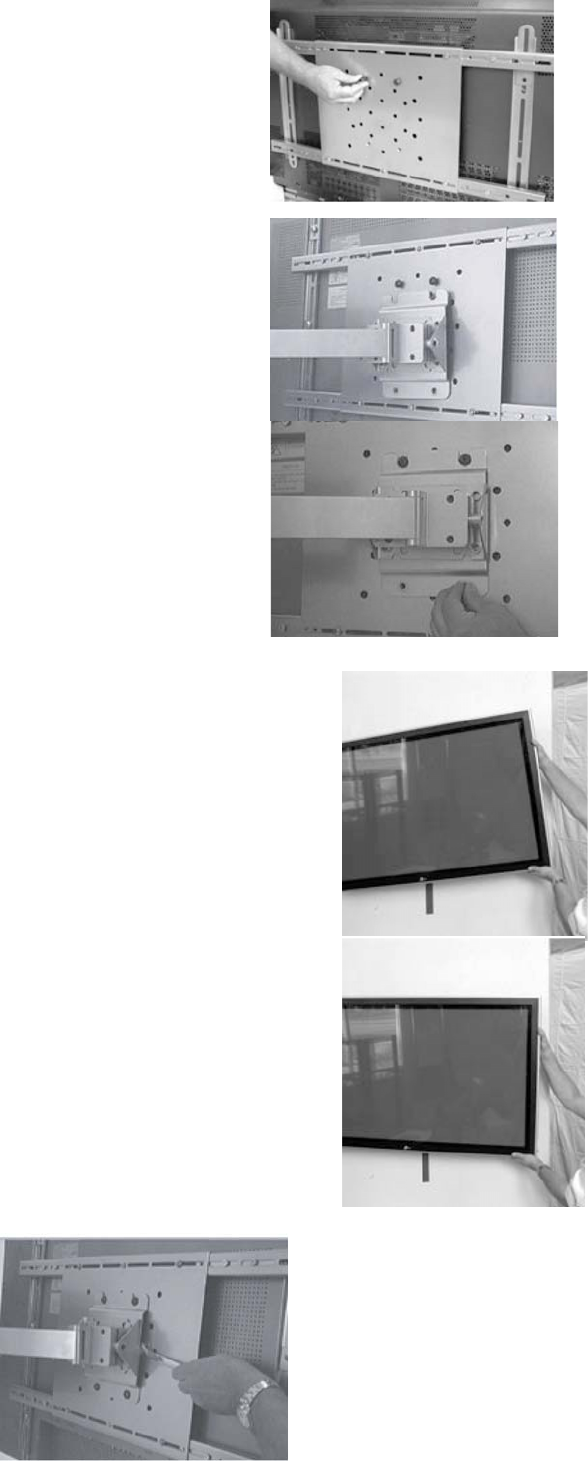
Mounting the display
1. Locate the set of four 3/8”-16 button head cap screws removed at the
beginning of the installation.
2. Thread two of the screws approximately a 1/4”(0.6cm) into the upper
set of PEM nuts on the adaptor plate, as shown
3. With the help of an assistant, carefully lift the display and hang it onto
the P-150 by dropping the exposed portion of the screws down into the
key slots on the nose piece of the P-150.
4. With the display hanging on the mount, thread the second set of screw
into place, and then tighten all four screws securely.
Display Adjustments
Roll Control
Function – Horizontal leveling of the display.
Operation – Grasp the sides of the display, and roll it into the desired position.
Adjusting Roll Tension – Roll tension is controlled by the two tension bolts located
on the outer edges of the nose piece. Use an open-ended 9/16” wrench to make
adjustments to the tension bolts by inserting wrench between the nose piece and the
adaptor plate.


