5. All of the screws are properly torqued to specification when the
unit is assembled at the factory and should not need an further
initial adjustments. However, due to the variety in size of different
monitors, MINOR adjustment may be required to optimize the
tension needed for ease of movement. Be sure that your
monitor is supported properly while making ANY changes to
the cantilever. To loosen or tighten the 4 screws respectfully on
the back of the rear pivot clamp until the desired tension is
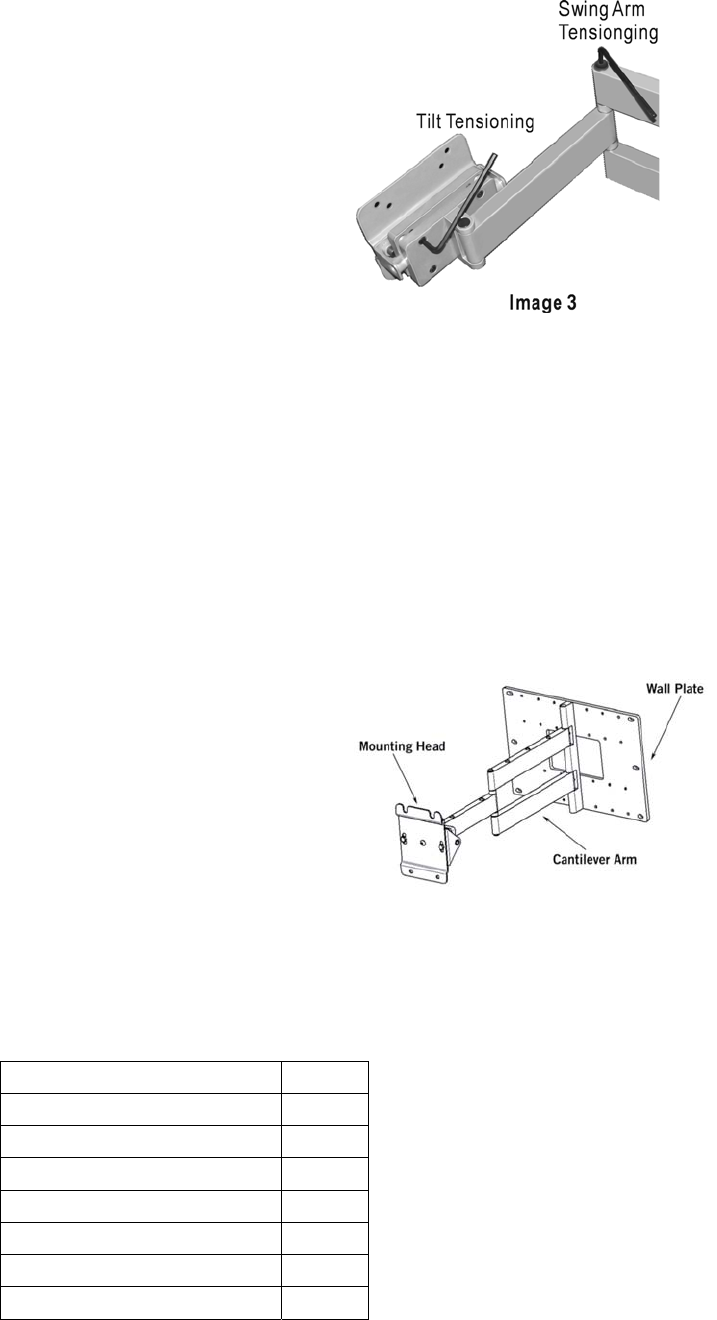
obtained (see image 2 – Tilt Tensioning Screws and Image 3 –
Tensioning Tilt). It is important to try to maintain even torque on
each of the 4 screws. It does not take that much change in torque to make a large difference in the
tilt tension. To loosen or tighten the swing arm tension use the supplied 5/32 inch hex wrench to
loosen or tighten the screw shown in image 2 & 3 (Swing Arm Tensioning Screw). Periodic
adjustment of these screws may be necessary to maintain desired tension. There should be NO
reason to tighten or loosen the wrist hinge bracket. You should need to tighten or loosen the
shoulder hinges screws (located top and bottom of hinge), improper tightening of these screws can
damage the shoulder hinge bracket and the wall mount plate.
P-150 Cantilever Mount Installation Instructions
z 125 lb maximum weight capacity
z Cantilever arm mount for large plasma panels
z Allows maximum flexibility for installing and viewing
displays
z Horizontal leveling adjustment (20erange,f10)
z Cantilever arm provides full extension and 180e
of lateral rotation for viewing from multiple locations.
z Nesting arm design allows display to be folded parallel to
wall
z Provides full tilt and swivel capabilities for optimum viewing
z Quick mount capability with Plad PA-4260
z Durable grey or black powder coat finish.
Check the Hare Ware Kit after open the package
Description Quantity
3/16 inch Hex Wrench 1
5/32 inch Hex Wrench 1
7/32 inch Hex Wrench 1
3/8 x 3-1/2 inch Lag bolt 6
3/8ID x 13/16OD Washer 6
Button Head Screw 3/8-16 x 1/2 4
Nylon jam nut 3/8-16 4
Read through the entire instruction manual before beginning.


