–
22
–
EN
You can change some Audio settings. It only affects during
the playback of DVD discs.
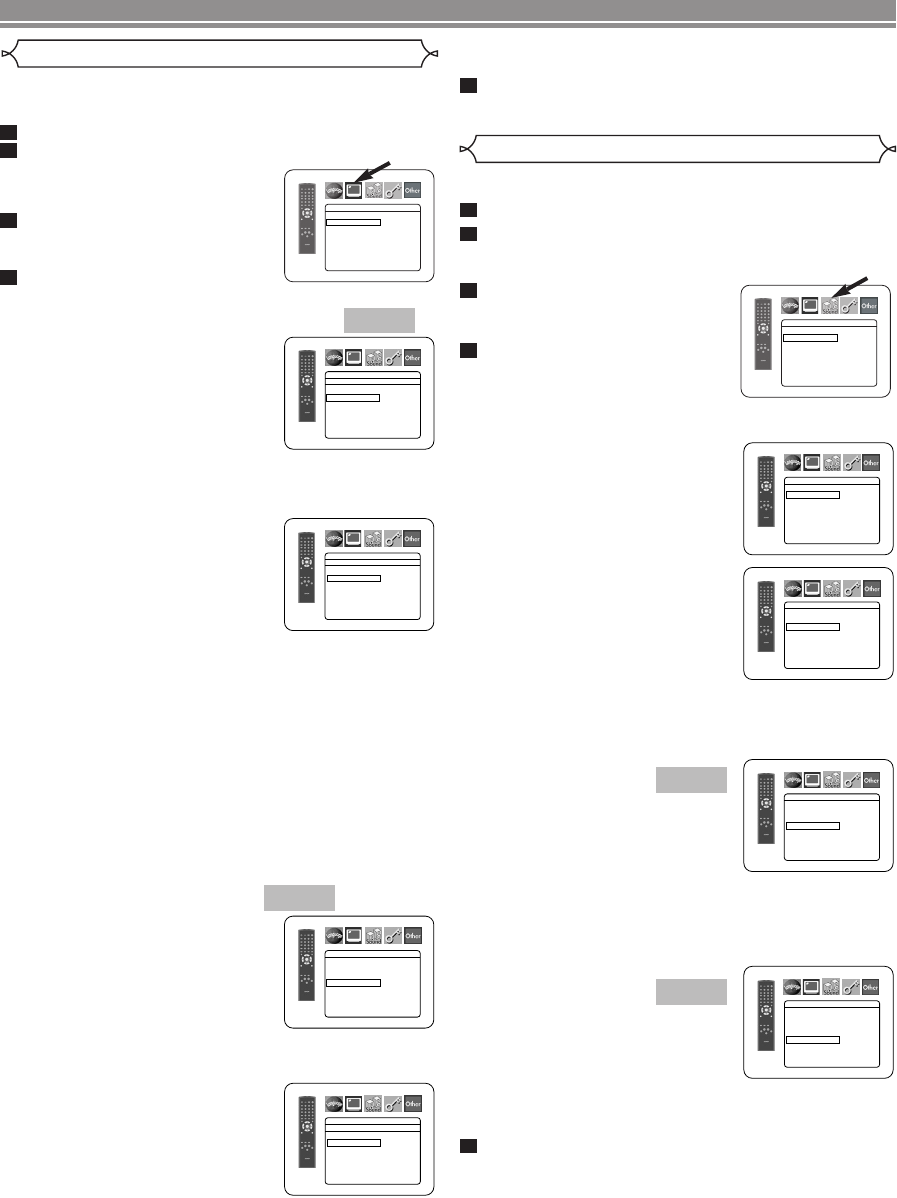
Press the SETUP button in stop mode.
Press the
Cursor buttons (s or B) to select
CUSTOM, then press the ENTER button.
• The custom mode will appear.
Press the Cursor buttons (s
or B) to select AUDIO, then
the
ENTER button to confirm.
Press the
Cursor buttons (K or
L) button to select an item,
then press the
ENTER button.
• This menu display contains 2 pages. Press the Cursor
button (L) repeatedly to show the next page.
DRC (Dynamic Range Control)
(Default : ON)
• DRC function compresses the
range of sound volume.
• DRC function is available only on
the discs that are recorded in the
Dolby Digital format.
LPCM SELECT
(Default : OFF)
• Set to ON when outputting in
48kHz (or 44.1kHz).
• This function is available only on
digital outputting of a disc record-
ed in over 96kHz (or 88kHz).
When playing disc with copyright protection
• The sound will be down sampled at 48kHz, even if you
set to OFF.
DOLBY DIGITAL
(Default: BITSTREAM)
• Set to BITSTREAM when the
player is connected to a Dolby
Digital decoder.
• This function is effective only for
the COAXIAL and OPTICAL con-
nections.
BITSTREAM:
DOLBY DIGITAL signals are output as Bitstream.
PCM:Convert Dolby Digital to PCM.
DTS
(Default: BITSTREAM)
• Set to BITSTREAM when the unit
is connected to a DTS decoder.
BITSTREAM:
DTS signals are output as
Bitstream.
OFF: No DTS sound will be output.
• DTS sound is output only from digital audio outputs.
Press the SETUP button to exit and activate the
new settings.
5
QUICK
QUICK
4
3
2
1
Audio Setting
AUDIO
DRC
ON
LPCM SELECT OFF
DOLBY DIGITAL BITSTREAM
DTS BITSTREAM
AUDIO
DRC
ON
LPCM SELECT OFF
DOLBY DIGITAL BITSTREAM
DTS BITSTREAM
AUDIO
DRC
ON
LPCM SELECT OFF
DOLBY DIGITAL BITSTREAM
DTS BITSTREAM
AUDIO
DRC
ON
LPCM SELECT OFF
DOLBY DIGITAL BITSTREAM
DTS BITSTREAM
AUDIO
DRC ON
LPCM SELECT OFF
DOLBY DIGITAL BITSTREAM
DTS BITSTREAM
Display Setting
You can change certain aspects of the DVD display screens,
still mode setting, the display panel on the front of the DVD
player and Progressive settings.
Press the SETUP button in stop mode.
Press the Cursor buttons (s or B) to select
CUSTOM, then press the
ENTER button.
•
The custom mode will appear.
Press the Cursor buttons (s or
B) to select DISPLAY, then press
the ENTER button to confirm.
Press the Cursor buttons (K or
L) to select an item, then press the ENTER button.
TV ASPECT
(Default : 4:3 LETTER BOX)
• Press the Cursor buttons (K or
L) for an item selection, then
press the ENTER button.
• Select 4:3 LETTER BOX for a
black bars appears on top and
bottom of the screen.
• Select 4:3 PAN & SCAN for a full
height picture with both sides
trimmed.
• Select 16:9 WIDE if a wide-screen TV is connected to the
DVD player.
STILL MODE
(Default : AUTO)
• Press the Cursor buttons (K or
L) for an item selection (AUTO,
FIELD, or FRAME), then press
the ENTER button.
• This function allows you to
adjust picture resolution and
quality in still mode.
• An individual picture on TV screen is called as “frame”,
which consists of two separate images called as “field”.
Some pictures may be blurred at the AUTO setting in
still mode due to their data characteristics.
• AUTO: Automatically selects the best resolution setting
(FRAME or FIELD) based on the data characteristics of
the pictures.
• FIELD: Select FIELD when the pictures are still unsta-
ble even if AUTO is selected. FIELD stabilizes the pic-
tures, although the picture quality may become coarse
due to the limited amount of data.
• FRAME:
Select FRAME to display relatively motionless
pictures in higher resolution. FRAME improves the pic-
ture quality, although it may unstabilize the pictures due
to simultaneous output of two field data.
PROGRESSIVE (Default: OFF)
•
Press the Cursor buttons (K or L)
for set PROGRESSIVE to ON or
OFF, then press the ENTER button.
• The setting will be effective
when you exit the setup screen
by pressing SETUP.
•
When PROGRESSIVE is ON,
P.SCAN appears on the DVD
player’s display after you exit the setup screen.
•
Refer to page 11 for more details.
PROG.MODE (Default: AUTO1)
• Press the Cursor buttons (K or
L) to select a setting (AUTO1,
AUTO2, or VIDEO), then press
the
ENTER button.
• This function allows you to
select the image output,
depending on the base material
(video or film) of the recorded DVD images, when
VIDEO OUT is set to COMPONENT PROGRESSIVE.
• AUTO1: Automatically selects the best image output
(AUTO2 or VIDEO) based on the information of
data stream.
• AUTO2: A combination of the top and bottom fields is
output as one-frame image.
QUICK
QUICK
4
3
2
1
DISPLAY
TV ASPECT
4:3 LETTER BOX
STILL MODE AUTO
PROGRESSIVE OFF
PROG.MODE AUTO1
DISPLAY
TV ASPECT
4:3 LETTER BOX
4:3 PAN & SCAN
16
:9 WIDE
DISPLAY
TV ASPECT
4:3 LETTER BOX
STILL MODE AUTO
PROGRESSIVE OFF
PROG.MODE AUTO1
DISPLAY
AUTO
FIELD
FRAME
STILL MODE
DISPLAY
AUTO1
AUTO2
VIDEO
PROG. MODE
DVD SETUP
• VIDEO: Either of top or bottom field is output for one-
frame image.
Press the SETUP button to exit and activate the new
settings.
5
E6180/81UD(EN).qx3 05.6.6 11:25 Page 22


