


Adjusting the picture
13
DX-55L150A11
Note: Menu items that are not selectable are grayed out. Menus in this
manual are described in TV mode, unless otherwise indicated.
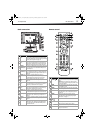
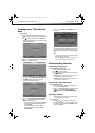
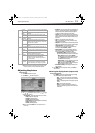
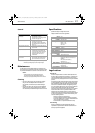
Adjusting the picture
To adjust the picture:
1 Press MENU. The Main menu opens.
2 Press ENTER or . The Video menu opens.
3 Press or to highlight an option, then press or to adjust
the option. You can select:
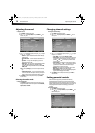
• Picture Mode—Selects the picture mode. You can select:
• Vivid (a bright and vivid picture)
• Standard (a standard picture)
• Theater (a finely detailed picture)
• Energy Saving (the backlight brightness is decreased)
• Sports (a dynamic picture)
• Custom (customized picture).
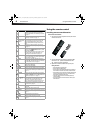
Note: You can also press PICTURE on the remote control to select the
picture mode.
• Brightness–Lets you increase or decrease the brightness of
the picture. Increasing the brightness can add more light to
dark areas of the picture, while decreasing the brightness
can add more darkness to light areas of the picture.
• Contrast–Lets you increase or decrease the contrast of the
picture. Increase the contrast to adjust the white areas of the
picture or decrease the contrast to adjust the black areas of
the picture.
• Color–Lets you adjust the intensity of the colors.
• Tint–Lets you adjust the overall color of the picture (only
supported in TV/AV mode).
• Sharpness–Lets you increase the sharpness level for clearer
images or decrease the sharpness level for smoother images.
• Color temperature –Lets you change the color
temperature. You can select the color temperature from
three options: Cool, Standard, or Warm.
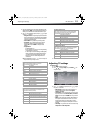
• Advanced Video–Lets you access and adjust advanced
video settings,such as Noise Reduction, Adaptive Contrast,
Overscan (only in HDMI), or Dynex Motion 120Hz.
• Dynex Motion 120Hz:–Eliminates motion blur to
provide clear detail and smooth motion. You can adjust:
• Effect–Off, Low (minimum effect), Medium
(Provide smooth and clear picture motion for normal
use), and High (eliminates motion blur to provide
clear detail and smooth motion).
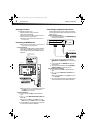
• Demo Partition–Sets the 120 Hz demo area size and
location. You can choose All, Right, or Left.
• Demo–Displays the differences between the picture
when the option is turned on and off.
• Reset Picture Settings–Resets all picture settings to the
factory defaults.
4 Press MENU to return to the previous menu, or press EXIT to
close the menu.
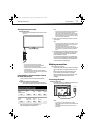
Choosing the display format (aspect ratio)
To choose the display format:
• Press ZOOM on the remote control repeatedly to cycle through
the available display formats. Options include:
• Auto —Selects the correct aspect ratio automatically.
• Normal —Selects the correct aspect ratio to match the
source image.
• Zoom —Enlarges the picture but may crop the top and
bottom.
• Wide—Shows a full-screen picture.
• Cinema—Stretches the picture at the edges [21:9
aspect], but maintains a good aspect ratio at the center
of the screen.
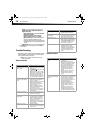
Parental
Channel
Block
Lets you select certain channels to be blocked.
Program
Block
Lets you select certain programs to be
blocked.
Input Block Lets you select certain input sources to be
blocked.
Change
Password
Lets you set a new password for parental
controls.
Button Lock Lets you lock TV buttons so that only the
remote control can operate the TV. Removing
the AC power and reconnecting it resets this
function back to default.
Clean All Eliminates all channels (and presets) stored in
the TV.
TV
Tuner Mode Lets you select the signal source for your TV
(Antenna or Cable).
Channel
Scan
Lets you initiate an automatic channel scan to
set up the available channels in your TV.
Channel
Skip
Lets you select certain channels to eliminate
from the available channels list.
MTS/SAP Lets you enable the SAP (Second Audio
Program) function. This lets you listen to a
program using an alternative second
language. Function availability depends on
your TV provider.
Audio
Language
Lets you select the language track you prefer
for viewing digital TV programs. Available
options depend on your digital TV provider.
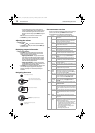
&XVWRP
Color
Tint
DX-55L150A11_10-1135_MAN_ENG_V1.book Page 13 Monday, October 25, 2010 12:02 PM