


Installation
14 313259D
Installation
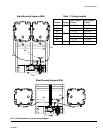
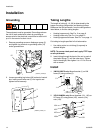
Grounding
The equipment must be grounded. Grounding reduces
the risk of static and electric shock by providing an
escape wire for the electrical current due to static build
up or in the event of a short circuit.
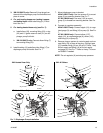
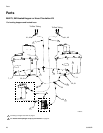
1. Remove grounding screw on diaphragm pump (3)
and tighten ring terminal on grounding cable (15)
under ground screw.
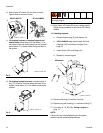
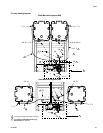
2. Loosen grounding lug locknut (W) on back of control
box. Insert ground wire end (Y) into lug slot and
tighten locknut securely.
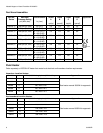
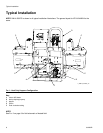
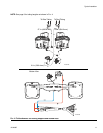
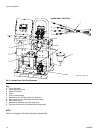
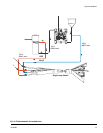
Tubing Lengths
The length of tubing (4, 16, 29) is determined by the
hopper mounting configuration and heating choices.
Reference the fluid schematic, from the configurations
listed below, to find the tubing lengths.
• Heating hoppers only. See F
IG. 2 on page 9.
• Heating hoses only. See F
IG. 6 on page 13.
• Heating hoppers and hoses. See F
IG. 4 on page 11.
Cut tubing to length specified in fluid schematics.
1. Use tubing cutter to cut tubing (4) squarely to
desired lengths.
NOTE: To ensure a leak-proof seal, apply PTFE tape
on all npt threads.
2. Insert tubing through the back of the nut in each of
the plastic fittings (7) until the tube stops. Tighten
the nut hand tight, then tighten it to 1-1/2 to 2 turns
with a wrench.
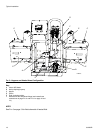
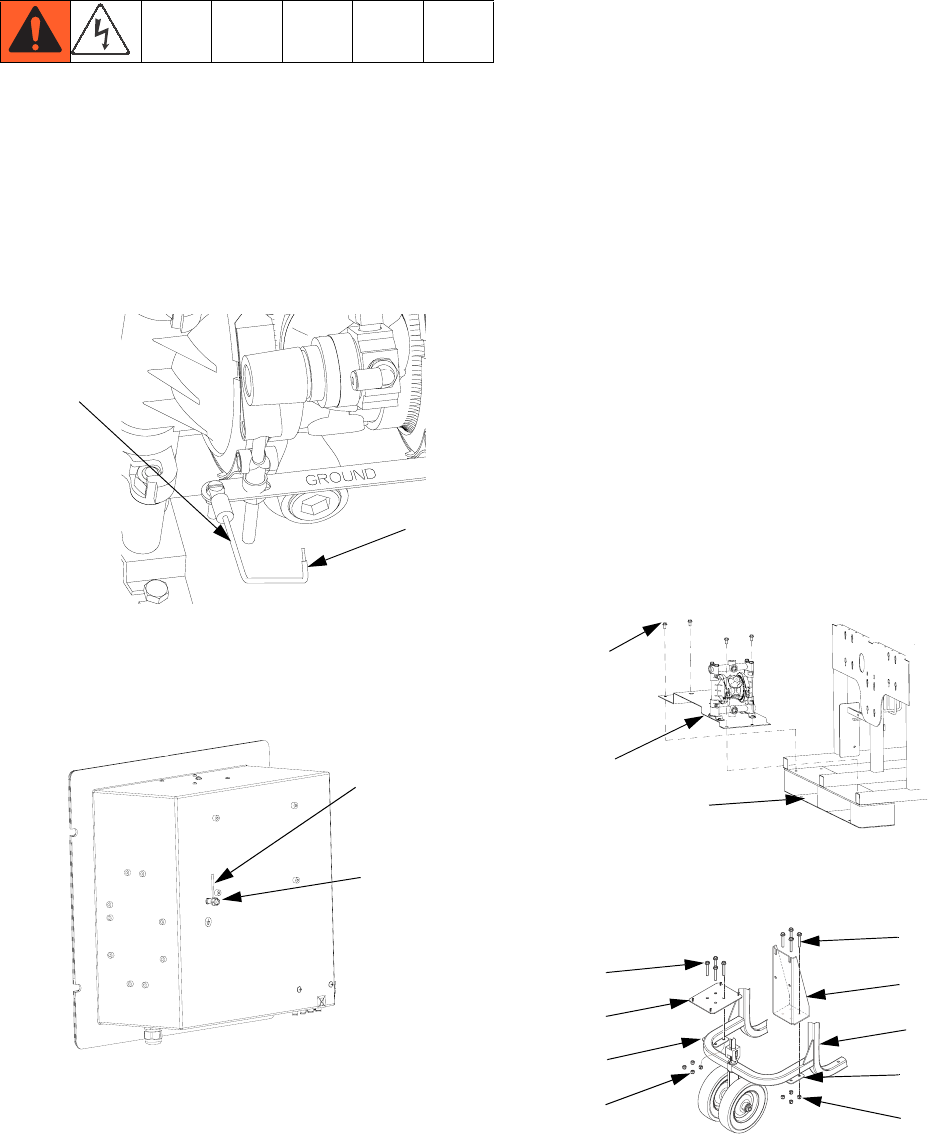
Install
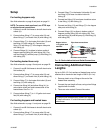
1. XM Kit 256273 only: Mount bracket (1) on XM
frame (D) using screws (5).
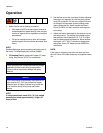
2. XP Kit 24M224 only: Mount brackets (101, 102) on
XP frame (D) using plates (105), screws (134),
nuts (133).
15
Y
r_256273_313259_9
Y
W
r_256273_313259_10
5
1
D
r_256273_313259_5
102
101
D
105
134
133
133
134
105
ti19176a