


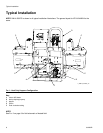
Installation
313259D 15
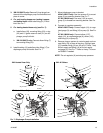
3. XM Kit 256273 only: Remove 3/4 npt plugs from
the end of the diaphragm pump fluid manifold and
place in center.
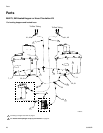
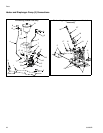
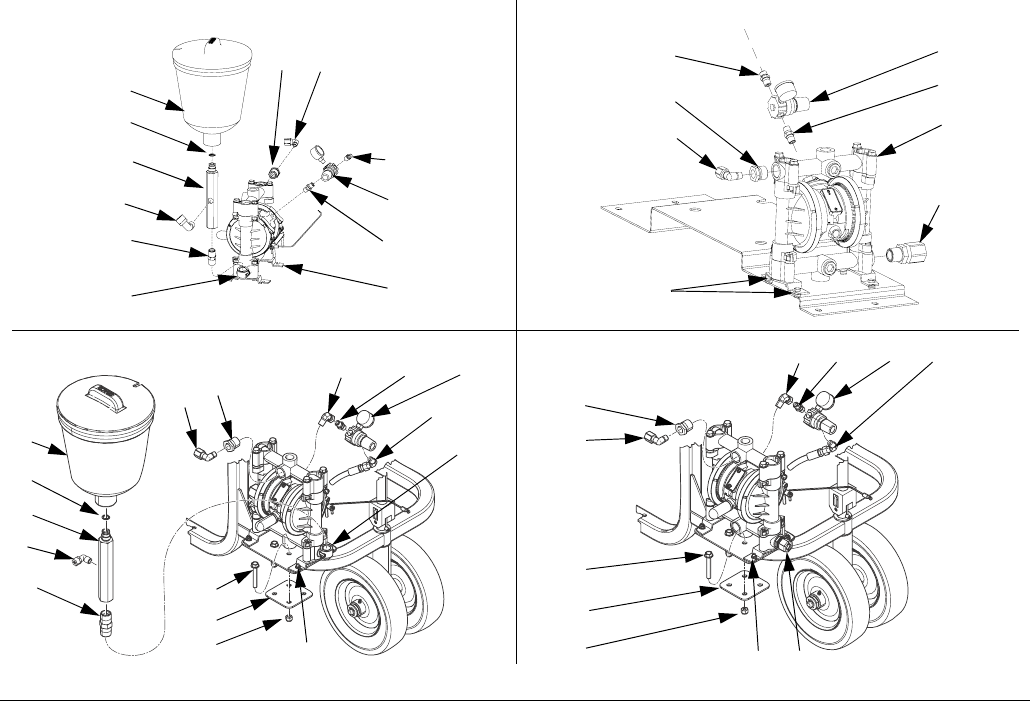
4. For only heating hoppers or heating hoppers
and heated hose: Install tube fitting (31) in fluid
inlet. See F
IG. 7.
5. For heating heated hose only (see F
IG. 7):
a. Install elbow (32), mounting fitting (23), o-ring
(22) and 1.5 gallon reservoir tank (21) on dia-
phragm pump fluid inlet.
b. XM Kit 256273 only: Connect elbow fitting (7)
to mounting fitting (23).
6. Install bushing (12) and elbow tube fitting (17) to
diaphragm pump fluid outlet. See F
IG. 7.
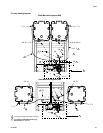
7. Mount diaphragm pump to bracket.
XM Kit 256273 only: Use four screws (2) to mount
pump (3) on mounting bracket. See F
IG. 7.
XP Kit 24M224 only: Use nuts (135) to mount
pump (3) to threads on mounting bracket. See F
IG.
7.
8. Connect air regulator assembly.
XM Kit 256273 only: Connect nipple (10), air regu-
lator/gauge (9), and fitting (19) to pump (3). See F
IG.
7.
XP Kit 24M224 only: Connect elbow (137),
nipple (10), air regulator/gauge (9), elbow (136),
and fitting (19) to pump (3).
9. Remove plug on system air control supply and con-
nect fitting (19) in place of the plug. Connect hose
(27) between fitting (19) on 100 psi (0.7 MPa, 7 bar)
XM air supply and fitting (19) on the air regula-
tor/gauge (9). See F
IG. 7. Refer to Husky 716 man-
ual 308981 if needed.
NOTE: The air regulator (9) controls pump pressure.
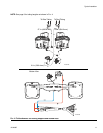
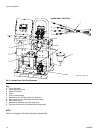
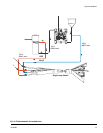
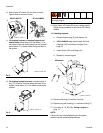
F
IG. 7: Diaphragm Pump Installation
9
12
17
31
10
19
3
2
21
32
23
7
12
17
9
10
19
22
3
XM: Heated Hose Only XM: All Others
XP: All OthersXP: Heated Hose Only
31
9
136,19,27
137 10
12
17
134
105
133
ti19173a
ti19155a
21
22
23
7
32
910
136,19,27
137
12
17
134
105
133
33
135
135
33
ti19229a