


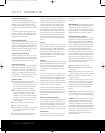
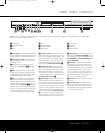
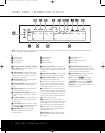
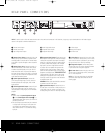
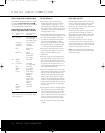
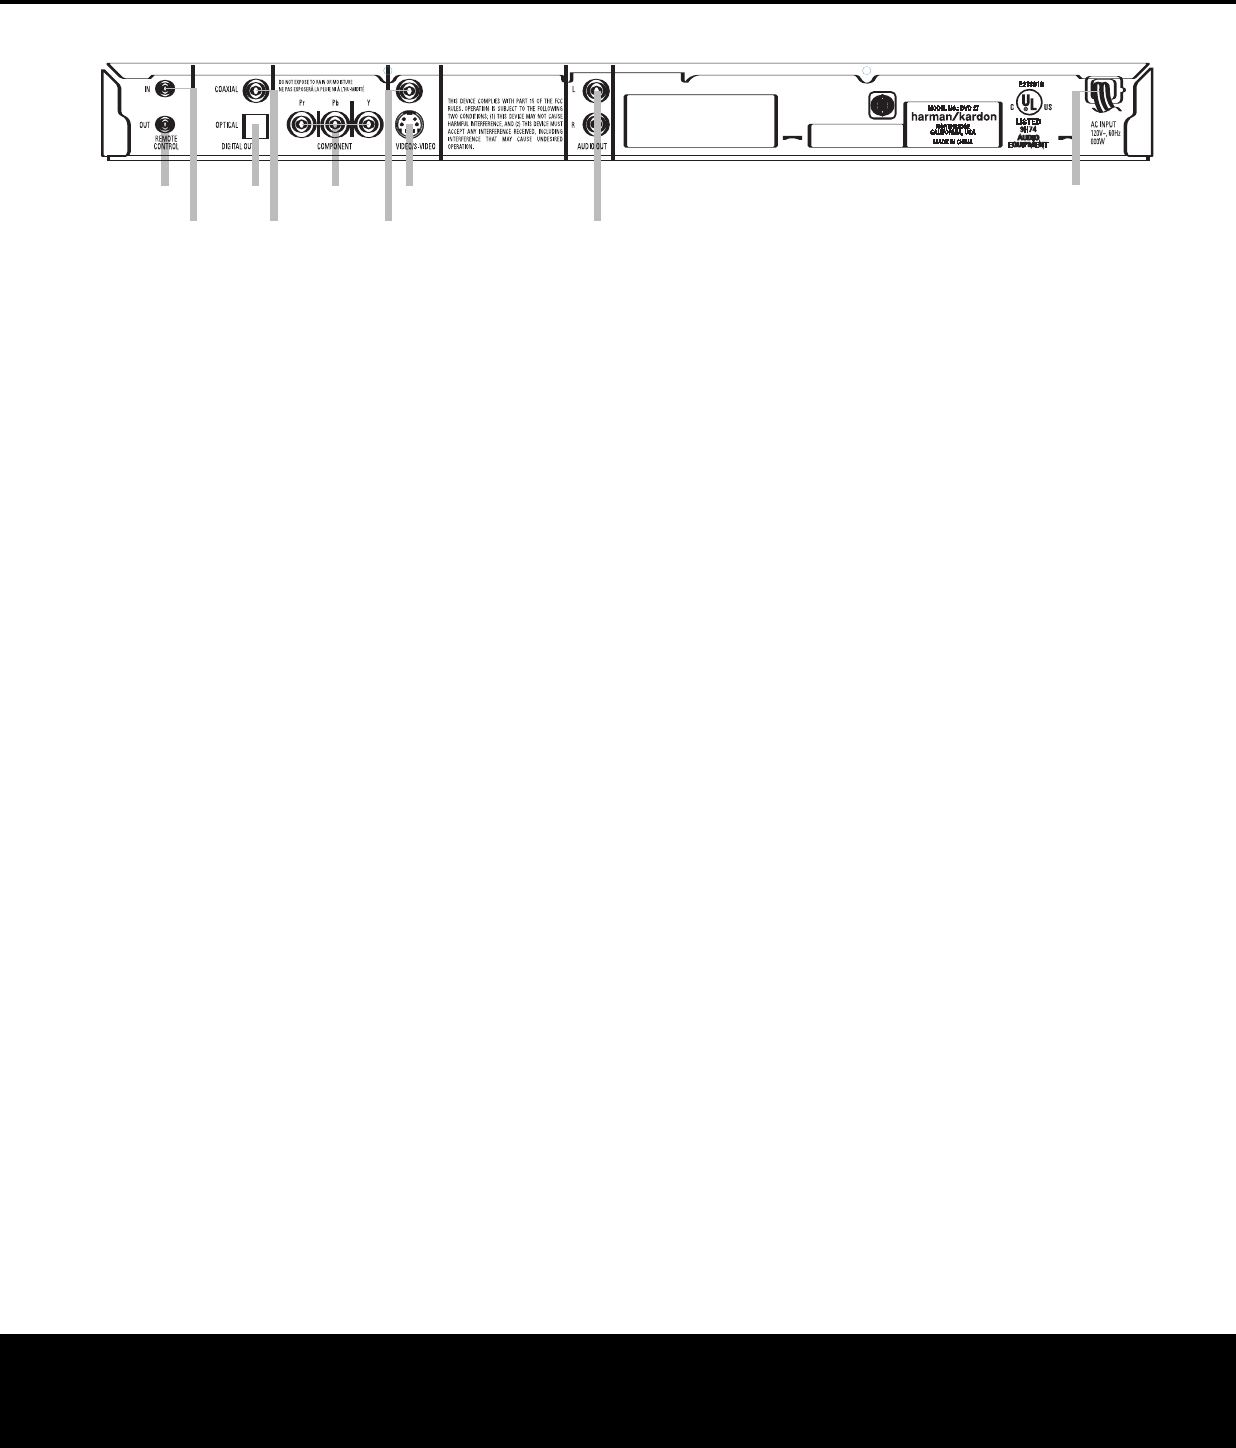
REAR-PANEL CONNECTIONS
1
0
2
3
4
5
6
7
8
¡
Remote Control Output
™
Remote Control Input
£
Optical Digital Audio Output
¢
Coaxial Digital Audio Output
∞
Component Video Outputs
§
Composite Video Output
¶
S-Video Output
•
Analog Audio Outputs
ª
AC Power Cord
¡
Remote Control Output: Connect this jack to the
infrared (IR) input jack of another compatible remote-
controlled product to have the built-in Remote Sensor
on the DVD 27 provide IR signals to other compatible
products.
™
Remote Control Input: Connect the output of a
remote infrared sensor, or the remote control output
of another compatible product, to this jack. This will
enable the remote control to operate even when the
front-panel Remote Sensor on the DVD 27 is blocked.
This jack may also be used with compatible IR remote
control-based automation systems.
£
Optical Digital Audio Output: Connect this
jack to the optical digital input of an A/V receiver or
surround processor for Dolby Digital, DTS or PCM
audio playback.
¢
Coaxial Digital
Audio Output:
Connect this jack
to the coaxial digital input of an A/V receiver or sur-
round processor for Dolby Digital, DTS or PCM audio
playback.
NOTES:
• Connect either the Optical Digital Audio Output
£
or the Coaxial Digital Audio Output
¢
to a
corresponding digital audio input on your receiver or
processor, but not both.
• The coaxial digital output should only be connected
to a digital input.
Even though it is the same RCA-
type connector as standard analog audio connec-
tions
,
DO NOT connect it to a conventional analog
input jack.
∞
Component Video Outputs: These outputs carry
the component video signals for connection to display
monitors with component video inputs. For standard
analog TVs or projectors with inputs marked Y/Pr/Pb
or Y/Cr/Cb, connect these outputs to the correspon-
ding inputs. If you have a high-definition television
or projector that is compatible with high-scan-rate
progressive video (480p or better), connect these
jacks to the HD component inputs. If you are using a
progressive scan display device, PROGRESSIVE
must be selected in the Video menu in order to take
advantage of the
progressive scan circuitry. See the
“Scan Type” section on page 20 for more information
on progressive scan video.
IMPORTANT: These jacks should NOT be connected
to standard composite video inputs.
§
Composite Video Output: Connect this jack to
the video input on a television or video projector, or to
a video input on an A/V receiver or processor if you
are using that type of device for video input switching.
¶
S-Video Output: Connect this jack to the S-video
input on a television or video projector, or to an S-video
input on an A/V receiver or processor if you are using
that type of device for S-video input switching.
•
Analog Audio Outputs: Connect these jacks to
an audio input on an A/V receiver, surround processor
or your television for analog audio playback.
ª
AC Power Cord: Connect this plug to an AC out-
let. If the outlet is controlled by a switch, make certain
that it is in the ON position.
NOTE: You’ll find more details about all audio/video
connections under Setup and Connections on the
following pages
.
12
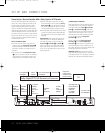
REAR-PANEL CONNECTIONS
N
OTE:
T
o make it easier to follow the instructions that refer to the controls and connectors in this illustration, a larger copy may be downloaded from the Product Support
section for this product at www.harmankardon.com.
DVD 27 (120V) OM 12/20/05 2:18 PM Page 12