© 2007 HeathCo LLC 598-1119-07
FEATURES
• Quickly add ON/OFF control of a receptacle without the expense of new wiring.
• Four selectable channels allowing the use of up to four separate systems in the same home.
• Products are UL/cUL and/or FCC/IC tested and approved.
• Operational range of up to 50 feet.
Remote Controlled Products
Operation
1. The two buttons on the remote will
operate one or more receiver units
with matching channels.
Note: Receivers must be at least 10
feet apart for best performance.
2. Push the ON button to turn the
plugged in receiver on or the
OFF button to turn the plugged in
receiver off.
Battery Replacement
The remote control requires a type A23 12 Volt
alkaline battery to operate. The remote control
is shipped with the battery installed. With typical
use, the battery will last approximately one year.
Remove battery when remote will not be used
for an extended period of time.
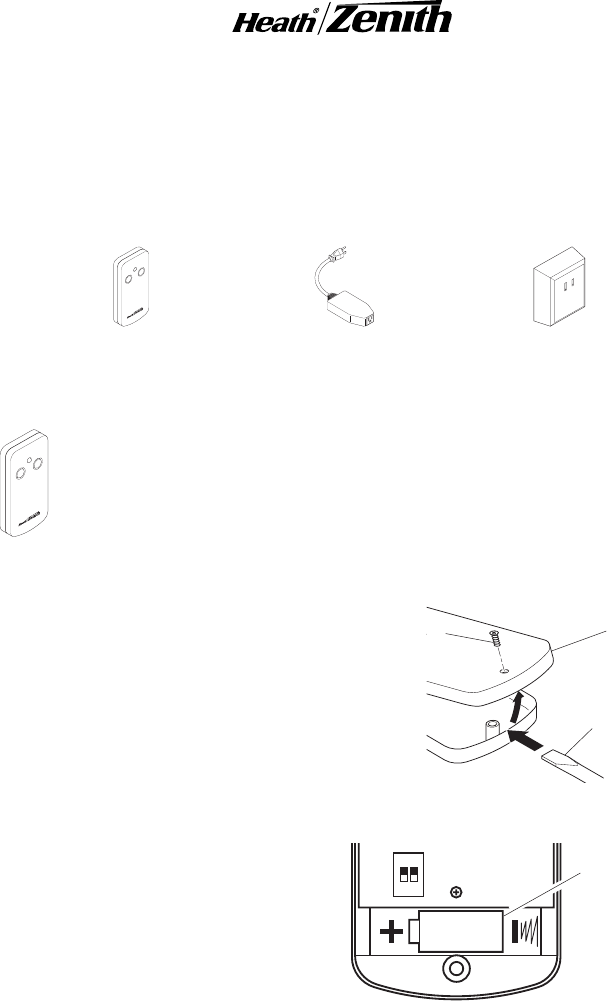
To replace the battery, follow the instructions
below:
1. Place remote control face down on a flat
surface.
2. Remove screw on bottom of remote with a
small phillips-head screwdriver.
2-BUTTON REMOTE CONTROL
ON
OFF
3. Gently insert a small flat-head screwdriver
between the two halves on the bottom of the
remote and twist. Carefully separate the back
of the remote from the front.
4. Lift the back of the remote up and lay aside.
5. Remove battery. Install replacement battery.
Make sure battery is oriented properly (see
illustration).
6. Reassemble remote in reverse order.
Inside of Remote Control
ON
12 V
1 2
Battery
Compartment
(Type A23)
Removing Back of Remote Control
Flat-Head
Screwdriver
Philips-Head
Screw
Remote
Control Back
ON
OFF
This manual applies to the following products:
2-Button Remote Control Indoor Plug-In ReceiverIndoor/Outdoor Receiver


