12
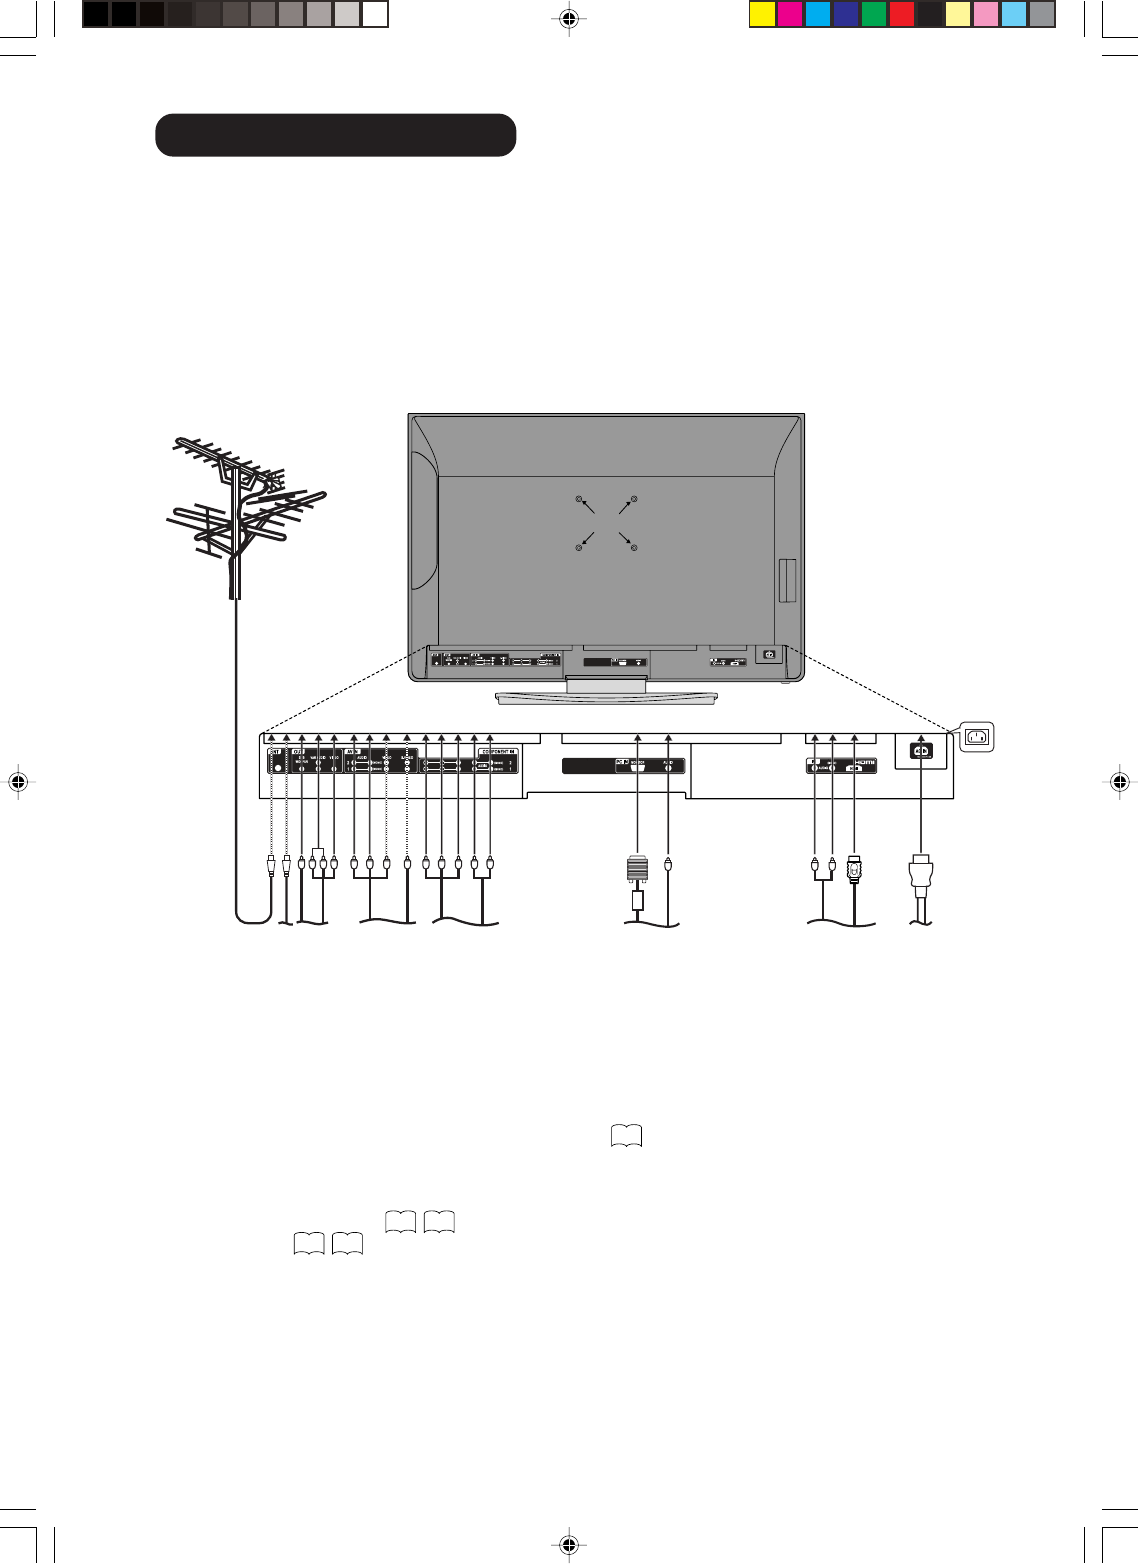
Antenna connection
Note: Before you connect something:
• To avoid every possible damage, turn off the TV-unit with Main Power Switch and then pull the power
plug out.
• Arrange the desired connection.
• When the connection made up firmly and correctly, connect the unit to AC100-240V, 50/60Hz and turn
the unit on.
• For safety, install an external aerial conforming to AS1417.1 (applicable for Australia only).
Connect the antenna as shown below. Connect the unit with an outdoor antenna (A) or a cable-net (B). In
case of reception disturbance, consult with a specialist of antenna.
(A) Outdoor antenna: If the outdoor antenna already exists, you can also connect to it for analog TV-
program.
(B) Antenna connection: The built-in Hyperband CATV tuner can receive all analog cable television
programs.
(C) Audio/Video/Subwoofer output: To connect with an audio amplifier and external speakers or
Subwoofer, and adjust the audio level using the TV’s remote control.
To control the audio, turn off the TV's built-in speakers
28
.
Signal from Video output jack are composite video signals.
(D) AV1/AV2 input: To the connection of audio and composite video/S-video cables.
(E) COMPONENT-1/2 input: To the connection of audio and component cables.
(F) PC Monitor input (PC):
16 35
.
(G) HDMI input:
16 36
.
(H) Power supply: Connect the supplied power cable. Connect to AC100-240V, 50/60Hz.
Never repair a damaged AC power cord with isolation-tape. Have a specialist exchange with a new AC
power cord. Do not let your pet loose near the cable. To bite isolation is danger of life. Above all, a rat,
a parakeet, a hamster, a rabbit and other toothed animals can bite the cable.
(I) Bracket holes: Fix a wall mounting bracket (not supplied) here.
(D)(B) (C) (G)(F)
(A)
(E) (H)
(I)
3V90441A [E] P09-12 31/10/05, 9:21 AM12
32LD380T
A
HITACHI


