


Getting Started
11
TV AND VCR UNPLUGGED WHILE HOOKING THEM UP.
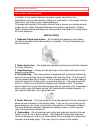
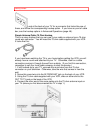
3 Hook Up the Audio/Video Signal
If your TV is a fairly recent model, you probably have both audio and video jacks.
Look on the back of your TV for three jacks - possibly color-coded yellow, white,
and red. They will be labeled something like IN (L and R), AUDIO IN, or VIDEO
IN. (If you are not sure, look at the back of your VCR - you will see two sets of
these jacks.)
If you have no jacks like these on your TV, skip this step and proceed to Step 4.
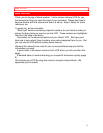
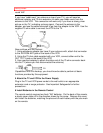
TV with Audio and Video Jacks
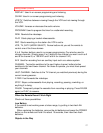
If you do find all three jacks on your TV, you need to purchase a three-line
audio/video cable with bell (RCA) connectors, like this:
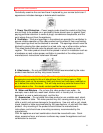
If you find a video jack and only one audio jack, your TV is probably monaural.
You can purchase a two-line audio/video cable, but the three-line is handy in
case you get a stereo TV later.
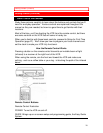
Connect the yellow VIDEO OUT jack on the VCR to the VIDEO IN jack on the
TV.
This direct video input will give you the best picture. It will also let you play
videos in a "picture in picture" feature, if your TV has it.
Then connect the AUDIO OUT jacks (red and white) on the VCR to the AUDIO
IN jacks on the TV (left to left, right to right).
This audio hookup will give you better sound than the RF signal hookup, because
the electronic signal won't have to go through a conversion process.
Plus your VCR has a stereo decoder, which your TV might not. For big speaker
sound, you can also use these jacks to connect the VCR to your stereo system
(page 50).
Capabilities: The audio and video signal connections are all you need to play
back a prerecorded tape. If you do not intend to record on your VCR from your
antenna/cable, then you're all hooked up now. Otherwise, continue with Step 4,
which will let you record off TV channels.
4 Hook Up the RF Signal