


16 EN
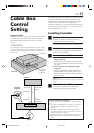
Setting cable box input
channel & brand
After installation, set the cable box input channel and its
brand correctly; otherwise, the Controller cannot work
correctly.
1
Turn on cable box
Select a channel other than channel 9 on your
cable box.
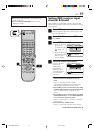
2
Access Main Menu screen on VCR
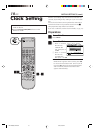
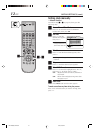
Press MENU.
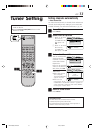
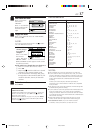
3
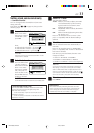
Access Cable Set Up screen
1 Press
@ #
to move
the arrow to
“TUNER SET UP”,
then press fi or
OK.
2 Press
@ #
to move
the arrow to
“CABLE SET UP”,
then press fi or OK.
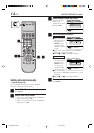
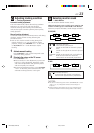
4
Select cable box input channel
Press %fi to move
the arrow to “INPUT
CH”.
Your selection
depends on how your
cable box is
connected to your
VCR.
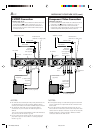
● If your cable box is connected to your VCR’s
ANTENNA IN terminal on the rear panel
Press
@
#
until the channel number
representing the cable box’s output (ON CH2 –
ON CH9) appears on the screen.
● If your cable box is connected to your VCR’s
AUDIO/VIDEO IN connectors on the front panel
Press
@
#
until “ON F-1” appears on the
screen.
● If your cable box is connected to your VCR’s
AUDIO/VIDEO IN (L-1) or AUDIO/VIDEO IN
(L-2) connectors on the rear panel
Press
@
#
until “ON L-1” or “ON L-2” appears
on the screen.
● If you do not use a cable box
Press
@
#
until “OFF” appears on the screen.
VCR
TV
CABLE
/DBS
3 – 6
2 7
INITIAL SETTINGS (cont.)
FUNCTION SET UP
INITIAL SET UPTUNER SET UP
THEN PRESS [OK]
DBS SET UP
SELECT WITH ARROW KEYS
SELECT
OK
EXIT
MENU
INPUT CH
BRAND 1
TEST MODE
OFF
TUNER SET CABLE SET UP
FUNCTION SET UP
INITIAL SET UPTUNER SET UP
THEN PRESS [OK]
INPUT CH
BRAND 1
TEST MODE
OFF
SELECT WITH ARROW KEYS
SELECT
OK
EXIT
MENU
CABLE SET UP
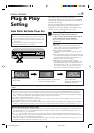
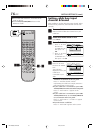
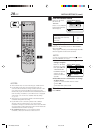
● Turn on the VCR and the TV, and select the AV
mode on the TV.
● Set the VCR/TV/CABLE/DBS selector on the
Remote to “VCR”.
HM-DH40000U-EN15-20 1/22/3, 4:37 PM16