24 EN
EDITING
Edit To
Another Video
Recorder
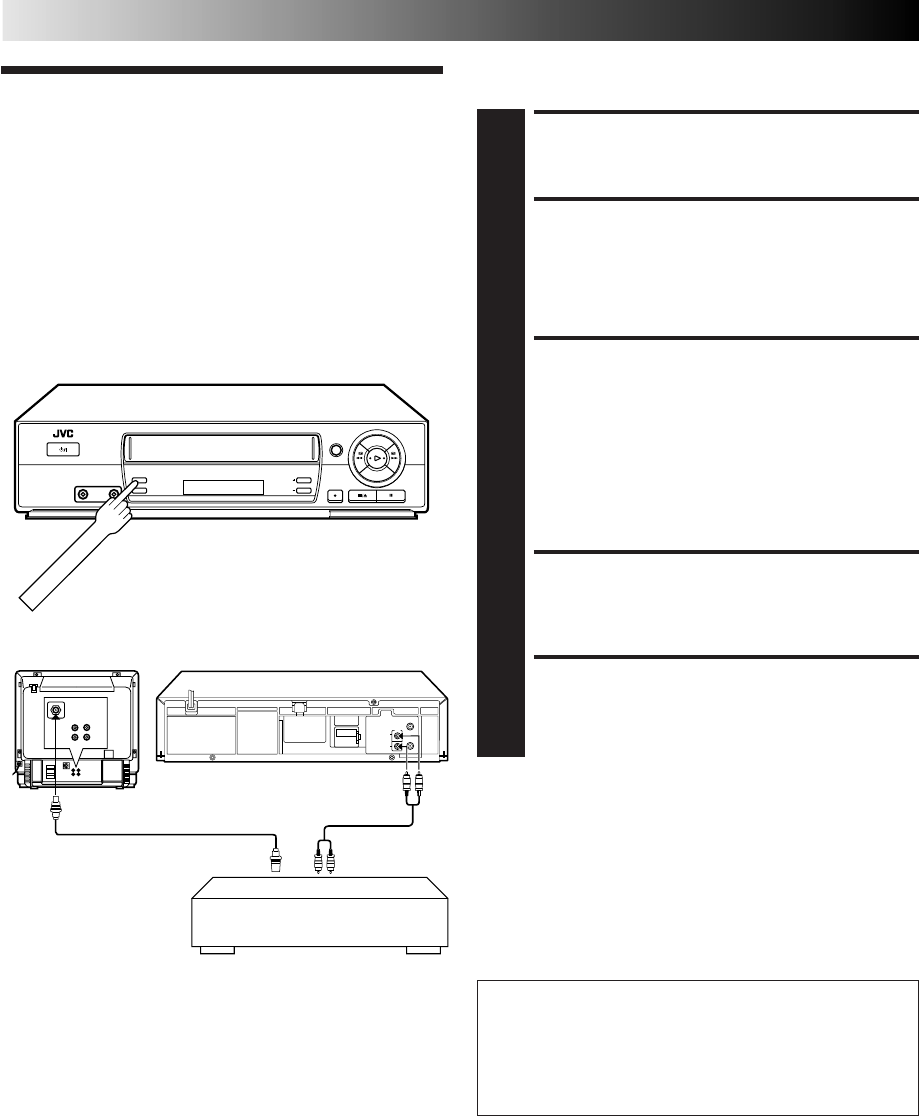
You can use your video recorder as the source player and
another video recorder as the recording deck.
MAKE CONNECTIONS
1
Connect the player's AUDIO/VIDEO OUT connectors
to the recorder's AUDIO/VIDEO IN connectors.
SET RECORDING DECK'S
INPUT MODE
2
Set the recording deck's external input mode.
SELECT "EDIT" FOR PICTURE
CONTROL SET MODE
3
Follow the "Picture Control" section on page 15, then
select "EDIT."
NOTE:
When you select "EDIT" to dub tapes, be sure to select
"AUTO" (or "NORM" when the B.E.S.T. function is set to
"OFF") after you finish dubbing the tapes.
START SOURCE PLAYER
4
Engage its Play mode.
START RECORDING DECK
5
Engage its Record mode.
NOTES:
●
All necessary cables can be obtained from your dealer.
●
When you use this recorder as the player for editing, be sure
to set "O.S.D." to "OFF" before starting (
੬
pg. 8).
●
NTSC tapes being played back in the NTSC
[
PAL mode
(
੬
pg. 27) cannot be dubbed to another recorder.
●
When you dub an NTSC tape using your recorder as the
playback deck, select NTSC 3.58 (or NTSC 4.43) with the
COLOUR SYSTEM button (
੬
pg. 26).
Another recorder
Recording deck
RF Cable (provided)
VIDEO
CHANNEL
Your recorderSource playerTV Receiver
IMPORTANT:
● To edit, both the player and the recorder must be of the
same colour system. Press your recorder's COLOUR
SYSTEM button to select the appropriate colour system.
● For more information on multi-system compatibility,
੬ pg. 26.
AV Cable
(not provided)
