


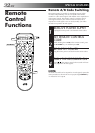
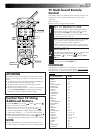


36 EN
123
456
7
89
0
1
2
4
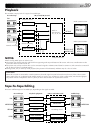
EDITING
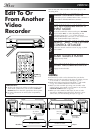
Edit To Or
From Another
Video
Recorder
You can use your video recorder as the source player or the
recording deck.
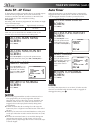
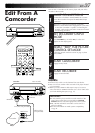
MAKE CONNECTIONS
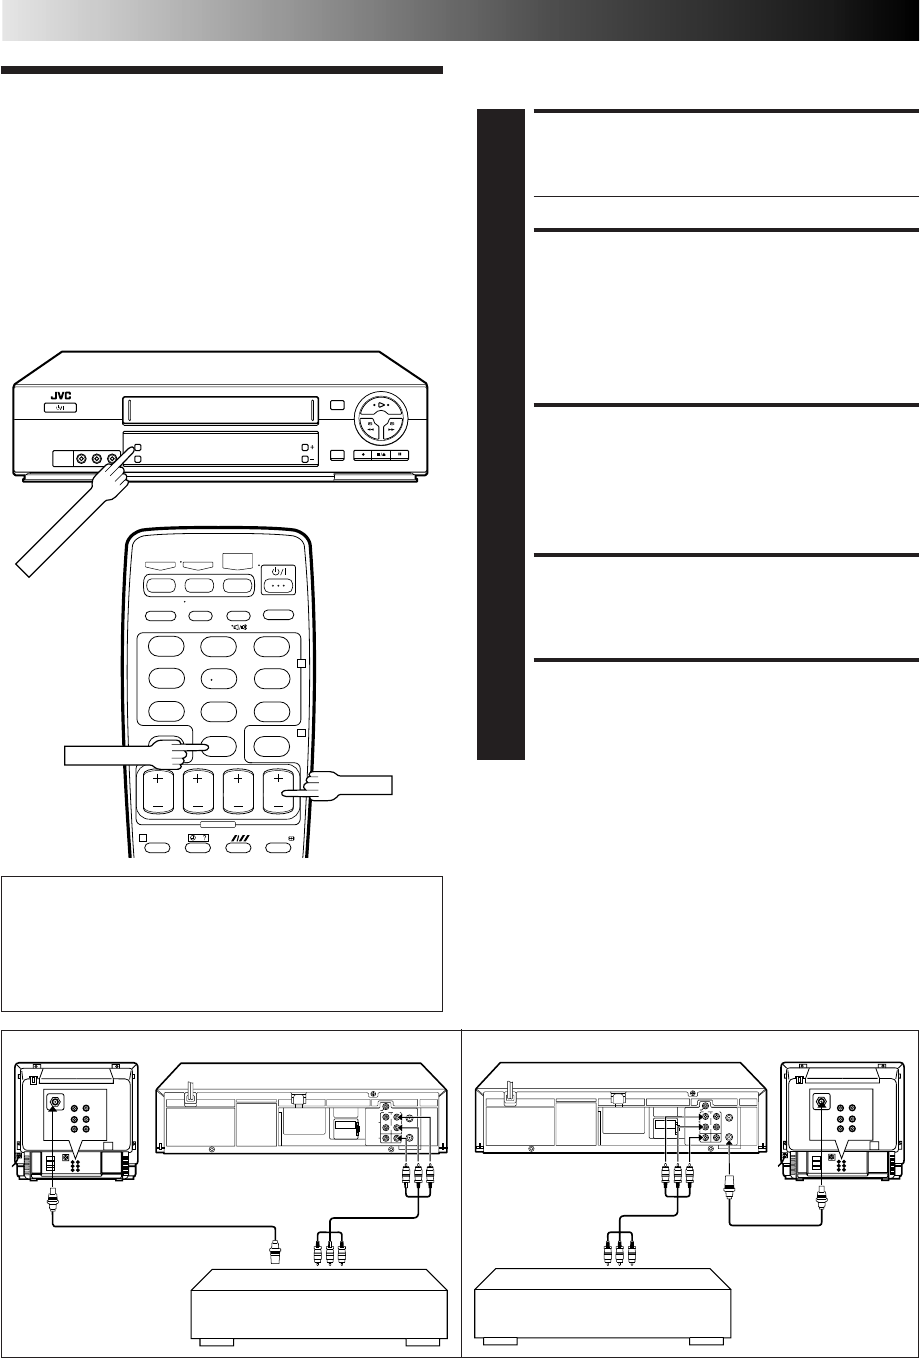
1
Connect the player's AUDIO/VIDEO OUT connector to
the recorder's AUDIO/VIDEO IN connector.
● Use the L connector for monaural connection.
SET RECORDING DECK'S
INPUT MODE
2
Set to AUX. With this video recorder, press NUMBER
key "0" and/or PR+/– to select depending on the
connector being used — "L-1" for the rear panel
AUDIO/VIDEO input connectors, or "F-1" for the front
panel AUDIO/VIDEO input connectors.
SELECT "EDIT" FOR PICTURE
CONTROL SET MODE
3
Follow the "Picture Control" section on page 15, then
select "EDIT."
START SOURCE PLAYER
4
Engage its Play mode.
START RECORDING DECK
5
Engage its Record mode.
NOTES:
●
All necessary cables can be obtained from your dealer.
●
When you use this recorder as the player for editing, be sure
to set "O.S.D." to "OFF" before starting (
੬
pg. 8).
●
NTSC tapes being played back in the NTSC
[
PAL mode
(
੬
pg. 39) cannot be dubbed to another recorder.
●
When you dub an NTSC tape using your recorder as the
playback deck, select NTSC 3.58 (or NTSC 4.43) with the
COLOUR SYSTEM button (
੬
pg. 38).
●
When you select "EDIT" to dub tapes, be sure to select
"AUTO" (or "NORM" when the B.E.S.T. function is set to
"OFF") after you finish dubbing the tapes (
੬
pg. 15).
Another recorder
Recorder Player
Another recorder
RF Cable (provided)
VIDEO
CHANNEL
Your recorderPlayer
TV Receiver
Recorder Your recorder
TV Receiver
RF Cable
(provided)
VIDEO
CHANNEL
NUMBER "0"
IMPORTANT:
● To edit, both the player and the recorder must be of the
same colour system. Press your recorder's COLOUR
SYSTEM button to select the appropriate colour system.
● For more information on multi-system compatibility,
੬ pg. 38.
AV Cable
(not provided)
AV Cable
(not provided)
COLOUR SYSTEM
PR +/–