


Page 4 July 17, 2003 8:53 am
— 4 —
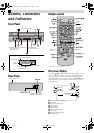
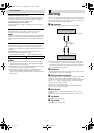
Basic Connections
A
Check contents
Make sure the package contains all of the accessories listed in
“Specifications” (
੬
16).
B
Situate recorder
Place the recorder on a stable, horizontal surface.
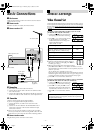
C
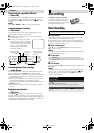
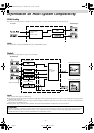
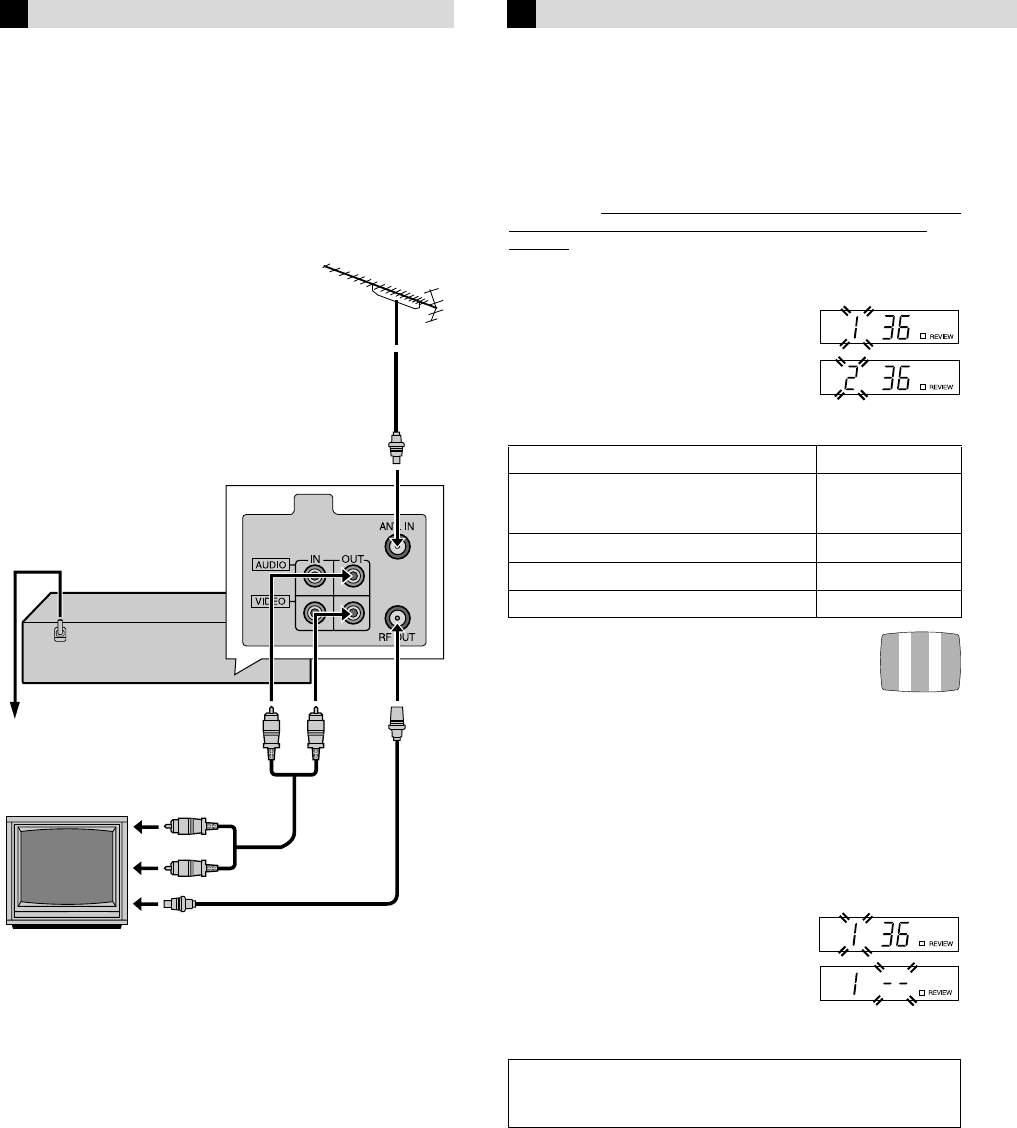
Connect recorder to TV
RF Connection
A Disconnect the TV aerial cable from the TV.
B Connect the TV aerial cable to the ANT. IN terminal on the
rear of the recorder.
C Connect the supplied RF cable between the RF OUT terminal
on the rear of the recorder and the TV’s aerial input terminal.
AV Connection
(improves picture quality during tape playback.)
If your TV is equipped with AV input connectors
A Connect the aerial, recorder and TV as shown in the
illustration.
B Connect an AV cable between the AUDIO/VIDEO OUT
connectors on the rear of the recorder and the AV input
connectors on the TV.
● Even if you are using AV cables to connect your recorder to
your TV, you must also connect it using the RF cable. This will
ensure that you can record one show while watching another.
D
Connect recorder to mains
Plug the mains power cord into a mains outlet.
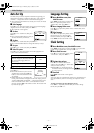
Initial Settings
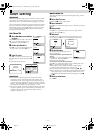
Video Channel Set
Video channel (RF output channel) is the channel on which your TV
receives picture and sound signals from the video recorder through
the RF cable. Before performing the following steps, make sure the
recorder’s power is off and there is no cassette inserted in the
recorder.
If you have connected the video recorder to your TV via the
provided RF cable only (RF connection)...
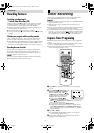
A Hold down 0 on the recorder until
the display panel shows the following.
B Press PR r or t on the remote control
to set appropriate TV system that
matches the system of TV being used
(refer to the table below).
1:B/G 2:D/K 3:I 4:H
C Set your TV to UHF channel 36.
● If the two vertical white bars appear clearly on
the screen as shown on the right, press OK or e
and then go to step D.
● If the two vertical white bars do not appear clearly,
press OK and then PR r or t to set the recorder to a vacant
channel between 28 and 60 which is not occupied by any local
station in your area.
(Ex.) If channel 50 is available in your area...
Then set your TV to UHF channel 50 and check if the two vertical
white bars appear clearly on the screen; if so, go to step
D
. If not,
re-set the recorder to another vacant channel and try again.
D Press OK or e to finish video channel set.
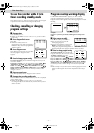
If you have connected the video recorder to your TV via both the
provided RF cable and an AV cable (AV connection)...
A Hold down 0 on the recorder until
the display panel shows the following.
B Press OK or e, then press PR t until
the display panel shows the following.
Now the video channel is set to off (– –).
C Press OK or e to finish video channel
set.
RF cable
(supplied)
Back of recorder
Mains power cord
AV cable
(not supplied)
To AV input
connectors
TV aerial cable
Mains outlet
To aerial terminal
TV
Major Countries/Areas TV System
New Zealand, Kuwait, U.A.E., Indonesia,
Singapore, Thailand, Malaysia, Iran, Saudi
Arabia, Egypt, Morocco, Lebanon, Iraq
B/G
China, Mongolia, Russia D/K
Hong Kong I
Australia H
If Auto Set Up or Tuner Set has not previously been performed,
the Language Select screen appears and Auto Set Up function
takes place automatically.
HR-V400AG-EN.fm Page 4 Thursday, July 17, 2003 8:53 AM