Filename [SR-MV45_55U_06DVD Operation1.fm]
Masterpage:Left+
30 EN
Page 30 January 10, 2007 1:18 pm
OPERATIONS ON DVD DECK
4 Press the number keys to enter the desired item number, then
press ENTER.
● Playback starts from the selected section.
Examples:
A To select track 5, press the number key “5”.
B To select track 15, press the number key “1” and “5”.
C To select track 25, press the number key “2” and “5”.
If you have specified a wrong selection
Press CANCEL or CLEAR
(8) to clear the wrong number, then
enter the correct one before you press ENTER in this step.
To clear the on-screen bar
Press ON SCREEN.
NOTES:
● When “X” is displayed on the TV screen in step 4, the chapter you
have selected is not contained in the disc, or chapter search does not
work on the disc.
● Before you press ENTER, playback may start automatically when you
enter the section’s number depending on the disc.
● This function is not possible for a Video CD with PBC function.
Time Search
You can play back a disc from the desired point by specifying the
elapsed playing time from the beginning of a title (DVD-RAM,
DVD-R, DVD-RW and DVD VIDEO) or a disc (Video CD and Audio
CD).
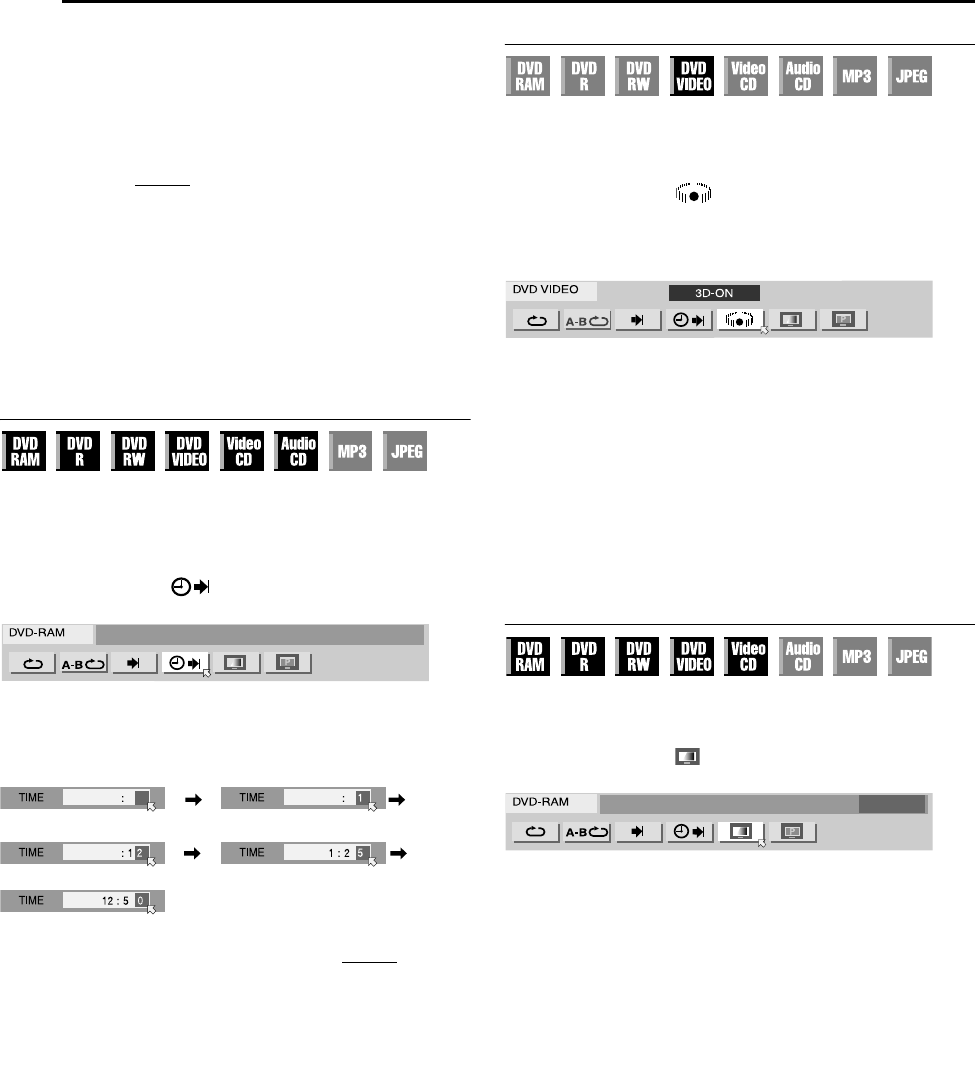
1 Press ON SCREEN twice to access the on-screen bar.
2 Press we to select “ ”, then press ENTER. The pop-up
window appears under the selected item.
3 Press the number keys to enter the time, then press ENTER.
Playback starts from the specified time.
Example:
To play back from a point 12 (minutes): 50 (seconds) elapsed.
If you have specified a wrong selection,
Press CANCEL (for the last entered number) or CLEAR
(8) (for
whole numbers) to clear the wrong number, then enter the correct
one(s) before you press ENTER in this step.
To clear the on-screen bar
Press ON SCREEN.
NOTES:
● When “X” is displayed on the TV screen in step 3, you have selected
a point that exceeds the recording time of the disc.
● Some DVD VIDEO discs do not contain time information, and it is not
possible to use the Time Search function. In such cases, “X” is
displayed on the TV screen as well.
● This function is not possible for a Video CD with PBC function.
Simulated Surround Effect
It is possible to get a simulated surround effect from your stereo
system. You can enjoy the virtual surround sound with your
2-channel stereo system.
1 Press ON SCREEN twice to access the on-screen bar.
2 Press we to select “ ”, then press ENTER.
● “3D-ON” appears above the selected item and Simulated Surround
Effect is activated.
● Each time you press ENTER, “3D-ON” appears and disappears
alternately.
To clear the on-screen bar
Press ON SCREEN.
To cancel the simulated surround effect
Press ENTER to clear “3D-ON” from the screen.
NOTES:
● The simulated surround effect works correctly only when playing back
a title recorded in multichannels.
● Simulated Surround Effect does not affect the DVD VIDEO bitstream
signal from the [DIGITAL AUDIO OUTPUT] connector.
● When Simulated Surround Effect is activated, the settings of
“ANALOG AUDIO OUT” and “D. RANGE CONTROL” are disabled.
(੬ pg. 58)
Adjusting The Picture Quality
You can obtain optimal picture quality by selecting an appropriate
picture mode.
1 Press ON SCREEN twice to access the on-screen bar.
2 Press we to select “ ”, then press ENTER. The pop-up
window appears under the selected item.
3 Press rt to select the desired option, then press ENTER.
NORMAL: Normally select this option.
CINEMA: Suitable for a movie disc, etc.
SHARP: Clearer, sharper-edged picture when viewing images with
lots of flat, same-colored surfaces such as cartoons.
SOFT: Select this option when too much noise appears.
To clear the on-screen bar
Press ON SCREEN.
Press 1 Press 2
Press 0Press 5
SR-MV45_55US.book Page 30 Wednesday, January 10, 2007 1:18 PM
